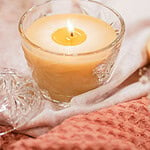
DIY Beeswax Candles in Vintage Glass Jars
Learn how to make beeswax candles by pouring melted beeswax into thrifted glass jars or vintage teacups for a simple cottage-inspired craft. These DIY beeswax candles are a lovely way to give old containers new life while creating warm, handmade candles for your home or gifting.
Equipment
- Protective covering or newspaper
- Stainless steel wax melting pot or heat-safe glass bowl
- Instant Pot or double boiler
- Stockpot, if using a stovetop double boiler
- Metal wick holder, wooden skewer, or chopstick
- Wooden skewer, for stirring
Materials
- Beeswax pellets or blocks of beeswax
- Candle wick appropriately sized for the chosen container
- Thrifted glass jar or teacup
- Wick sticker or a small amount of melted beeswax
- Essential oils optional
Instructions
- Prepare your container – Clean and completely dry your vintage glass jar or sturdy teacup. Place it on a protected work surface so it's ready before you begin melting the beeswax.
- Melt the beeswax – Add the beeswax to a stainless steel wax melting pot. For my Instant Pot method, I place a wire rack inside the Instant Pot, add 3 cups of water, then set the melting pot on the rack. Use the Sauté function on low or medium heat and stir occasionally with a wooden skewer while the beeswax melts. You can also gently melt the beeswax using a double boiler on the stovetop.
- Secure the wick – Attach the wick to the bottom center of your container with a wick sticker or a small amount of melted beeswax. Use a metal wick holder, bamboo skewer, or chopstick across the top to hold the wick upright and centered.
- Pour the beeswax – Once the beeswax is completely melted, carefully pour it into your prepared container, leaving about ½ inch of space at the top. Take another look at your wick after pouring and adjust it while the wax is still liquid if it has shifted off center.
- Let the candle harden – Leave the candle sitting undisturbed for about 30–45 minutes, depending on the size of your container. Don't remove the wick holder until the beeswax is completely firm.
- Trim the wick – Once the candle has completely hardened, remove the wick holder and trim the wick to approximately ½ inch. Your homemade beeswax candle is ready.
Notes
Choose the Right Wick – Wick size matters when making beeswax container candles. Choose a wick appropriate for the diameter of your particular jar or teacup rather than treating wick size as one-size-fits-all.
Melting Tip – Melt beeswax gently using the double-boiler method and avoid overheating it. The original project uses either an Instant Pot setup or a traditional stovetop double boiler to provide gentle, indirect heat.
Prevent Sinkholes – Pour the melted beeswax slowly. The original project also recommends pouring in layers and allowing each layer to cool slightly before adding the next if sinkholes are a concern.
Thrifted Container Tip – Vintage sugar jars, glass containers, and teacups give these candles their cottage character. Choose a sturdy container suitable for the project, and make sure it is thoroughly cleaned and dried before adding the wick and hot wax.
Cleanup – Let spilled beeswax cool and harden before gently scraping it from the work surface. For stubborn wax residue, the original project recommends carefully warming it with a hair dryer to soften it before cleanup.