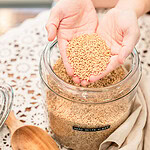
How to Mill Flour at Home
Learn how to mill flour at home using wheat berries and a grain mill. This simple beginner method walks you through weighing, checking, milling, sifting, and storing freshly milled flour.
Equipment
- Grain Mill
- Digital kitchen scale
- Bowl or flour container
- Airtight storage container, if needed
Ingredients
- Wheat berries or another whole grain suitable for your mill
Instructions
- Weigh the wheat berries – Use a digital kitchen scale to weigh the amount of grain your recipe calls for. If your recipe needs 500 grams of freshly milled flour and you are not sifting, start with 500 grams of wheat berries.
- Check the grain – Look through the wheat berries for stones, chaff, or other debris. Make sure the grain is clean and completely dry before milling.
- Set up the grain mill – Place a bowl or flour container beneath the flour chute. Make sure any canisters, filters, or other parts are properly in place according to the manufacturer's instructions.
- Choose the grind – For most everyday baking, mill wheat berries into a fine flour. Adjust the setting according to your grain mill and what you plan to bake.
- Mill the wheat berries – Add the wheat berries to the hopper according to your mill's instructions and let the mill process the grain into flour.
- Check the flour – The freshly milled flour should feel fine and soft, with small pieces of bran visible throughout.
- Sift if needed – Sifting is optional. If you want a lighter flour for certain breads, cakes, or pastries, sift out some of the bran after milling.
- Use or store the flour – For the best flavor and quality, use freshly milled flour as soon as practical. Store extra flour according to the storage guidelines below.
Notes
Follow your mill's instructions – Every grain mill operates a little differently. Always follow the manufacturer's directions for your specific model, including when to add the grain and how to adjust the grind.
Use the right grains – Only mill grains your machine is designed to handle, and make sure they are clean and completely dry before milling.
Give fresh flour time to hydrate – Freshly milled flour can absorb liquid differently than conventional flour. For quick bread batters, pancakes, waffles, cakes, brownies, and cookies, allow the batter to rest for 10–15 minutes when appropriate. Allow bread dough to hydrate – For yeast breads and sourdough, a 30–45 minute hydration rest can be helpful when appropriate before continuing with mixing or fermentation.
Store freshly milled flour properly – Keep it in an airtight container at room temperature for 1–3 days, in a moisture-resistant airtight container in the refrigerator for 4–7 days, or in a freezer-safe airtight container for up to 6 months.
Check stored flour before baking – Give the flour a quick smell before using it. If it smells stale, musty, or sour, discard it.
Mill only what you need – Whenever practical, I recommend milling enough flour for your current recipe or the next few days so you can use it as fresh as possible.