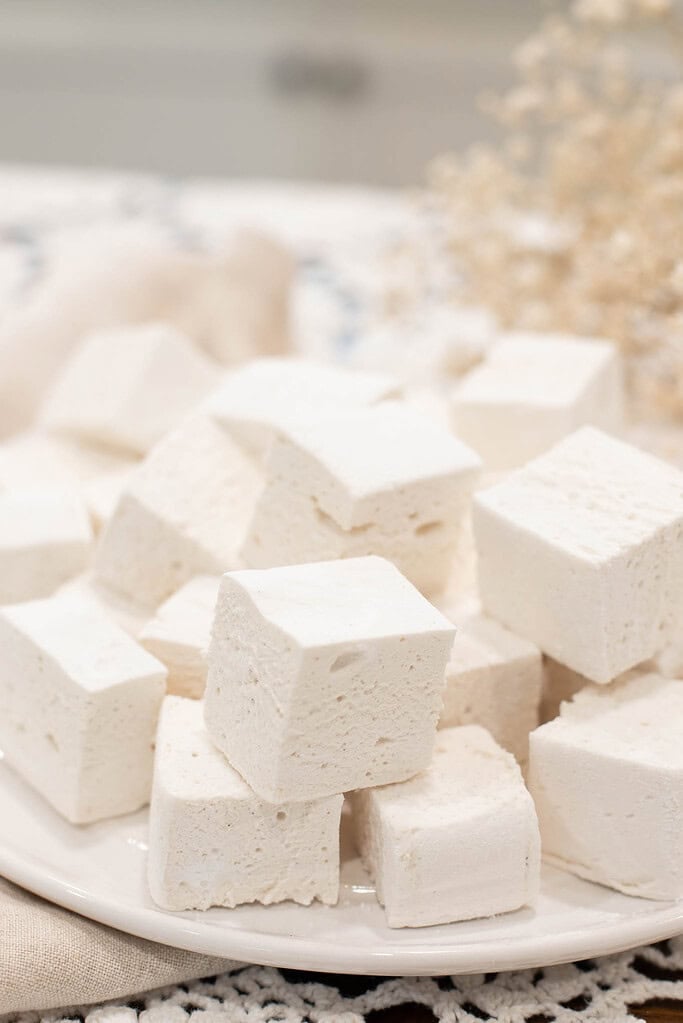
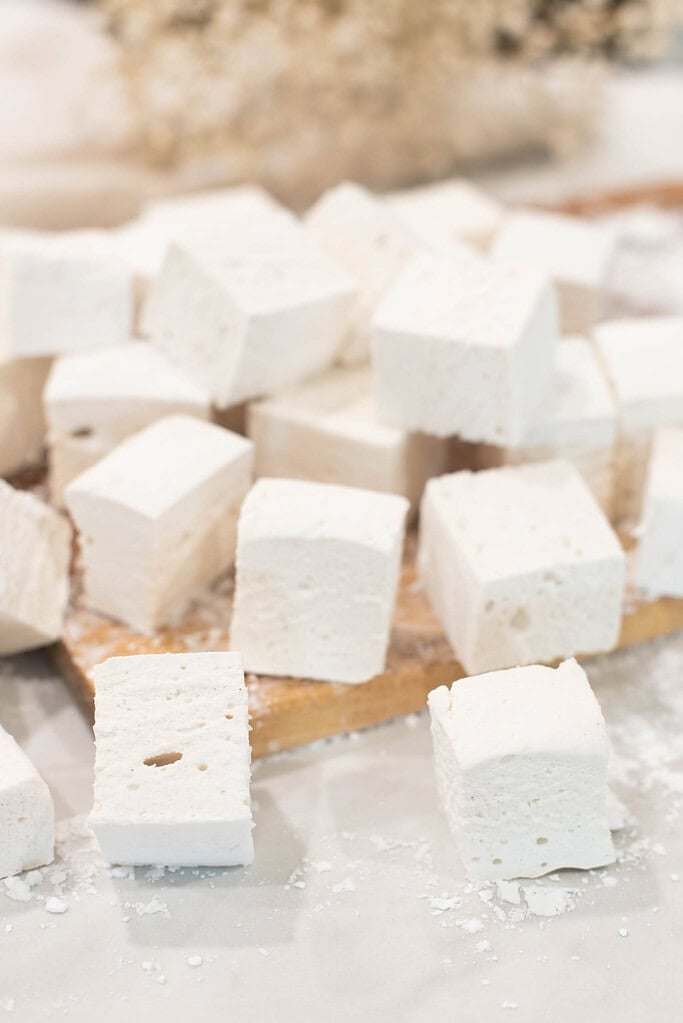
This homemade vanilla marshmallow recipe is a classic treat made right on the stovetop. It’s most often enjoyed in hot cocoa, toasted over a fire, or used in s’mores.
Once you make your first batch and see how easy and quick they are to make, you’ll be making lots more for all kinds of homemade marshmallow treats.
We use them in hot chocolate made with this hot cocoa mix, add them on top of sweet potato casserole, and stir them into a gingerbread latte or creamy crockpot hot chocolate.
This post may contain affiliate links. Please read our disclosure policy for details.
Why You’ll Love This Recipe
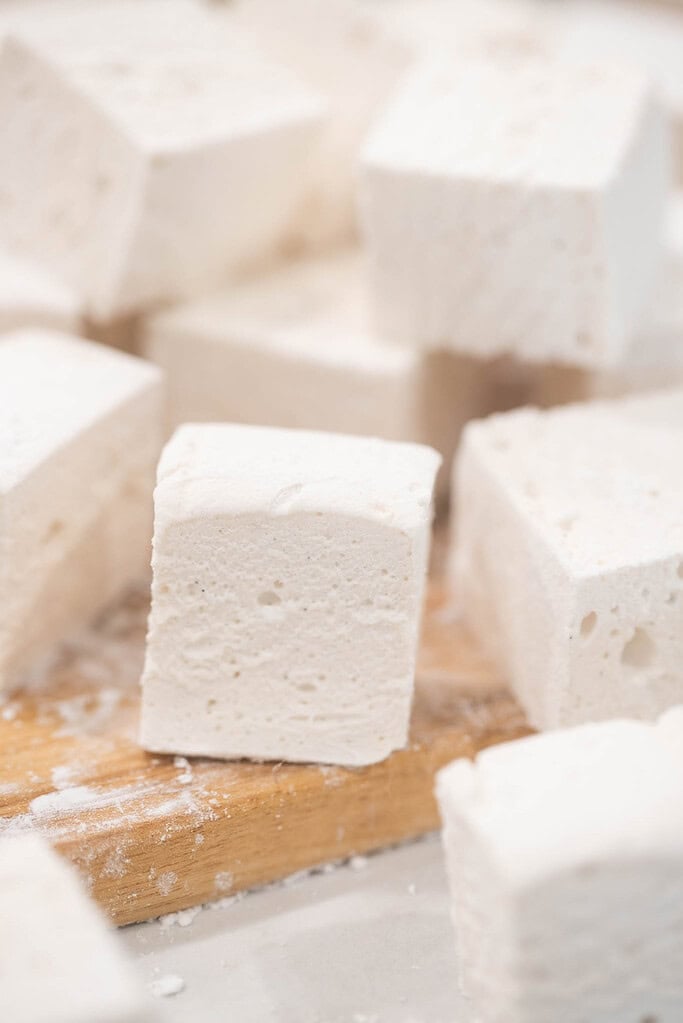
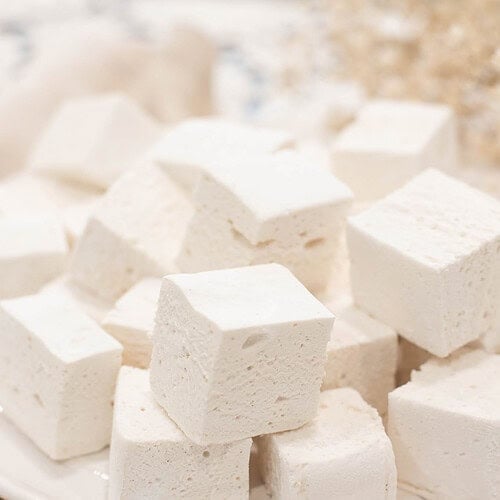
- Soft, fluffy texture: These marshmallows set up light and pillowy without feeling stiff. They cut cleanly and hold their shape well. My children, when they were younger, loved to use cookie cutters to cut out all kinds of fun shapes.
- Straightforward stovetop method: Everything is made in one saucepan and a mixer. The process is simple and quick to make at home.
- Classic vanilla flavor: Vanilla extract gives them a familiar taste that works in drinks, desserts, and snacking. I used this homemade vanilla extract, which gave them tiny specks of vanilla beans, but you can use clear vanilla extract for a pure white result.
- Versatile for drinks and desserts: They melt nicely into hot cocoa and coffee drinks. They also work well as a topping or mixed with baked goods.
- Make-ahead friendly: Once set, they store well for weeks. That makes them easy to prepare ahead of holidays or gatherings.
- Great for sharing: The fluffy squares package easily for gifting. They’re a practical, homemade treat that travels well.
Ingredients
Variations & Add-Ins
- Vanilla bean paste: Swap it in for extract to add visible vanilla flecks and a slightly deeper flavor.
- Peppermint extract: Replace part of the vanilla for a simple holiday version that works well in hot cocoa.
- Maple syrup: Substitute a small portion of the corn syrup for a mild maple flavor and softer sweetness.
- Chocolate dusting: Mix cocoa powder into the cornstarch and sugar coating for a light chocolate finish.
- Smaller batch cut: Cut the marshmallows into bite-size pieces for cocoa mugs or dessert toppings.
Recipe Tips
Measure everything first: Candy making moves quickly once the sugar starts boiling. Having ingredients ready keeps the process smooth.
Use a candy thermometer: Reaching the soft-ball stage helps the marshmallows set properly and hold their shape.
Avoid stirring the syrup: Once the sugar dissolves and begins boiling, leave it alone to prevent crystallization.
Whip until thick and glossy: The mixture should increase in volume and hold its shape before transferring to the pan.
Grease the pan well: A properly greased pan makes it much easier to release the marshmallows after setting.
Dust generously when cutting: A good coating of cornstarch and sugar prevents sticking during slicing and storage.
How To Make Vanilla Marshmallows
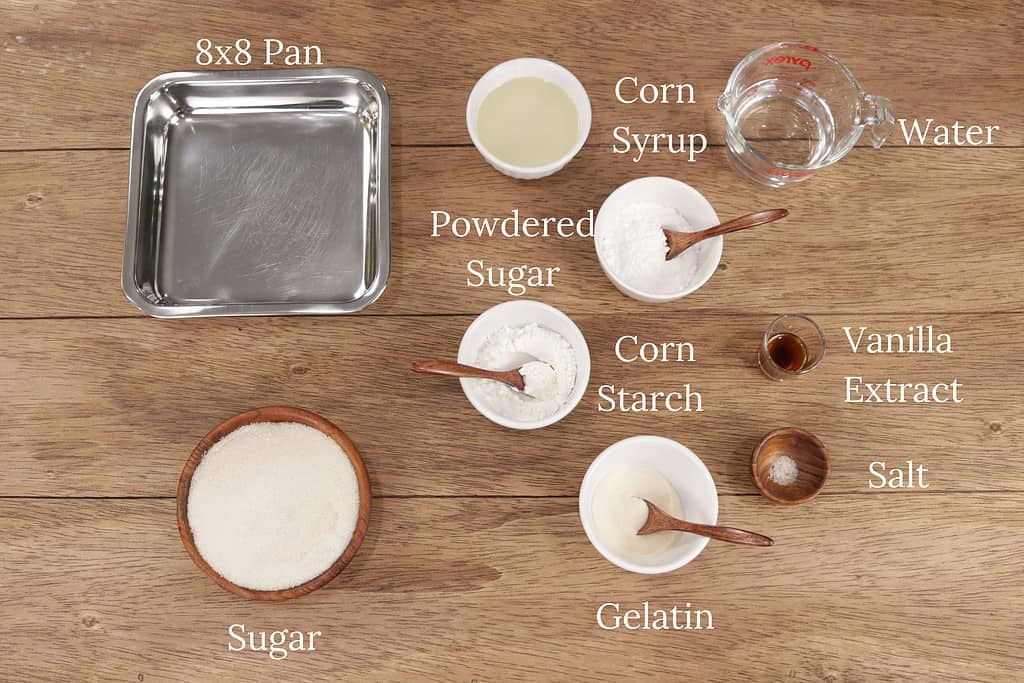
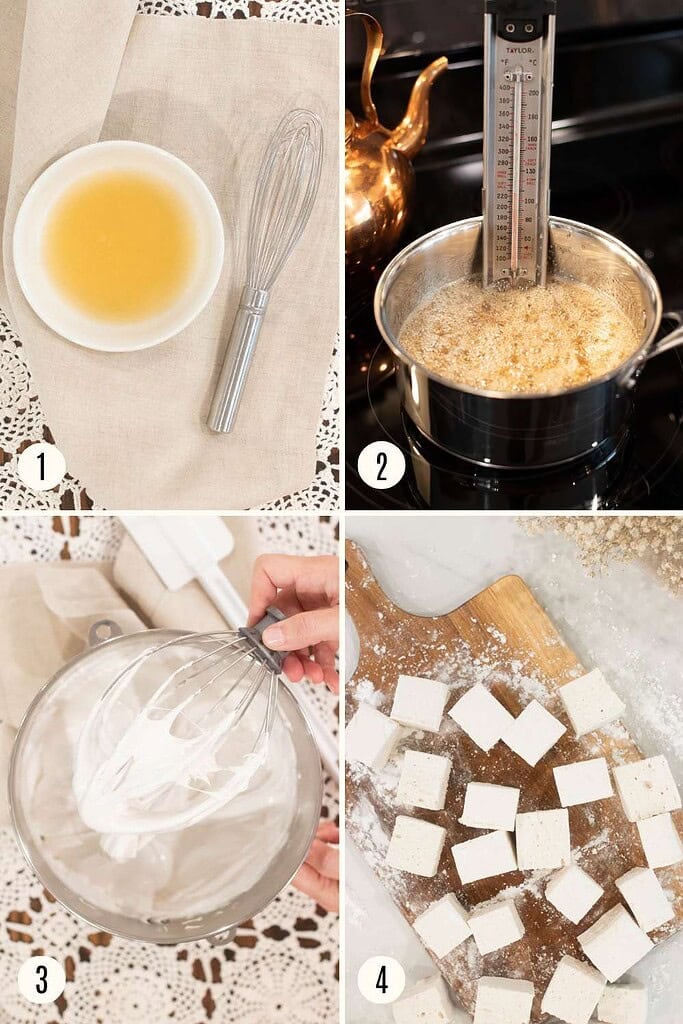
- Bloom the gelatin: Add ½ cup of the water to a small bowl and sprinkle the gelatin over the top. Let it sit for about 5 minutes until softened.
- Prepare the pan: Grease an 8×8-inch baking pan with coconut oil or butter, coating the bottom and sides well.
- Make the sugar mixture: Combine the remaining ¼ cup of water, granulated sugar, and corn syrup in a medium saucepan. Heat over medium heat, stirring until the sugar dissolves.
- Cook the syrup: Stop stirring and let the mixture boil until it reaches 235°F, the soft-ball stage, using a candy thermometer.
- Start the mixer: Place the bloomed gelatin in the bowl of a stand mixer fitted with the whisk attachment and mix on low speed to loosen it.
- Add the hot syrup: With the mixer running on low, slowly pour the hot syrup into the gelatin mixture.
- Add vanilla and salt: Pour in the vanilla extract and add the salt once the syrup is fully incorporated.
- Whip until fluffy: Increase the mixer speed to high and beat for 10–12 minutes, until thick, white, and fluffy.
- Transfer to the pan: Pour the mixture into the prepared pan and smooth the top with a spatula.
- Let it set: Cover and let the marshmallows rest at room temperature for at least 6 hours or overnight.
- Cut and coat: Turn the marshmallows out onto a dusted cutting board, cut into squares, and toss in the cornstarch and sugar mixture.
Freezing & Storage
- Room temperature storage: Store the marshmallows in an airtight container at room temperature. They keep well for several weeks when properly dusted.
- Freezing marshmallows: Place fully coated marshmallows in a freezer-safe container or bag with parchment between layers. Freeze for up to 3 months and bring to room temperature before using.
- Avoid moisture: Keep marshmallows away from humidity, as moisture can make them sticky and affect their texture.
How To Gift
- Simple treat bags: Place a handful of marshmallows in clear cellophane bags and tie with twine or ribbon for easy gifting.
- Jar gifts: Pack marshmallows into a wide-mouth mason jar and add a handwritten label or tag.
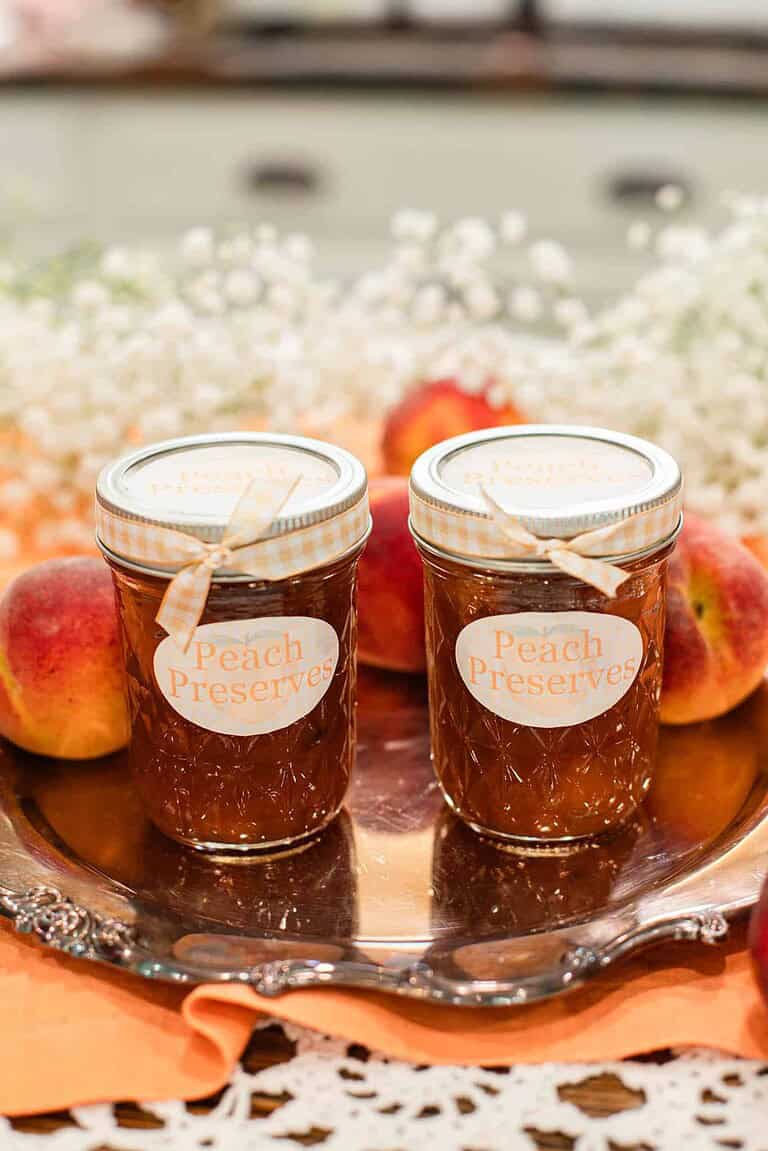
- Hot cocoa bundles: Pair the marshmallows with a jar of hot cocoa mix or a mug for a complete, practical gift.
- Holiday tins: Line a small tin with parchment paper and arrange the marshmallows in a single layer to keep them neat.
FAQ’s
More Recipes from The Cottage
- Cozy Gingerbread Hot Chocolate
- Homemade Gingerbread Latte
- Hot Cocoa Mix
- Easy Creamy Crockpot Hot Chocolate
Join The Community
Want More Cozy Recipes & Seasonal Inspiration?
Get cozy, from-scratch recipes, seasonal cottage living tips, and slow living inspiration delivered straight to your inbox.


Another favorite from my kitchen to yours, where the seasons guide the table and every meal is an act of love — may this recipe become a favorite in your kitchen too.
With gratitude & love,
Emily
Homemade Vanilla Marshmallows Recipe
Equipment
- 1 8×8-inch baking pan
- 1 Medium saucepan
- 1 Stand mixer with whisk attachment
- 1 Candy Thermometer
Ingredients
- ¾ cup water (180 g) divided*please read instructions before starting
- 7 tsp powdered gelatin or 3 packets Knox gelatin (21 g)
- 2 cups granulated sugar (400 g)
- ⅔ cup light corn syrup (215 g)
- 1 tbsp vanilla extract (13 g)
- Pinch salt (1 g)
- ¼ cup cornstarch for dusting (30 g)
- ¼ cup confectioners sugar for dusting (30 g)
- Coconut oil or butter for greasing pan (14 g)
Instructions
- Bloom the gelatin: Add ½ cup of the water to a small bowl and sprinkle the gelatin over the top. Let it sit for about 5 minutes until softened.
- Prepare the pan: Grease an 8×8-inch baking pan with coconut oil or butter, coating the bottom and sides well.
- Make the sugar mixture: Combine the remaining ¼ cup of water, granulated sugar, and corn syrup in a medium saucepan. Heat over medium heat, stirring until the sugar dissolves.
- Cook the syrup: Stop stirring and let the mixture boil until it reaches 235°F, the soft-ball stage, using a candy thermometer.
- Start the mixer: Place the bloomed gelatin in the bowl of a stand mixer fitted with the whisk attachment and mix on low speed to loosen it.
- Add the hot syrup: With the mixer running on low, slowly pour the hot syrup into the gelatin mixture.
- Add vanilla and salt: Pour in the vanilla extract and add the salt once the syrup is fully incorporated.
- Whip until fluffy: Increase the mixer speed to high and beat for 10–12 minutes, until thick, white, and fluffy.
- Transfer to the pan: Pour the mixture into the prepared pan and smooth the top with a spatula.
- Let it set: Cover and let the marshmallows rest at room temperature for at least 6 hours or overnight.
- Cut and coat: Turn the marshmallows out onto a dusted cutting board, cut into squares, and toss in the cornstarch and sugar mixture.
- Store: Shake off excess coating and store in an airtight container.
Video
Notes
Nutrition
Did you make this recipe?
If you gave it a try and loved it, I’d be so grateful if you came back to leave a 5 “⭐️” rating. Use the buttons below to share, comment, or connect—I truly enjoy seeing and celebrating your beautiful bakes.

Emily Rider
Cottage lifestyle blogger and home miller with 25+ years of sourdough and fresh-milled flour experience.
Sharing cozy homemade recipes that help you bake with confidence, celebrate each season, and savor the beauty of everyday cottage living.