This homemade bread flour blend is crafted to help you bake loaves that rise beautifully and taste just the way you intend. From tender sandwich slices to crusty artisan rounds, this guide walks you through the best beginner blend using freshly milled wheat berries. It’s simple, nourishing, and creates better flavor than anything from a bag of flour at the grocery store.
There’s something magical about the hum of my grain mill in the quiet morning hours. I reach for hard red wheat, scoop in a bit of hard white wheat, and start milling. The scent of fresh milled flour rises—nutty, rich, and earthy.
Over the past 25 years, I’ve tested many combinations of whole wheat berries in search of the perfect balance for homemade bread.
This simple blend of hard red wheat and hard white wheat is my go-to. It gives your bread doughstructure, softness, and that satisfying chew—ideal for sourdough starter, sandwich bread, or even quick breads like rustic rolls.
I used to rely on purpose flour or ap flour, but now I bake with purpose using this balanced blend of whole grain flours. You don’t need fancy tools—just a reliable grain mill, two kinds of wheat berries, and a cozy spot in your kitchen.
Below, I’ll share how to make it step-by-step, store it well, and customize it with confidence.
Why You’ll Love This Bread Flour Blend
- Balanced Flavor: The combination of red and white wheat gives your loaf of bread a cozy, nutty taste that’s never too bold or bland. It makes good bread that works well for everything from toast to artisan bread.
- Reliable Structure: With a naturally balanced protein level, this blend offers excellent gluten development for a strong dough. You’ll get a smooth kneading process, chewy crumb, and a beautiful dough rise.
- Simple & Practical: This blend uses just two types of hard wheat—easy to source and easy to mill. No mystery flours or confusing blends, just a dependable, beginner-friendly mix.
- Better Than the Bag: You’ll skip the guesswork of white bread flour, cake flour, or even self-rising flour—and enjoy the full-bodied taste that comes from using your own flour.
Elements That Bring It Together
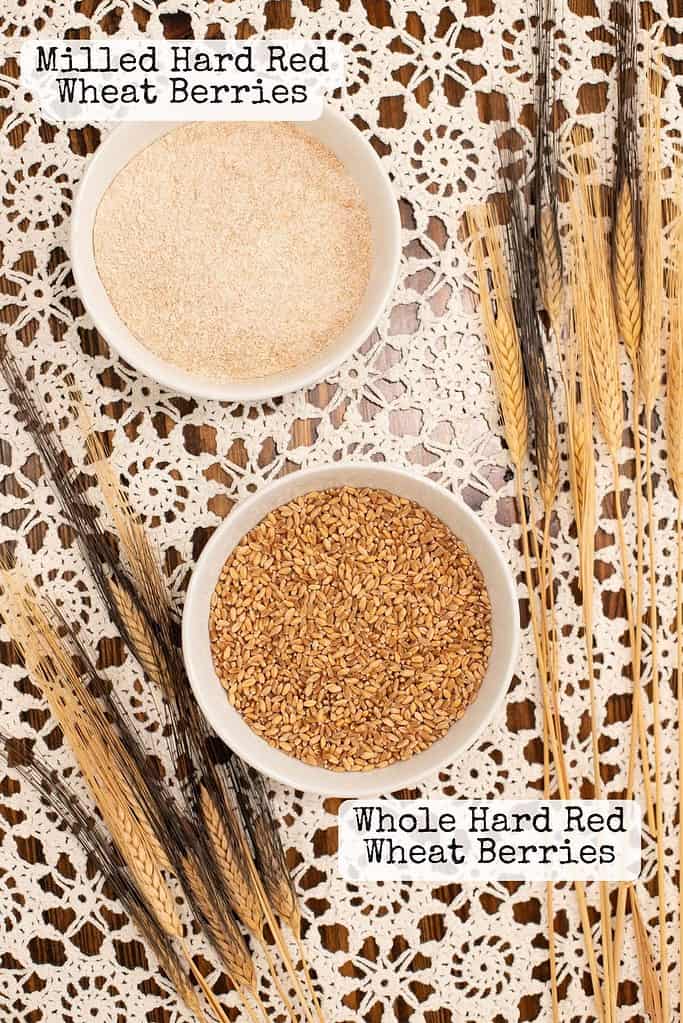
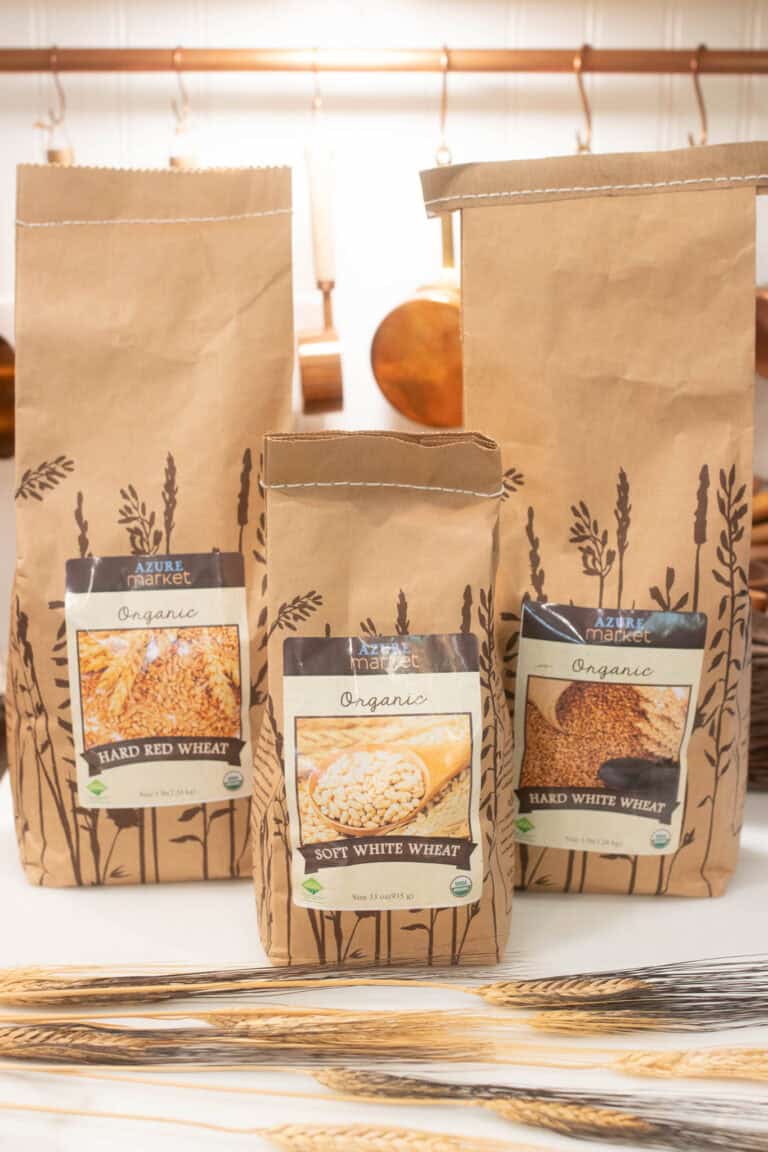
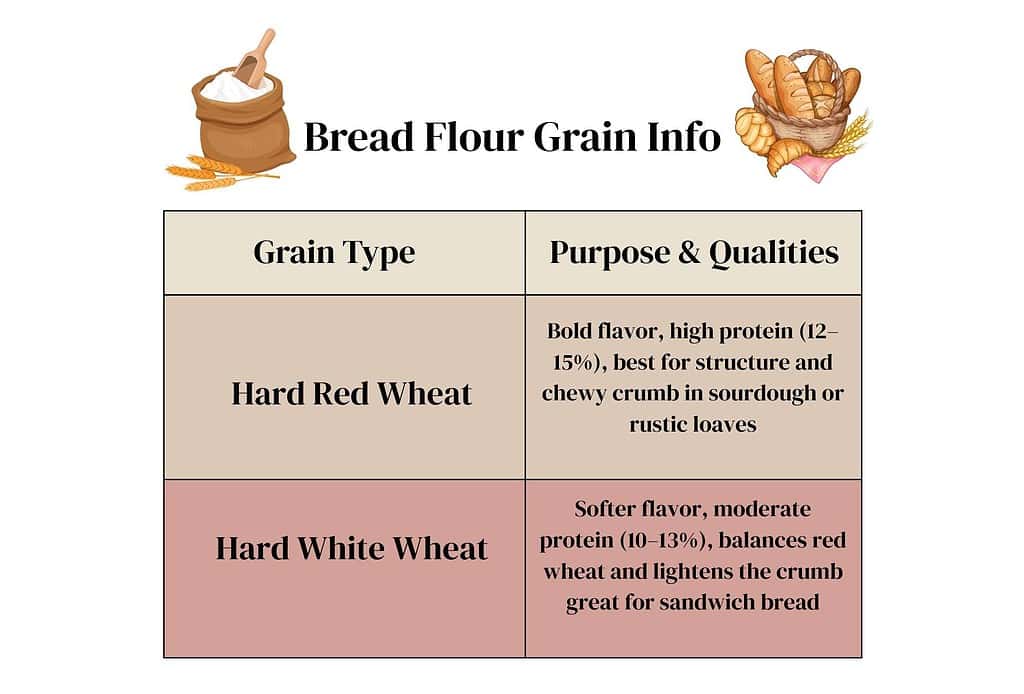
Hard Red Wheat: The hearty base of the blend, red wheat brings a rich, nutty flavor and strong gluten structure. It stores well and supports a long-lasting yeast bread rise.

Hard White Wheat: This softens the flavor and lightens the crumb while still offering the higher protein contentneeded for strength. It hydrates evenly and helps create a beautiful rise with a mild, golden finish.

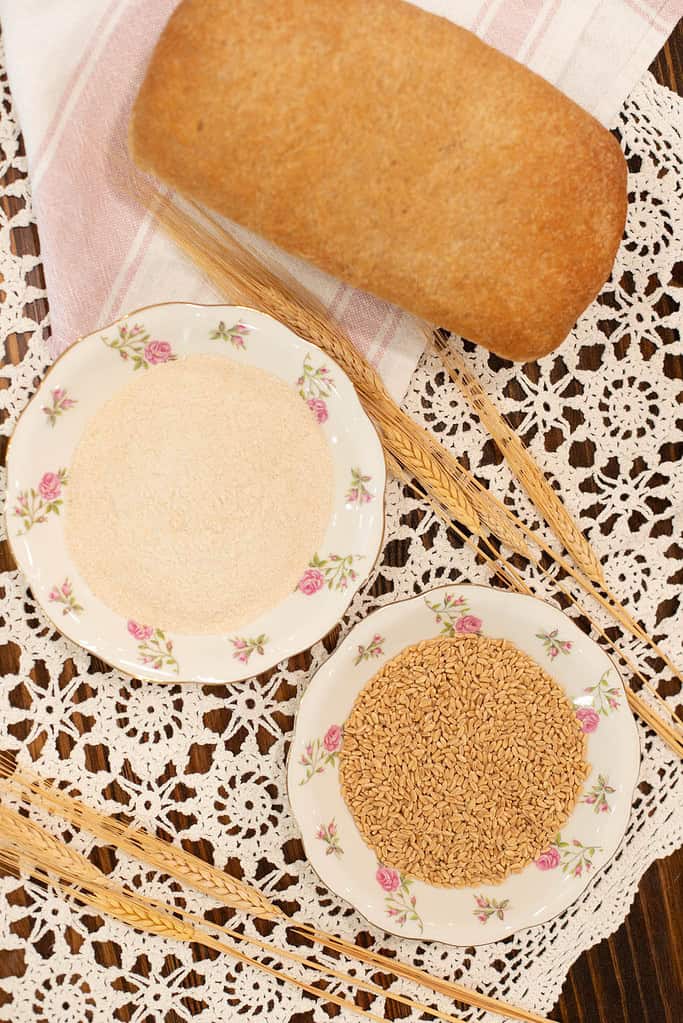
Grain Mill: Milling fresh flour at home preserves nutrients and creates a flour that’s fuller in taste and texture. It also lets you skip non-organic flour and explore stone ground flour or even english organic wheats.


#50 or #40 Sieve: Want a slightly lighter texture in your bread? Sift your flour using a #50 or #40 sieve to remove just enough bran while keeping the heartiness needed for structure. This step is especially helpful when you’re looking for a finer crumb but still want your bread to hold shape and chew.
Easy Ways to Personalize This Bread Flour Blend
Even though this blend is simple, there are ways to adjust it gently to suit your own baking preferences:
- Go Lighter: Shift to 60% hard white and 40% hard red wheat. It gives a more tender loaf and mimics the feel of plain flour or white flour.
- Go Heartier: Try 60% hard red and 40% hard white for more chew and flavor. This blend stands up beautifully to a hearty sourdough starter.
- Sift to Adjust Texture: A #60 sieve removes bran for lighter flour that stores better. This helps if you’re making pizza dough, kneading soft rolls, or want longer storage.
- Store with Care: I store all flour in the fridge or freezer. According to Sue Becker of BreadBeckers.com, flour begins to oxidize as soon as it’s milled. For best results, sift out the bran before storing at room temperature. The bran contains oils (like vitamin E) that can spoil.
How Long Will This Process Take?
From start to finish, blending your own homemade bread flour takes about 20 to 30 minutes. Once you’ve done it a couple of times, the process becomes second nature.
You’ll measure, mill, sift, and store(or I recommend milling and using the same day), all while connecting more deeply to your baking.

Step-by-Step: How to Make This Flour Blend
Step 1: Measure Your Berries
Use equal parts hard red wheat and hard white wheat. I often do 250g of each of Hard White and Hard Red for a 500g batch.

Step 2: Mill Your Grains
Grind each type of wheat using your grain mill. The smell, the texture—it’s a sensory experience that beats anything from a bag of flour.

Step 3: Sift (Optional)
Use a #50 or #40 sieve to sift out some of the bran. This gives you a lighter crumb while maintaining strength and chew.
Step 4: Whisk to Combine
Stir the flours together in a large bowl until well blended. This ensures a consistent texture and protein balance in every scoop.
Step 5: Store or Use Immediately
You can use your flour immediately or store it in an airtight container in the fridge or freezer to preserve flavor and nutrients. If you prefer room temperature storage, be sure to sift out the bran, as it contains oils that spoil more quickly.

Use your freshly milled bread flour blend in this Freshly Milled Flour Sourdough Sandwich Bread Recipe.
Continue Your Freshly Milled Flour Journey
If you’re anything like me, you want to know A to B and every why and how when I am learning a new skill, whether it’s in the kitchen or in the garden.
I love those tiny but mighty details, and it helps me troubleshoot on my own if I know all the ins and outs. I hope these posts help with just that when it comes to Freshly Milled Flour information. More to come soon…..
- #01. Beginner’s Guide to Freshly Milled Flour at Home
- #02. My Top 5 Favorite Tools for Milling Fresh Flour at Home
- #03. What Whole Grains to Use for Milling Flour at Home
- #04. Tips for Converting Recipes to Freshly Milled Flour
- #05. Sifting Fresh Milled Flour: When It Matters Most
- #06. Bread Flour Blend Using Freshly Milled Wheat Berries
- #07. Soft Wheat Blends for Homemade Cake And Pastry Flour
- #08. Blending Wheat Berries for Homemade All-Purpose Flour
- #09. Baking Sourdough with Freshly Milled Flour at Home
- #10. Where To Buy Wheat Berries And Other Whole Grains
More Freshly Milled Flour “How-To” Posts From The Cottage;
- Beginner’s Guide to Freshly Milled Flour at Home
- My Top 5 Favorite Tools for Milling Fresh Flour at Home
- What Whole Grains to Use for Milling Flour at Home
- Easy Tips for Storing Wheat Berries: Long and Short Term
- Tips for Converting Recipes to Freshly Milled Flour
- Sifting Fresh Milled Flour: When It Matters Most
Blending your own bread flour using freshly milled wheat berries turns baking into something more intentional and meaningful.
This simple mix of red and white wheat has become a staple in my cottage kitchen, and I hope it becomes a favorite in yours, too. If you give it a try, I’d love to hear what you make first!
Disclaimer: This post shares and reflects my personal experience baking with freshly milled flour at home for over 25+ years. It is intended for informational and inspirational purposes only. Please use your best judgment and consult a qualified professional for any dietary or health-related advice.

Bread Flour Blend Using Freshly Milled Wheat Berries
Equipment
- 1 Wheat Mill
Ingredients
- Equal Amounts of Red Whole Wheat Berries
- Equal Amounts of White Hard Wheat Berries
Instructions
- Measure out equal parts of hard red wheat and hard white wheat needed for your recipe or the amount you want to mill ahead of time and have ready for your baking needs.
- Mill the hard red wheat in your grain mill and transfer the flour to a large bowl.
- Mill the hard white wheat and add it to the same bowl.
- If desired, sift the combined flour through a #50 or #40 sieve to remove bran for a smoother crumb.
- Whisk the flours together until well combined.
- Use the flour immediately in your bread recipe or store in an airtight container in the fridge or freezer.
Notes
- For best texture and rise, use a 50/50 blend of hard red wheat and hard white wheat. It gives structure and softness in one.
- Always mill wheat berries right before you plan to use the flour. Fresh flour has better flavor, better rise, and more retained nutrients.
- Use a #50 or #40 sieve if you want a lighter crumb. Sifting removes larger bran flakes while keeping enough structure for sandwich loaves.
- Don’t overfill your grain mill. Milling in batches helps prevent overheating and gives you a more even grind.
- Store extra flour in the fridge or freezer in an airtight container. Fresh flour starts oxidizing as soon as it’s milled—cool storage keeps it fresh longer.
- If you’re baking right after milling, let the flour sit uncovered for 10–15 minutes to cool slightly. This helps it hydrate more evenly in your dough.