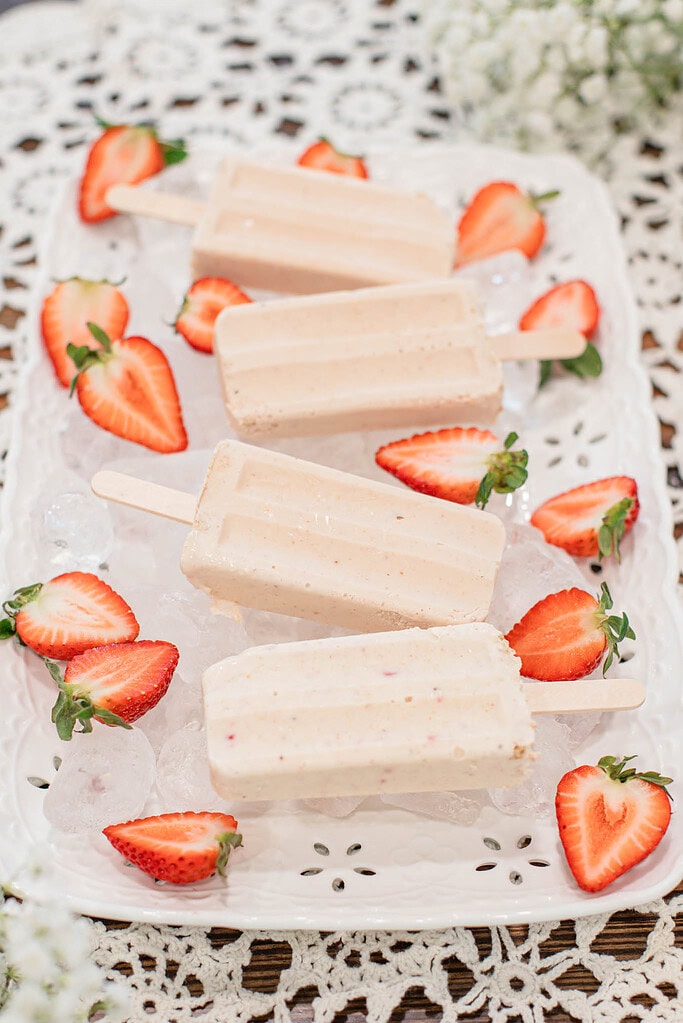
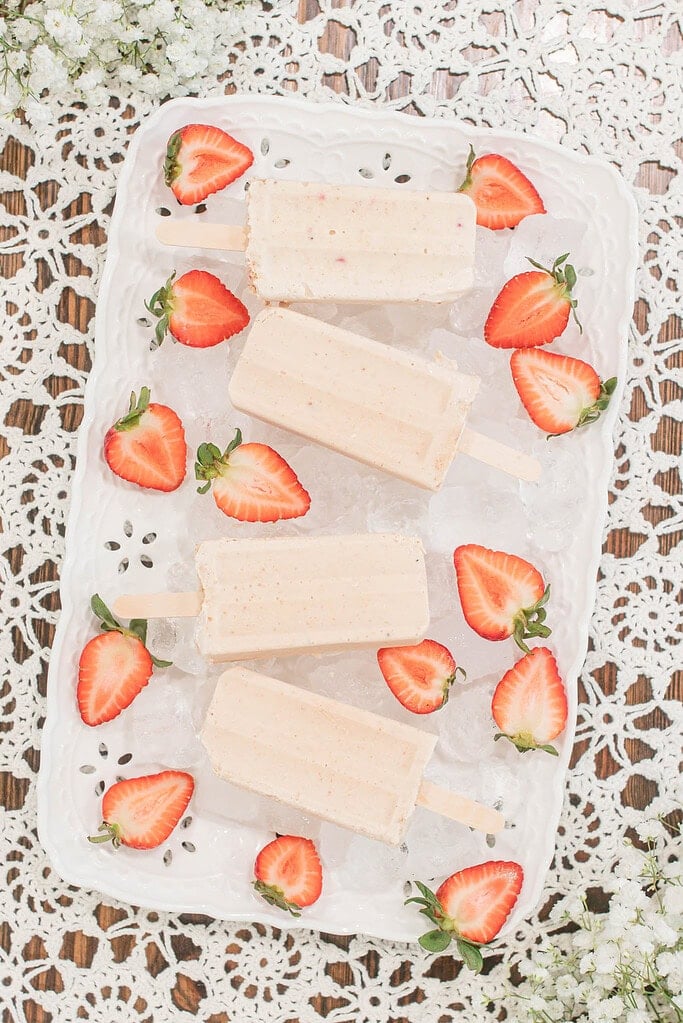
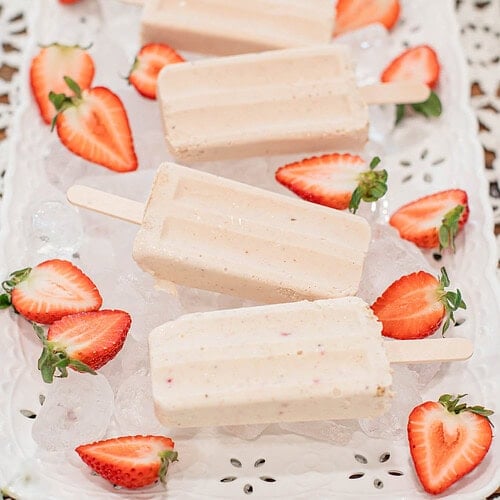
These strawberry cheesecake popsicles are creamy, rich, and taste exactly like cheesecake on a stick — made with real cream cheese, fresh strawberries, and a swirl of graham cracker crumbs throughout. Full-fat dairy and completely blended strawberries are what keep the texture smooth and creamy rather than icy.
No baking, no fuss, and they taste like a real dessert — creamy, rich, and made from ingredients worth serving to people you love.
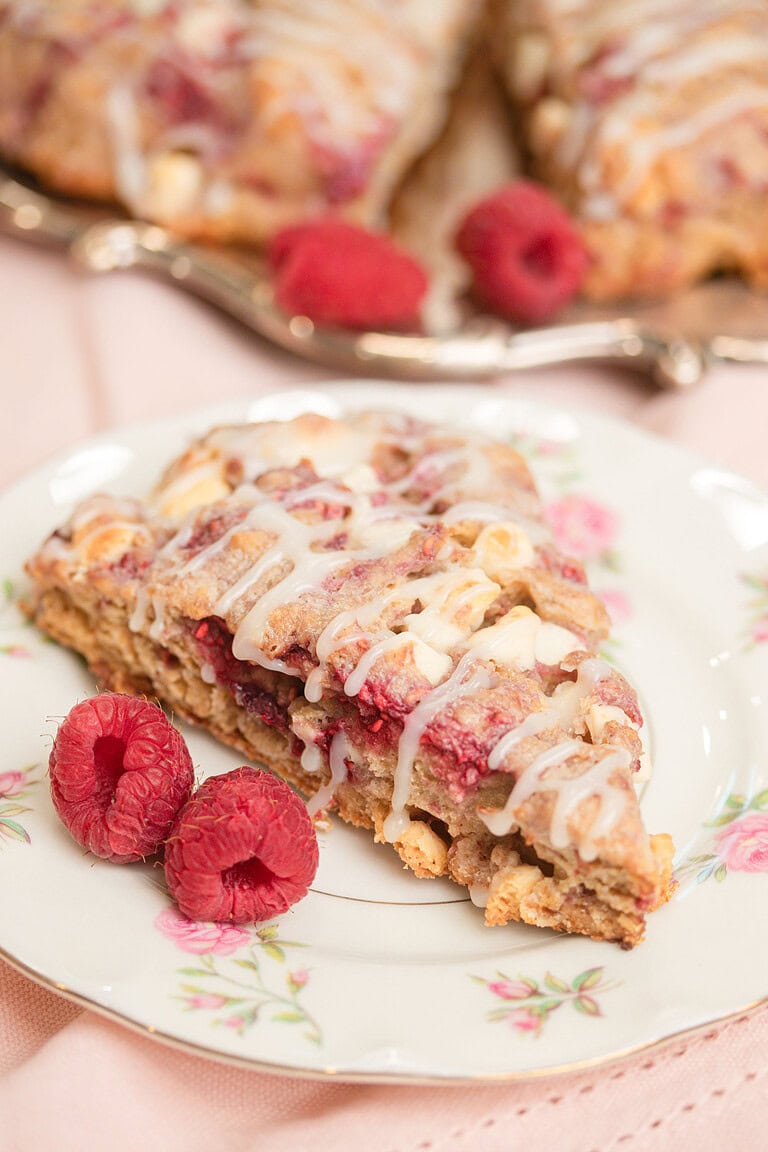
If you love fresh strawberry recipes, you might also enjoy Whipped Strawberry Cream Cheese and Strawberry Shortcake Recipe, Biscuit-Style with Fresh Milled Flour.
Why You’ll Love This Recipe

Ingredients
Variations & Add-Ins
Recipe Tips
Use full-fat dairy only – Full-fat cream cheese and heavy cream are what keep these popsicles creamy instead of icy. Lower-fat versions contain more water and will freeze harder.
Blend strawberries smooth first – Blend the fresh strawberries completely smooth before adding them to the mixture. Small fruit chunks freeze into hard icy bits that affect the creamy texture.
Keep molds level – Set the molds flat and undisturbed in the freezer so the mixture sets evenly and the sticks stay centered. A baking sheet works well for keeping them stable.
Insert sticks at the right time – If your mold doesn’t hold sticks upright, freeze for 1 hour first, then insert them once the mixture is slightly firm.
Don’t rush the freeze – These need at least 6 to 8 hours or overnight to freeze completely solid. Pulling them out too early causes bending and cracking when you unmold them.
Unmold with warm water – Run warm water over the outside of the mold for 10 to 15 seconds, then pull straight out. Don’t twist or the popsicles can crack.
Store right after unmolding – Transfer to an airtight freezer container and wrap individually in parchment paper to prevent freezer burn.
Instructions
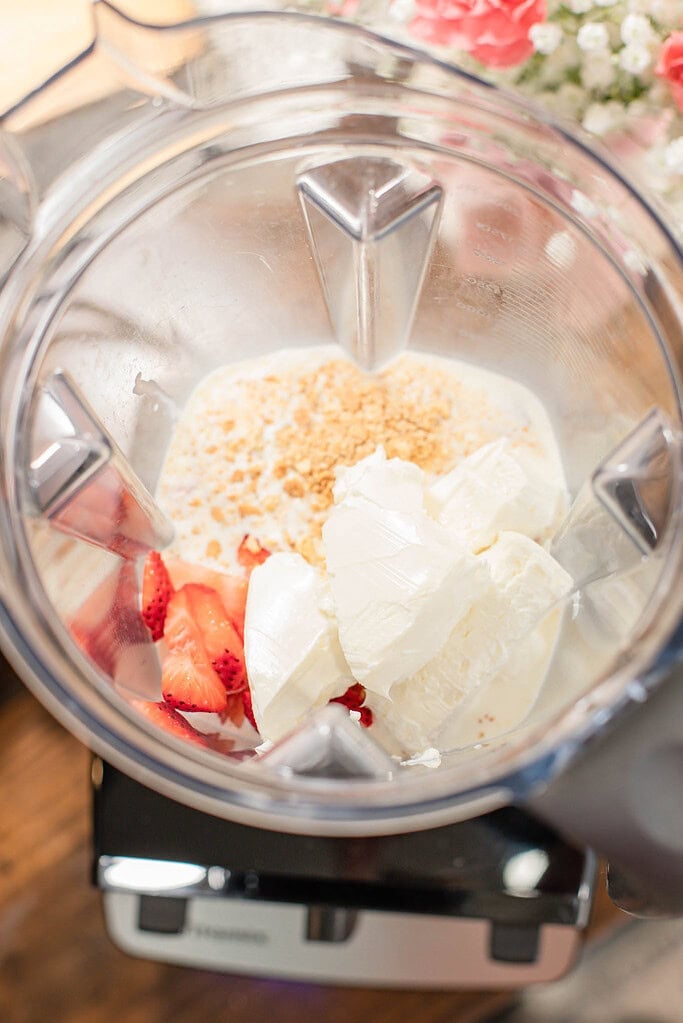
- Soften the cream cheese – Remove the cream cheese from the refrigerator and let it sit at room temperature for 30 to 45 minutes until very soft. Soft cream cheese blends smoothly and prevents lumps in your strawberry cheesecake popsicles.
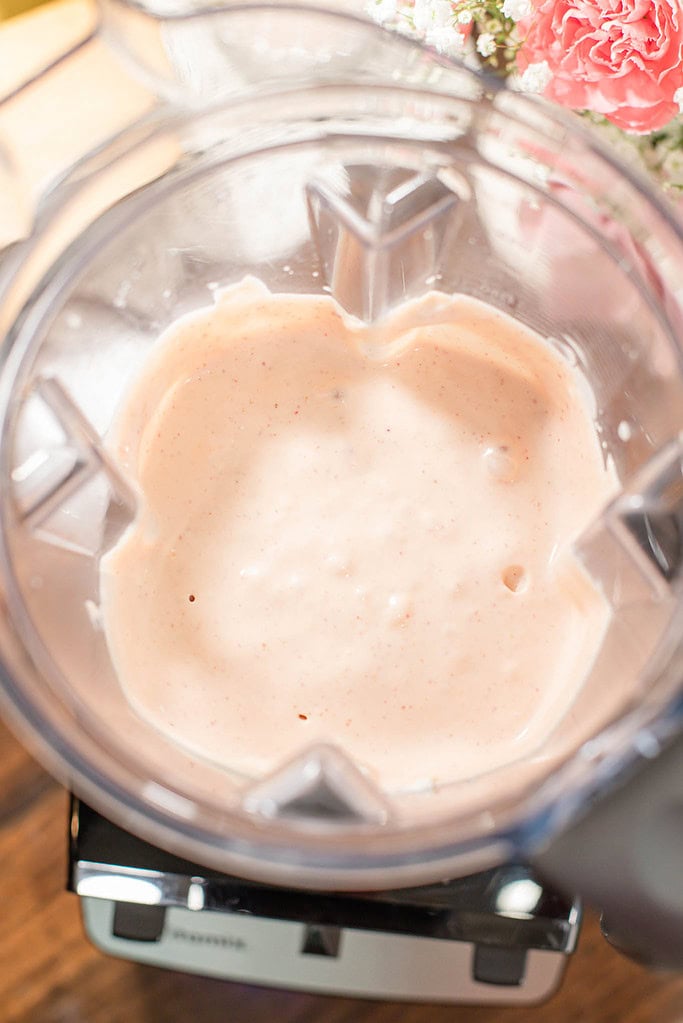
- Blend the base – Add the softened cream cheese, heavy cream, blended fresh strawberries, maple syrup, and vanilla extract to a blender. Blend until completely smooth and creamy, stopping to scrape down the sides if needed.
- Taste and adjust – Spoon out a small amount and taste. If it needs more sweetness, add an extra teaspoon of maple syrup or sugar and blend again briefly. Remember the mixture will taste less sweet once frozen.
- Add graham cracker crumbs – Stir the graham cracker crumbs directly into the mixture for even texture, or sprinkle a small amount into the bottom of each mold and gently swirl for a layered cheesecake effect.
- Fill the molds – Pour the mixture evenly into the popsicle molds, leaving a small amount of space at the top for expansion. Tap the molds lightly on the counter to release any air bubbles.
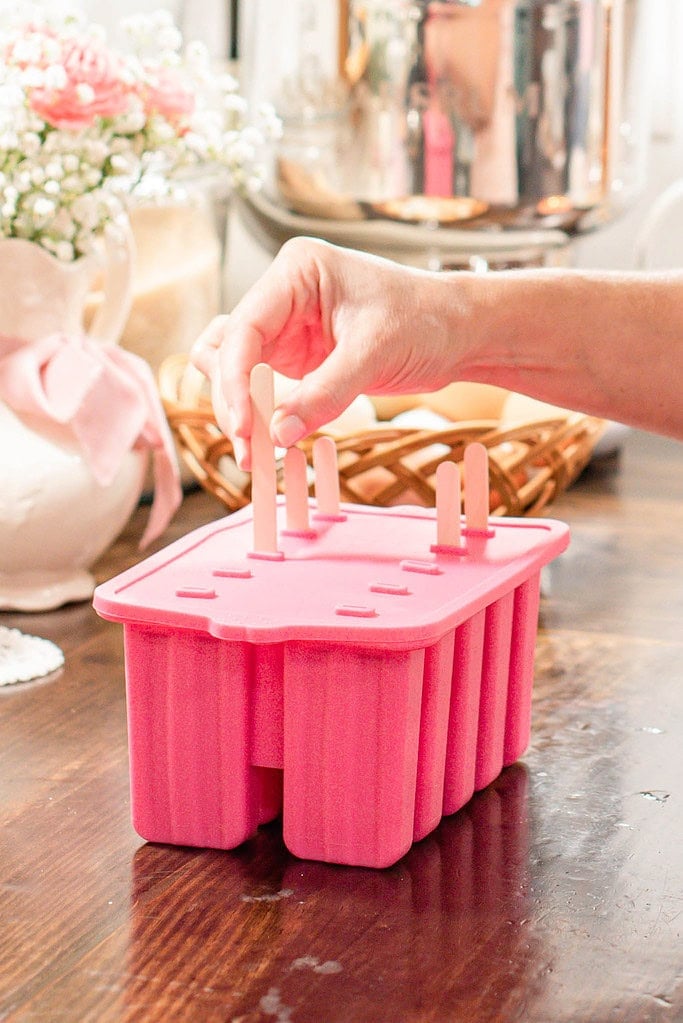
- Insert the sticks – Place a wooden popsicle stick into the center of each mold. If your mold doesn’t hold them upright, freeze for 1 hour first, then insert the sticks once the mixture is slightly firm.
- Freeze until solid – Place the molds flat in the freezer and freeze for 6 to 8 hours or overnight until completely solid. Pulling them out too early causes bending and cracking.
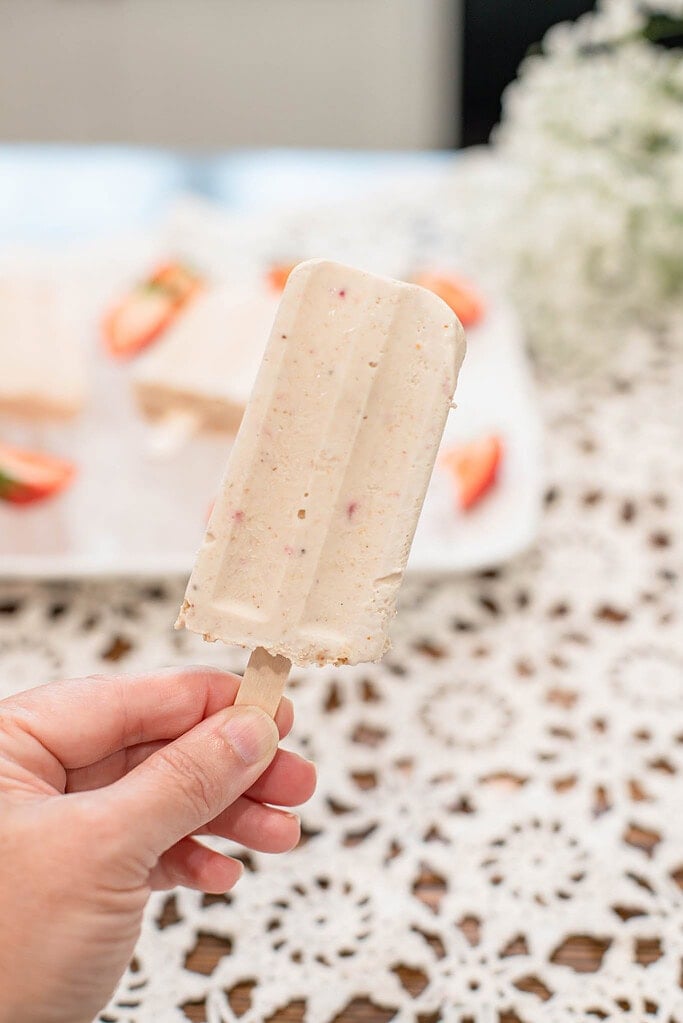
- Unmold and serve – Run warm water over the outside of the mold for 10 to 15 seconds to loosen. Pull straight out gently and serve immediately or transfer to an airtight freezer container.
Freezing & Storage
- Freeze completely before removing – Allow the popsicles to freeze for at least 6 to 8 hours or overnight until fully solid. Removing them too early causes bending or cracking.
- Unmold with warm water – Run warm water over the outside of the mold for 10 to 15 seconds to loosen, then pull straight out. Don’t twist.
- Store in an airtight container – Once removed from the molds, transfer to an airtight freezer-safe container or wrap individually in parchment paper to prevent sticking and freezer burn.
- Best within 2 weeks – For the creamiest texture and freshest flavor, enjoy within 2 weeks. After that, ice crystals may begin to form.
- Let soften before serving – If very firm straight from the freezer, let them rest at room temperature for 2 to 3 minutes before serving.
FAQ
Join The Community
Want More Cozy Recipes & Seasonal Inspiration?
Get cozy, from-scratch recipes, seasonal cottage living tips, and slow living inspiration delivered straight to your inbox.
More Strawberry Recipes from the Cottage

Strawberry Cheesecake Popsicles
Equipment
- 1 Blender
- 1 Popsicle mold
- 10 Wooden popsicle sticks
- 1 Ziploc bag & rolling pin
- 1 Measuring Cups and Spoons
Ingredients
- 8 ounces full-fat cream cheese, softened 226 grams
- 1 ⅛ cups heavy cream 270 grams
- ½ cup fresh strawberries, blended until smooth 120 grams
- 3 tablespoons + 2 teaspoons maple syrup, honey, or granulated sugar 60 grams
- 1 teaspoon pure vanilla extract 5 grams
- 3 tablespoons graham cracker crumbs optional for layering or swirling 21 grams
Instructions
- Soften the cream cheese — Remove the cream cheese from the refrigerator and let it sit at room temperature for 30–45 minutes, until very soft. Soft cream cheese blends smoothly and prevents lumps in your strawberry cheesecake popsicles.
- Blend the base mixture — Add the softened cream cheese, heavy cream, blended strawberries, sweetener, and vanilla extract to a blender. Blend until completely smooth and creamy, stopping to scrape down the sides if needed.
- Taste and adjust — Before pouring into the molds, taste the mixture. If needed, add a little more sweetener and blend again, remembering that flavors taste slightly less sweet once frozen.
- Add graham cracker crumbs — Stir in the crumbs for an even texture, or sprinkle a small amount into each mold and gently swirl for a layered cheesecake effect.
- Fill the molds — Pour the mixture evenly into popsicle molds, leaving a small amount of space at the top for expansion as they freeze. Tap the molds lightly on the counter to release any air bubbles.
- Insert the sticks — Place popsicle sticks into the center of each mold. If your mold does not hold them upright, freeze for about 1 hour first, then insert the sticks once slightly firm.
- Freeze until solid — Freeze for at least 6–8 hours or overnight, until the popsicles are completely firm. This ensures they release cleanly without bending.
- Unmold and serve — Run warm water over the outside of the mold for 10–15 seconds to loosen. Pull straight out gently to remove the popsicles without cracking.
Notes
Blend strawberries smooth first – Blend the fresh strawberries completely smooth before adding them to the mixture. Small fruit chunks freeze into hard icy bits that affect the creamy texture.
Unmold with warm water – Run warm water over the outside of the mold for 10 to 15 seconds, then pull straight out. Don’t twist or the popsicles can crack.
Full-fat dairy only – Full-fat cream cheese and heavy cream are what keep these popsicles creamy instead of icy. Lower-fat versions contain more water and will freeze harder.
Did you make this recipe?
Rate it 5 “⭐️” below.
If you liked this recipe, I’d be so grateful if you would share it with others. Use the buttons below to share, comment, or connect.

Emily Rider
Home miller since 1999 with fresh-milled flour & sourdough experience. Sharing from-scratch recipes and traditional kitchen skills, rooted in the seasons and inspired by everyday cottage living and seasonal rhythms.