This Beginner’s Guide to Freshly Milled Flour will walk you through everything you need to know to get started.
As a home baker with over 25 years of experience milling flour in my own kitchen, I’ve tested and refined these tips firsthand.
Milling my own flour at home has transformed the way I bake over the past years, turning simple ingredients into something deeply rewarding and crafted with care.
The scent of freshly ground grains, the warmth of a homemade loaf, the satisfaction of knowing exactly what’s in your bread—this is the heart of home milling.
The Art of Slow, Intentional Baking with Freshly Milled Flour
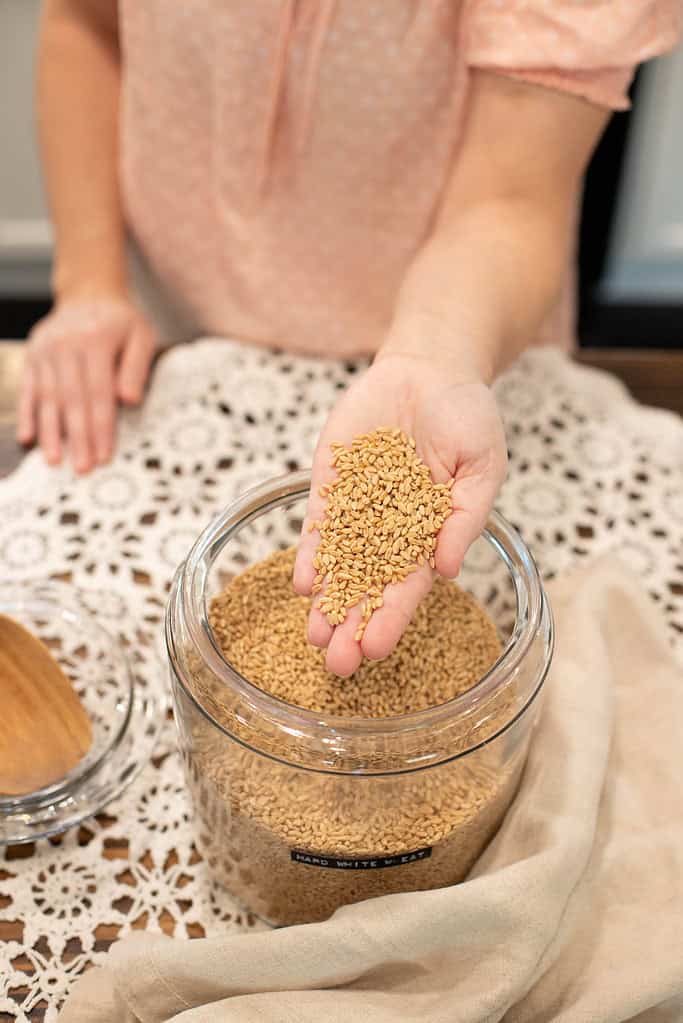
Imagine the gentle hum of a grain mill in your kitchen as you turn whole wheat berries into flour, right at your countertop.
It’s a quiet, intentional act that brings you closer to your ingredients and the roots of traditional home baking.
When you start working with whole grains, it’s not just about the ingredients—it’s about the experience.
Milling your own flour adds a new layer of appreciation for what goes into each loaf, cookie, or crust.
As many home bakers have discovered, the flavor of whole wheat flour is rich and earthy, and the texture of stone-milled flour adds something truly special to your favorite recipes.
With the right grain mill, you can adjust your flour from super fine, for cake-style bakes, to ultra coarse, perfect for hearty loaves or rustic textures.
Some mills even let you make porridge blends, homemade cereal, or a cozy pot of cream of wheat—right in your kitchen.
The options are endless when you choose the right mill and embrace the full potential of your home milling journey.
In my experience, milling flour at home allows me to retain more of the grain’s natural components, which I’ve found changes the texture and flavor of baked goods compared to store-bought flour.
Buying a quality grain mill and choosing whole wheat berries from local sources can improve your baking.
Whether you use an electric grain mill, a manual one, or a large stone mill, milling your own flour gives you the freshest results.
There’s no one “right” way—just the method that fits your kitchen, your baking style, and your pace.
Fresh milling gives you a chance to explore baking with more connection to your ingredients and the process.
Ready to give it a try?
Start small, enjoy the journey, and experience how milling your own flour can become a meaningful part of your homemade routine.
My Journey into Milling Fresh Flour
When I was a young girl, I spent summers on my grandparents’ homestead in Oklahoma.
My grandmother milled her own flour and baked from scratch using whole grains in her sourdough and regular recipes.
I didn’t realize it then, but those quiet moments in her kitchen planted so many seeds in me.
Around age ten, after my grandfather passed away, my grandmother moved to Seattle to be closer to her family.
Because of this, we stopped visiting the homestead, and over time, the memories of her home milling and her sourdough journey faded into the background.
Fast forward to 1999—I was newly married and expecting my first baby.
We had just moved to a little cottage (964 sq ft cutiest house ever) on the mountain when a neighbor invited me into her kitchen.
She reintroduced me to milling whole wheat flour and showed me how to bake bread with the fresh-milled grains.
That moment unlocked something deep within me.
Suddenly, I was transported in a flood of memories—standing in my grandmother’s kitchen, watching her grain mill turn golden wheat into flour.
It sparked a huge desire to carry on a lost art that was part of my heritage.
To bring a piece of family tradition into my own home.
This was the humble beginnings of my freshly milled flour journey.
This time, I had the desire and guidance to gather the tools and begin my own sourdough and freshly milled flour adventure.
My sweet neighbor from the mountain, Betty Sue(the sweetest woman I have ever met), shared her favorite grain mill info, helped me source whole wheat berries, and introduced me to Bread Beckers, Azure Standard, and Jovial Foods—brands I still trust.
She also shared with me Sue Beckers’ website, Bread Beckers and an audio CD that Sue made sharing all about Freshly Milled Flour.
You can find Sue Becker’s YouTube HERE, and her website you can find it HERE.
Since then in 1999, I’ve milled my own whole wheat flour at home.
What began as a memory rekindled has become a slow, intentional rhythm in my everyday life.
Over two decades later, milling flour at our cottage still connects me to generations before me and gives me the joy of nourishing my family, one loaf or baked good at a time.
Want a peek into my kitchen? I just shared my top 5 favorite tools for milling fresh flour—these are the ones I reach for every single week!
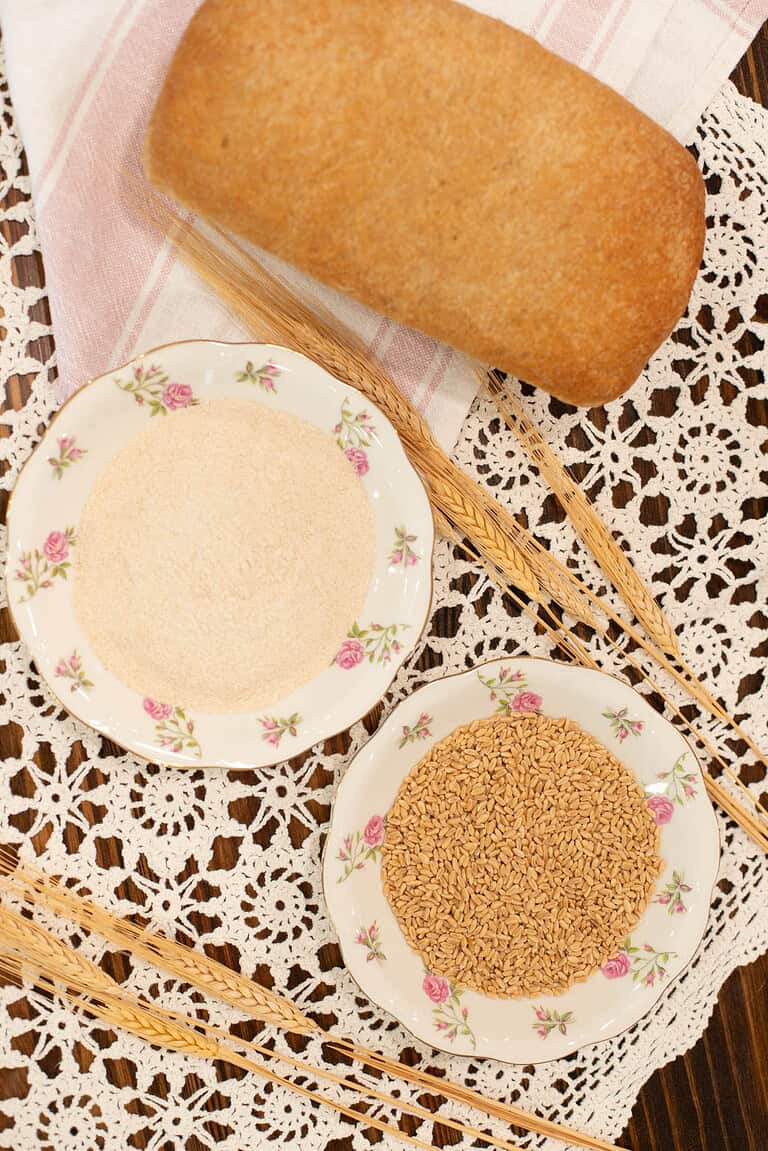
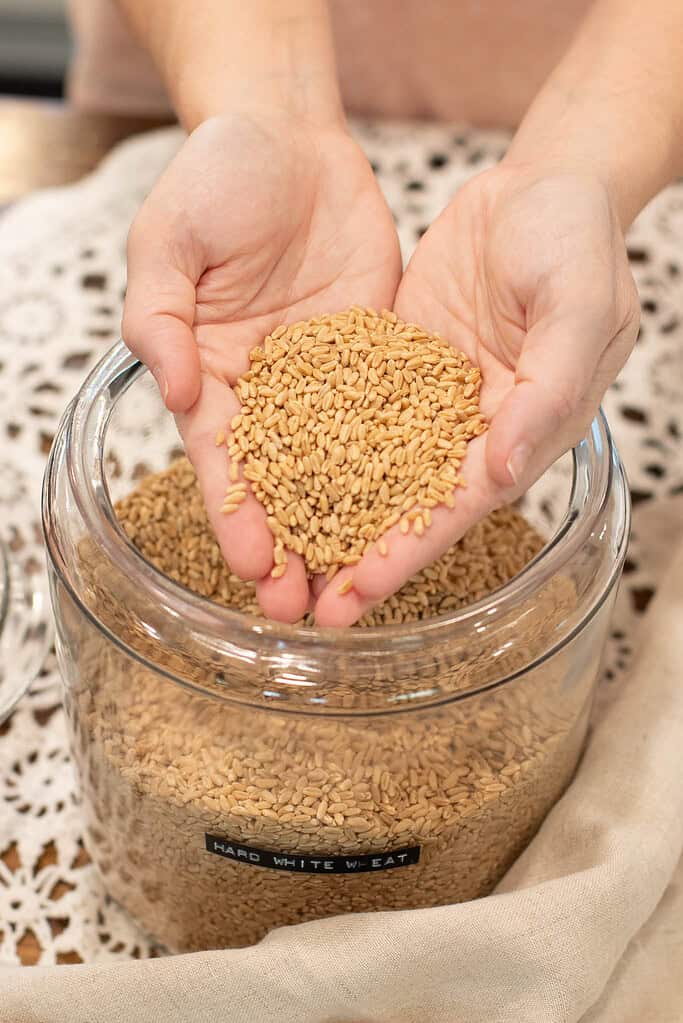
Choosing the Right Wheat for Milling
Choosing the right wheat berries depends on what you love to bake.
Some wheat varieties work best for hearty breads, while others are perfect for delicate pastries.
Understanding the different types of wheat will help you create the best flour for your recipes.

- Hard Red Wheat – High in protein with low moisture, hard red wheat is ideal for hearty, whole grain breads and sourdough. It has a rich, nutty flavor and strong gluten, perfect for structure and rise. This one’s a favorite in my kitchen!
- Hard White Wheat – Also high in protein with low moisture, but with a milder flavor than hard red wheat. It works beautifully in bread and sourdough recipes when you want a lighter taste without sacrificing structure.
- Soft White Wheat – Low in gluten, high moister, and naturally soft, this wheat is perfect for cakes, muffins, and quick breads. I use it to make my own cake flour—it creates that delicate crumb we all love. This one’s a favorite in my kitchen! Makes the best cakes in my humble opinion.
- Soft Red Wheat – Similar to soft white wheat, but with a slightly nuttier flavor. It’s low protein, high moisture, and gluten content make it a great choice for tender pastries, cookies, and other delicate baked goods.
- Durum Wheat – Durum is best known for pasta-making thanks to it’s unique gluten strength and high protein content. It creates firm, toothsome noodles and works well in semolina-style recipes.
- Ancient Grains – (Einkorn, Spelt, Emmer, Kamut (or Khorasan wheat), and Buckwheat) These Heritage Grains, aka Ancient Grains, offer unique flavor and baking characteristics, and they retain the traditional structure of the grain. While they may behave differently in baking, they bring character and a closer connection to traditional milling practices.

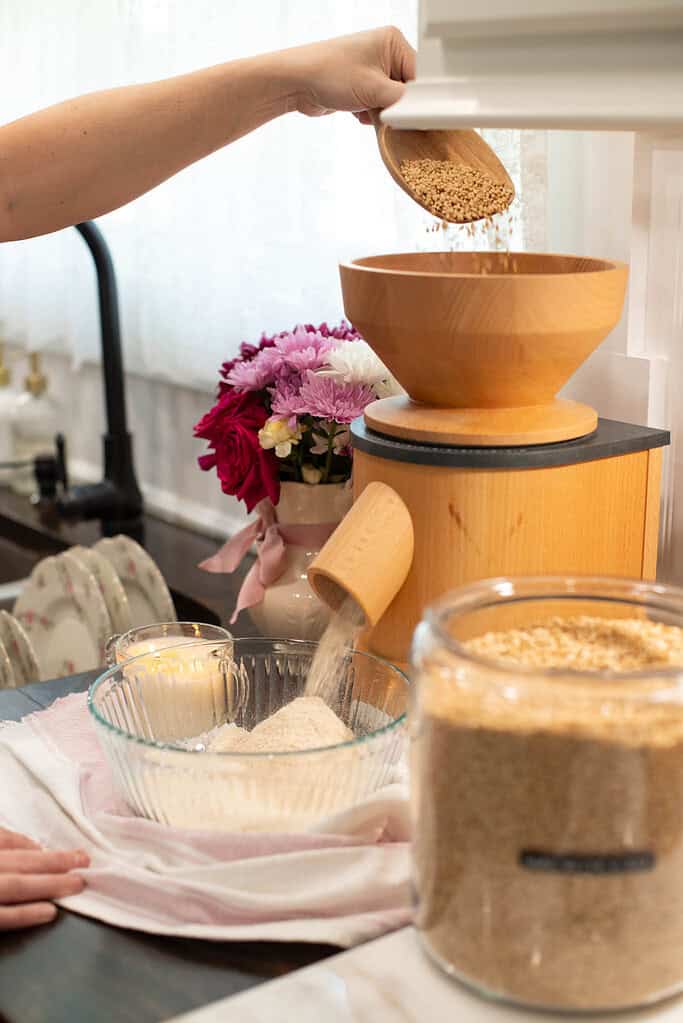
The Milling Process: What You Need to Know
Milling your own flour is simple, but it will completely change how you bake.
A grain mill works by crushing wheat berries and separating the outer layer (bran) from the soft inner flour.
Depending on your mill, you can adjust the settings to get just the right texture you want.

- Choose your mill – You’ve got options—electric grain mills for speed, hand mills for quiet simplicity, or stone mills if you love that old-world charm. Choose what fits your kitchen and your rhythm.
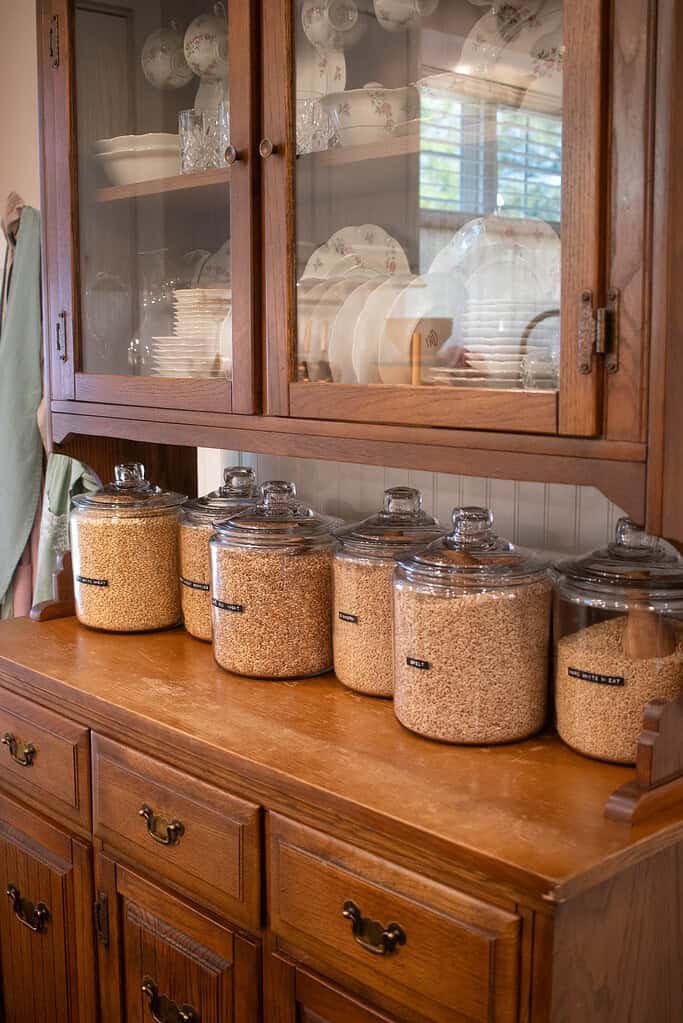
- Pick your grain – Start with fresh, high-quality wheat berries. The fresher the grain, the better the flour, and the better your final bake.
- Adjust the settings – Each mill is different. For soft bakes like muffins or cake, use a finer setting. For a more rustic texture in bread, go a bit coarser. Don’t be afraid to experiment.
- Store it well – Freshly milled flour still has its natural oils, so it needs a little extra care. Keep it in an airtight container in a cool spot—in your fridge or freezer. Which is perfect if you’re not baking daily. But freshly milled and used the same day is my go to approach.
- Get creative – Try mixing different types of wheat or playing with ancient grains like einkorn or spelt and and so many others. It’s fun to explore new flavors and textures in your go-to recipes.
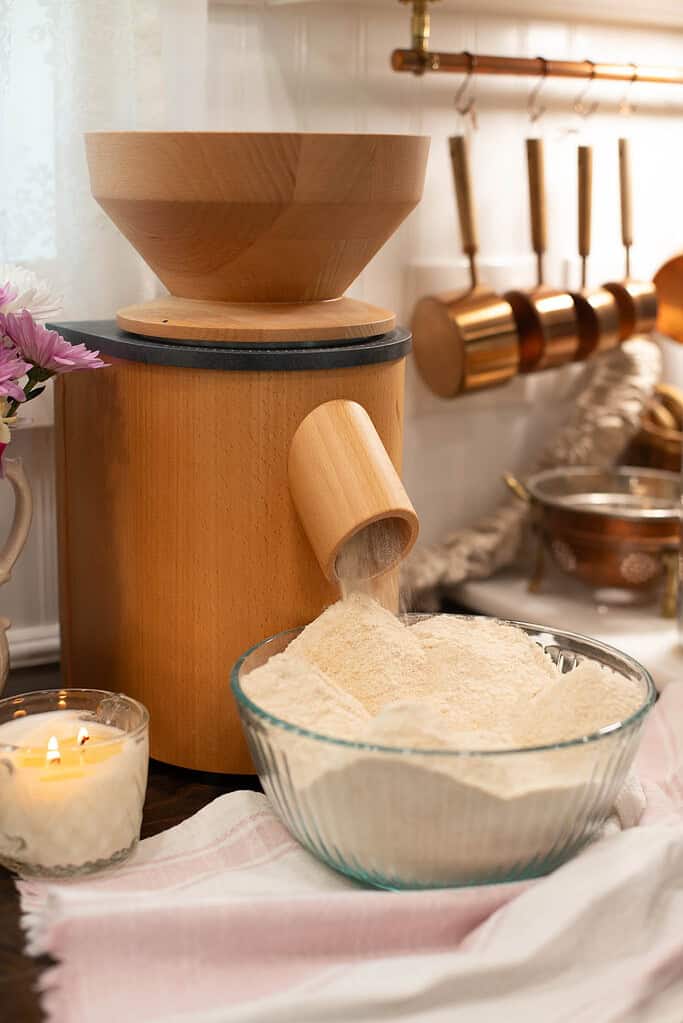
The Grain Mills I Use in My Cottage Kitchen
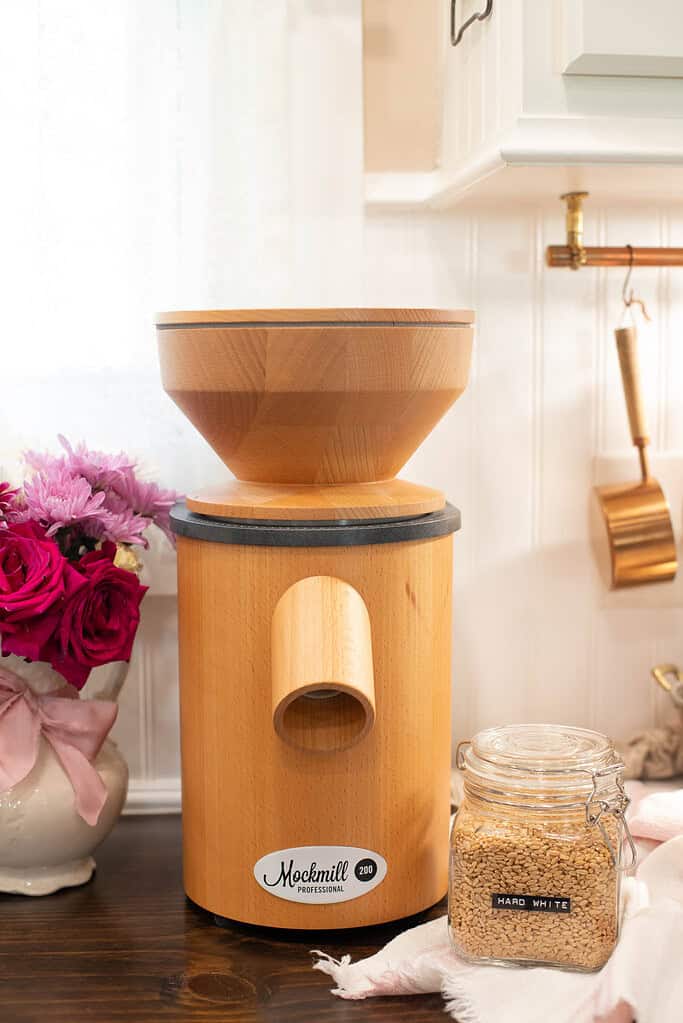
My on-the-counter, ready-to-use at any time is the Mockmill Professional 200 Stone Grain Mill.
I can conveniently mill on demand without having to add on a hopper or any extra equipment.
All I need is a bowl, the mill, and wheat berries( and of course, power).
The Mockmill uses corundum ceramic stones to grind up grains.
It can mill from very fine to coarse.
l plug it in, place a bowl under the spout, turn it on first, then add my wheat berries to the hopper on top, and I am milling away.

Here are the bowls I love and use.
I love these glass Pyrex bowls because they fit under The Mock Mill without issues for me and come with a lid so I can cover my sourdough in between stretch and folds and overnight fermenting.
Allowing me the convenience to use just one bowl from start to finish.

My second mill is The Wonder Mill, previously known as The Whisper Mill.
This mill is fast and it can mill super fine to super coarse.
It mills with an added hopper to the side and some attachments for larger grains such as dent corn or dried beans.
The Wonder Mill is an impact mill (also known as a micronizing electric mill), which means that inside the mill, there are two wheels, but only one turns to grind the wheat.
The steel wheels fit so tightly together that running grain through them as one wheel turns crushes the grain into powder.
It was my first mill to purchase back in 1999 when it was called The Whisper Mill, but I have recently upgraded to the newest version, The Wonder Mill.
I gave the original Whisper Mill to a good friend in 2013. She was in need of a mill with a large homeschooling family.
She is still using it and loves making fresh bread for her family.
I use this mill when I am batch baking for blog posts or when I am baking large amounts for family and friends.
Milling isn’t just a prep step—it’s an experience.
And once you try it, it might just become your favorite part of from-scratch cooking.
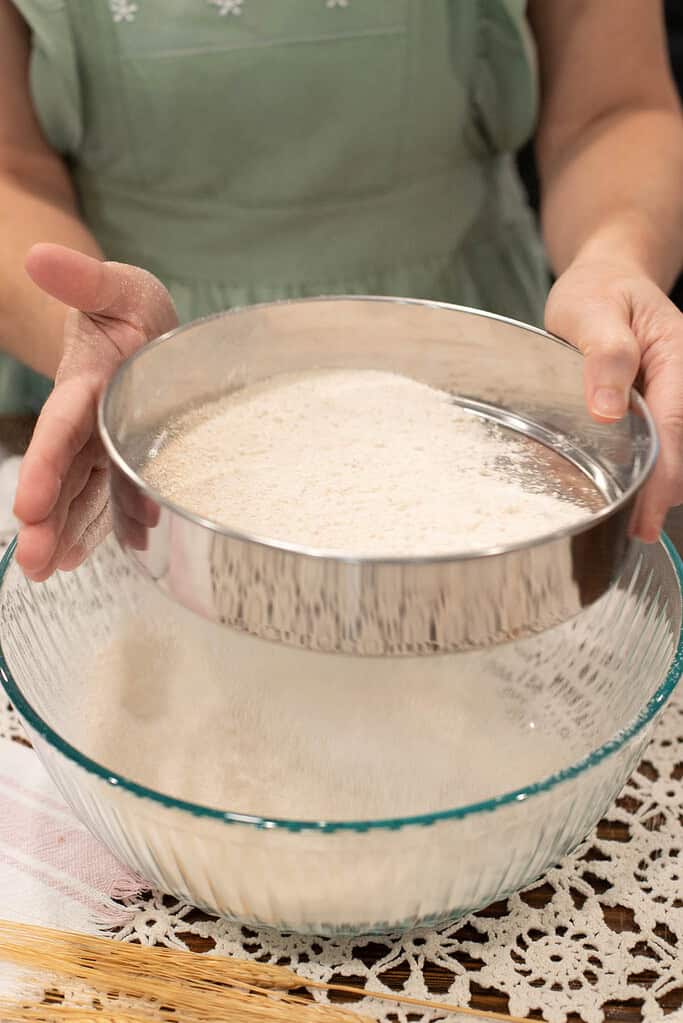
To Sift or Not to Sift?
Some people use freshly milled flour just as it comes out of the mill, and that’s totally fine. But in my family, sifting flour has always been part of the process.
My grandmother, great-grandmother, and great-great-grandmother all sifted their flour when making biscuits, cakes, and softer breads.
It’s a tradition that’s been passed down through generations, and one I still lean on today.

Sifting removes a portion of the bran, which helps lighten the texture in delicate baked goods. But don’t toss that bran—it’s still full of goodness. I save it and add it to banana bran muffins, pancakes, or even a batch of hearty breakfast bars.
It’s a simple way to reduce waste and use the whole grain. I will even give to the chickens and they love it and in turn give us rich flavored eggs.
When I started milling my own flour back in 1999, my sweet neighbor helped guide me, building on the knowledge passed down from the women in my family.
To learn more about sifting freshly milled flour, I wrote a post, Sifting Fresh Milled Flour: When It Matters Most, sharing all about sifting your flour.

Over the years, I’ve found that using a #40, #50, or #60 sieve (the finer one) is especially helpful when making my sourdough starter.
Too much bran can get in the way of strong gluten development, so I sift more often for cakes, pastries, and lighter bakes.
For rustic loaf, though? I let it all stay in.
I’ll be sharing more soon about my favorite manual sieves and my favorite electric sieve, how I use them, and why sifting plays such a helpful role in my cottage kitchen.
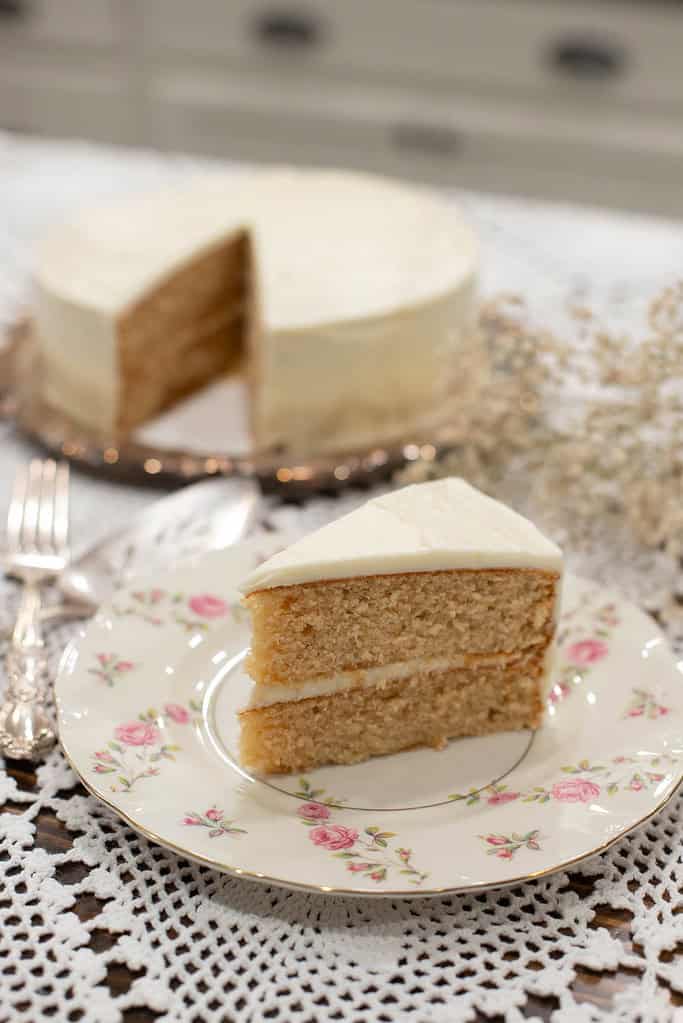
Baking with Freshly Milled Flour
The photo above is of my Sourdough Vanilla Cake using freshly milled flour recipe. PS: It’s our favorite cake!!!
Freshly milled flour behaves differently from store-bought flour. It’s lighter, more delicate, and still includes the full grain components.
These differences can influence the texture and feel of your final bake.
My sourdough vanilla cake uses freshly milled soft white wheat sifted with a sieve.
This is one of our favorite dessert bakes, made with freshly milled flour.
It’s a long-standing recipe I developed by adapting my original blueberry cheesecake cake (made with my classic birthday vanilla cake base) into a sourdough freshly milled flour version.
I hope you love it just as much as we do here at the cottage—let me know what you think!
If you’re new to baking with it, you may need to make a few simple adjustments—but with a little practice, it becomes second nature.
Here are a few helpful tips I’ve learned over the past 25 years in my own kitchen:
- Hydration matters – Fresh flour tends to absorb more water. If your dough feels dry or stiff, it’s okay to add a little extra filtered water to help it come together.
- Letting flour rest (optional) – Some bakers find that letting freshly milled flour rest for 12–24 hours improves texture in recipes like sourdough. While it’s not always necessary, it can make a difference in certain baked goods.
- Easing into substitutions – If you’re working with a favorite recipe, start by replacing half of the all-purpose flour with freshly milled flour. It’s a great way to learn how the texture and flavor shift without fully committing on the first try.
- Smart storage tips – Because fresh flour retains its natural oils, it doesn’t have the same shelf life as store-bought. Following general food safety practices, I store any extra in a food-grade container with a tight lid and place it into the freezer for later use, using it within 3-6 months.
- And one more quick note – when converting a recipe, you may need to use a little more flour. I usually plan on about 1 1/4 cups of freshly milled flour for every 1 cup of standard flour a recipe calls for. Since fresh flour is less compact, that small increase helps keep the structure of your recipe just right.
If you’re just beginning to explore the world of freshly milled flour—maybe you’re still researching mills or wondering where to start with sourcing wheat—you’re in the right place.
I’ve also put together a handful of trusted recipes to help you get a feel for baking with fresh flour.
You can find them linked right here: Freshly Milled Flour Recipes here on the Blog.
Continue Your Freshly Milled Flour Journey
If you’re anything like me, and you want to know A to B and every why and how when learning a new skill, whether it’s in the kitchen or in the garden. Your in the right place!
I love those tiny but mighty details, and it helps me troubleshoot on my own if I know all the ins and outs. I hope these posts help you when it comes to Freshly Milled Flour information.
- #01 Beginner’s Guide to Freshly Milled Flour at Home
- #02 My Top 5 Favorite Tools for Milling Fresh Flour at Home
- #03 What Whole Grains to Use for Milling Flour at Home
- #04 Easy Tips for Storing Wheat Berries: Long and Short Term
- #05 Tips for Converting Recipes to Freshly Milled Flour
- #06 Sifting Fresh Milled Flour: When It Matters Most
- #07 Bread Flour Blend Using Freshly Milled Wheat Berries
- #08 Grinding Freshly Milled Wheat Berries for Homemade All-Purpose Flour
- #09 Baking Sourdough with Freshly Milled Flour at Home
- #10 Where To Buy Wheat Berries And Other Whole Grains
- #11 Homemade Cake and Pastry Flour Using Freshly Milled Flour
If you’re ready to bake sourdough with freshly milled flour, I’ve got something special coming. After 25 years of baking sourdough with freshly milled flour. I’m sharing my honest tips and gentle know-how I wish I had when I started.
Sign up for the Cozy Cottage Community email newsletter so you don’t miss a thing.

Milling Flour FAQ‘s For Beginners – What You Need to Know
What is freshly milled flour?
Freshly Milled Flour is flour made by grinding whole grains, like wheat berries, right before baking. It contains all parts of the grain: the bran, germ, and endosperm, offering a fuller flavor and a more traditional baking experience.
Why should I consider milling my flour?
Milling at home gives you control over the type and quality of grain you use. It’s a great way to experiment with flavor, texture, and a wide range of grains, tailored to your recipes and preferences.

What equipment do I need to start milling?
You’ll need a grain mill—either electric or manual:
• Electric Grain Mills: Best for frequent baking and larger batches.
• Manual Grain Mills: Quiet, simple, and great for small quantities or backup use.
Choose what fits your kitchen routine best.
Which grains are good for milling?
Popular choices include:
- Hard red wheat (great for hearty breads)
- Hard white wheat (ideal for bread with a lighter flavor)
- Soft white or soft red wheat (best for cakes, muffins, and pastries)
- Durum wheat (traditionally used for pasta)
- Ancient grains like einkorn, spelt, or emmer for a unique flavor and texture
For A beginner’s bread flour blend, read this post: Bread Flour Blend Using Freshly Milled Wheat Berries.
How does freshly milled flour behave differently from store-bought?
Fresh flour is lighter and often more absorbent. You may notice:
- More water is needed in the dough
- Heartier textures in whole-grain bakes
- Richer, nuttier flavor
- May need to sift with a #40, #50, or #60 sieve for cakes and other baked goods.
It’s not about one way being better than another—it’s simply a different approach.
One that brings you a little closer to the wheat berry and the beauty of using fresh-milled grains in your baking.
With a bit of a learning curve and small adjustments—like understanding the difference between fine flour and wholemeal flour—you’ll be on your way to baking beautiful loaves and finding your own best results in no time. Happy baking!
Do I need to adjust my regular recipes when converting to freshly milled flour?
Usually, yes—but just a little: Read this blog post for more in-depth details, Tips for Converting Recipes to Freshly Milled Flour.
- Add extra water slowly if the dough feels dry
- Start by replacing half the flour in a recipe with fresh flour
- For a more delicate texture, sift to remove some bran
- In most recipes, use about 1¼ cups of freshly milled flour for every 1 cup of store-bought flour.
How should I store freshly milled flour?
Use it fresh when possible. If storing:
- Keep in an airtight container
- Store in a refrigerator or freeze
Fresh flour retains natural oils, so proper storage helps preserve freshness. fro more information on storing your wheat berries, read my post, Easy Tips for Storing Wheat Berries: Long and Short Term.
Where can I buy quality grains for milling?
You can find wheat berries and other grains at:
- Local farmers’ markets
- Health food and specialty grocery stores
- Reputable online grain suppliers
I’ll be sharing a full blog post soon with links to my favorite grain sources and how I store them at home.
If you don’t want to miss it, be sure to sign up for your Cozy Cottage Community email newsletter.
I’ll also be sharing more tips from my 25+ years of baking with freshly milled flour—including grain recommendations, storage tips, and practical ways to build confidence in your home milling journey.
Can I use freshly milled flour in any recipe?
You can! However, the results may vary depending on the recipe. Start slow:
- Sub in fresh flour gradually and take notes
- Sift if needed to match the desired texture
- Rustic bakes, quick breads, and hearty loaves are great starting points
You’ve got this. Milling is simple, rewarding, and a beautiful way to connect with your ingredients.
Want to dive deeper into baking with fresh flour?
Stay tuned—more resources, tips, and beginner-friendly recipes are on the way.
Looking for ways to use freshly milled flour in your baking? Try these delicious, tested recipes;
- Sourdough Vanilla Cake with Fresh Milled Flour
- Easy Sourdough Focaccia with Freshly Milled Flour
- Sourdough Whole Wheat Baguette Recipe
- Whole Wheat Sourdough Sandwich Bread Recipe
- Homemade Sourdough Whole Wheat Irish Soda Bread
Milling flour at home is more than just a skill—it’s a way of slowing down, of embracing the craft of baking, of reconnecting with the simplicity of real food.
There’s beauty in the process, in the patience it requires, in the joy of pulling a warm, golden loaf from the oven.
The learning process is simple, and the results are so worth it. Once you start, you may never want store-bought flour again.
🌾 I’d love to hear from you!
Have you tried milling your own flour?
What draws you to the idea of milling your own flour?
Is it the connection to tradition, the joy of working with whole ingredients, or the desire for a more intentional way of baking?
Share your thoughts in the comments—I am here to help you through this journey.
🌾 Want exclusive, freshly milled flour recipes and tips?
Sign up for my Cottage Living Community newsletter today!
Disclaimer: This post shares and reflects my personal experience baking with freshly milled flour at home for over 25+ years. It is intended for informational and inspirational purposes only. Please use your best judgment and consult a qualified professional for any dietary or health-related advice.