These DIY fire starters come together in minutes using simple household materials and a bit of melted wax. Each one lights easily and burns steadily, giving you a clean, reliable flame without chemicals or fuss.
The natural materials and light scent of wax and spice make them a satisfying, hands-on craft you’ll reach for all winter long.
This post may contain affiliate links. Please read our disclosure policy for details.
When the weather turns crisp and the evenings draw in, I start gathering supplies for these DIY fire starters. There’s something comforting about melting wax on the stove while the scent of cinnamon and bay leaf drifts through the kitchen. We use them for our first fires of the season — whether in the fireplace or under the stars — always paired with mugs of hot cocoa and a tray of Homemade Vanilla Marshmallows Recipe (How to Make) ready for roasting.
I first made these as a way to use up leftover dryer lint and candle wax, but they quickly became one of our favorite cozy winter DIYs. They burn clean, light easily, and look lovely tucked into a small basket by the hearth. I sometimes make an extra batch alongside a few Cozy DIY Beeswax Candles in Thrifted Vintage Glass Jars or a pan of Spritz Cookies Recipe | Classic & Nostalgic cooling on the counter.
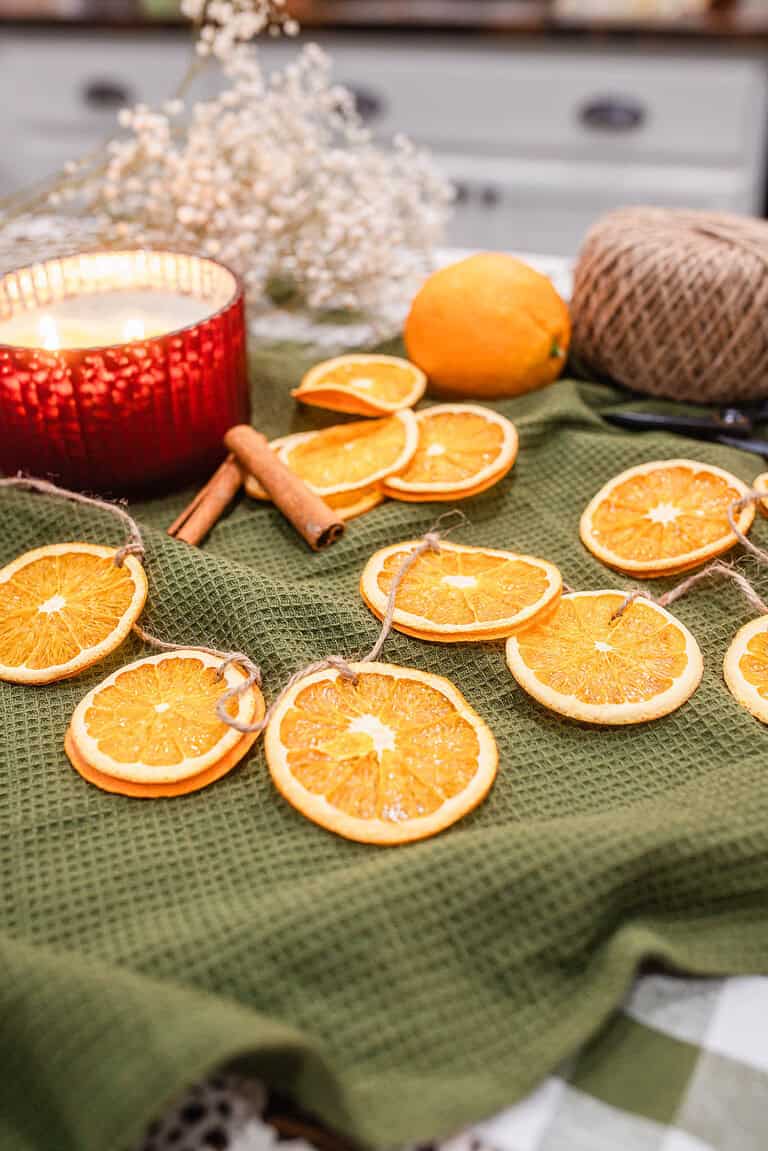
They fit right into our rhythm of cottage crafts for winter — the same quiet afternoons we spend baking Sourdough Cinnamon Rolls Recipe | Use Discard or Starter, pouring Easy Creamy Crockpot Hot Chocolate Recipe into warm mugs, or stringing up a Dried Orange Garland for the festive season ahead. Simple, practical, and naturally beautiful, these little fire starters have become one of our favorite cold-weather staples.
Why You’ll Love These DIY Fire Starters
Supplies
DIY Tips
Melt carefully: Always use a double boiler or candle pot to melt wax slowly and safely. Overheating can cause the wax to smoke or discolor.
Prepare tins first: Set up your muffin liners and wicks before melting the wax so you can pour immediately once it’s ready.
Use even layers: Pour the melted wax slowly to fill each cup evenly, helping them harden with a smooth surface.
Add natural elements wisely: Cinnamon sticks and bay leaves add charm but shouldn’t overcrowd the wax—keep them centered and light.
Cool completely: Allow the fire starters to harden fully before removing them from the tin to prevent cracks or loose wicks.
Store dry: Keep your finished fire starters in a sealed container or basket away from moisture so they light easily every time.
How To Make DIY Fire Starters
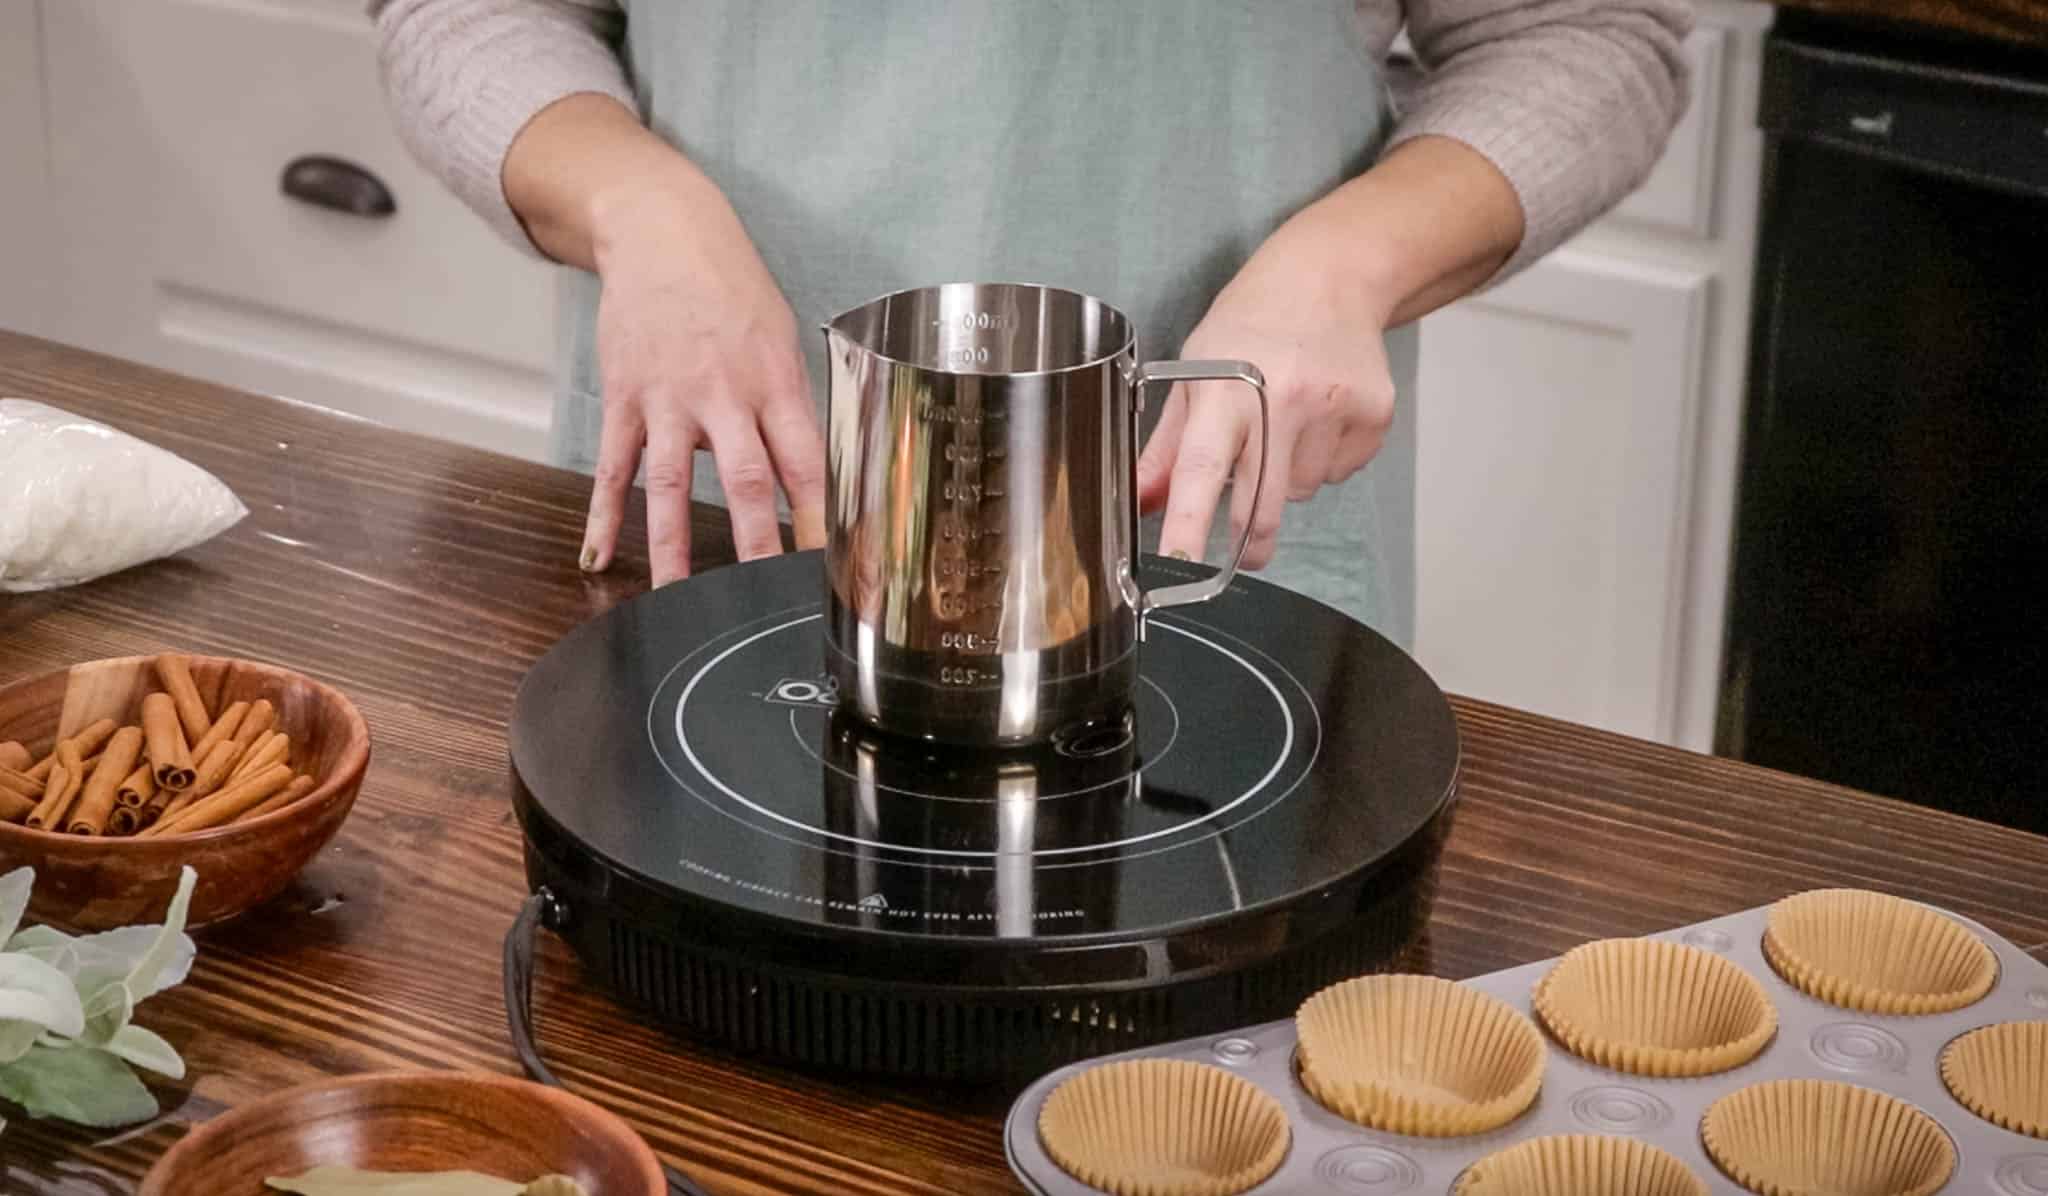
Step 1: Melt your candle or paraffin wax slowly in a double boiler or candle melting pot over low heat. Stir occasionally until the wax is fully liquefied and smooth.
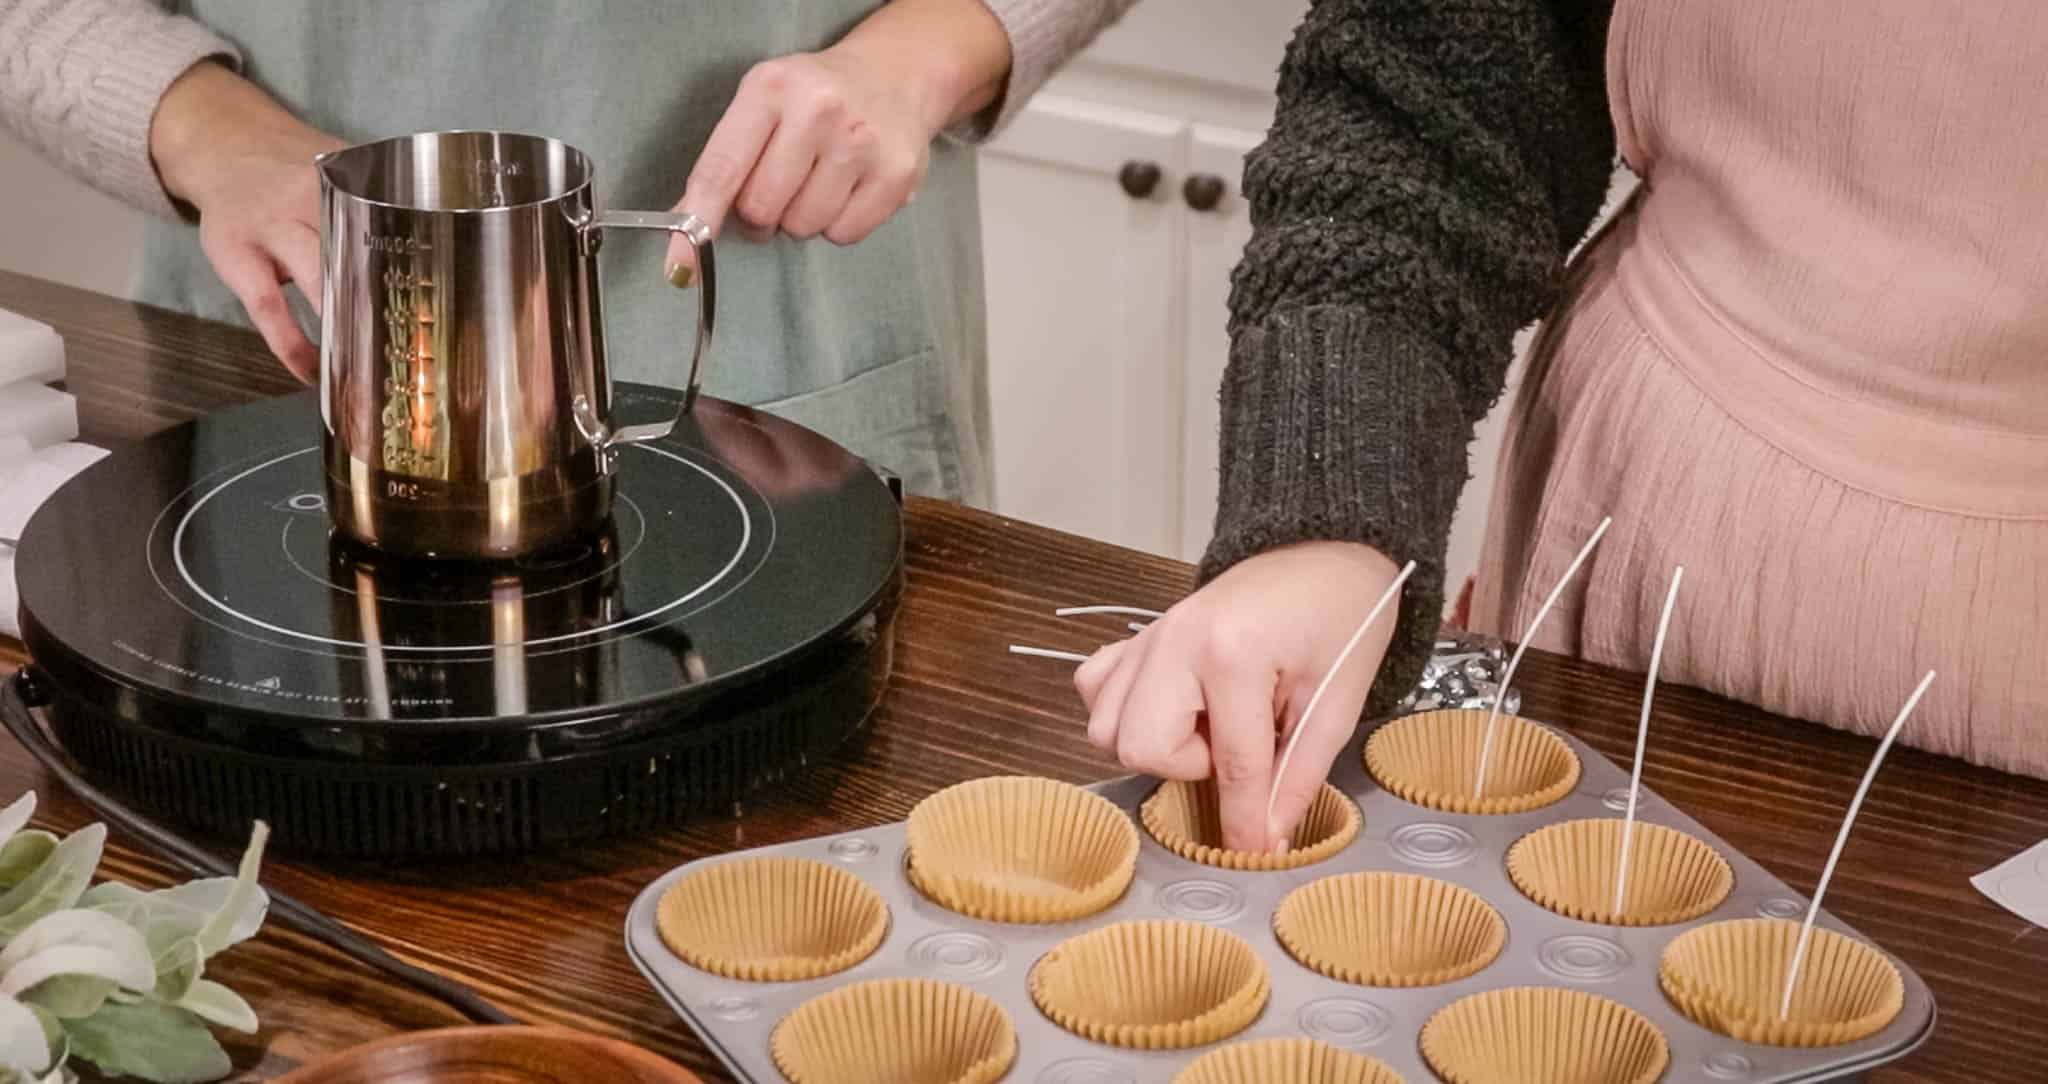
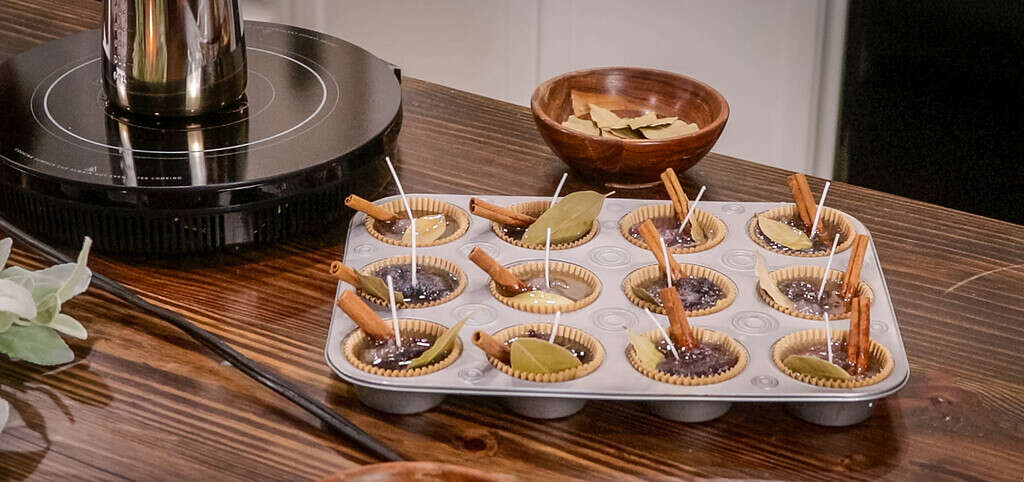
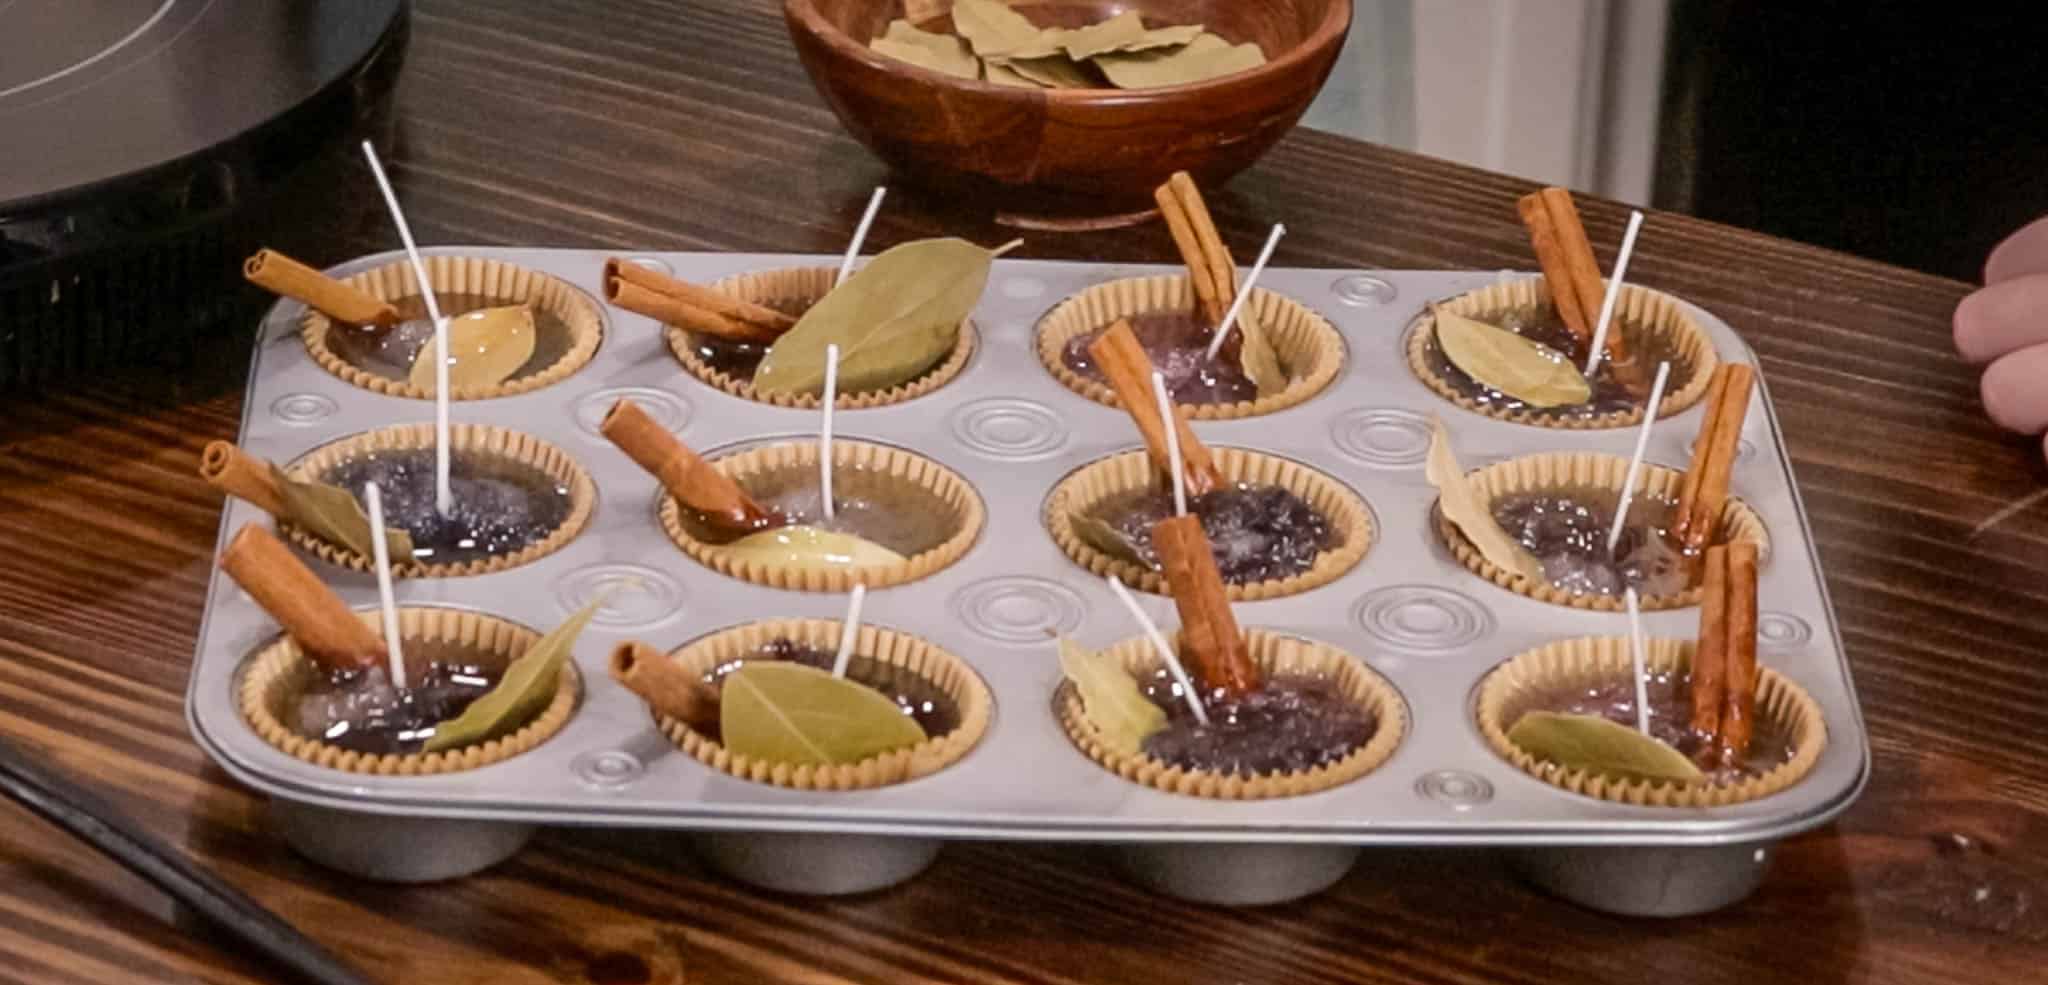
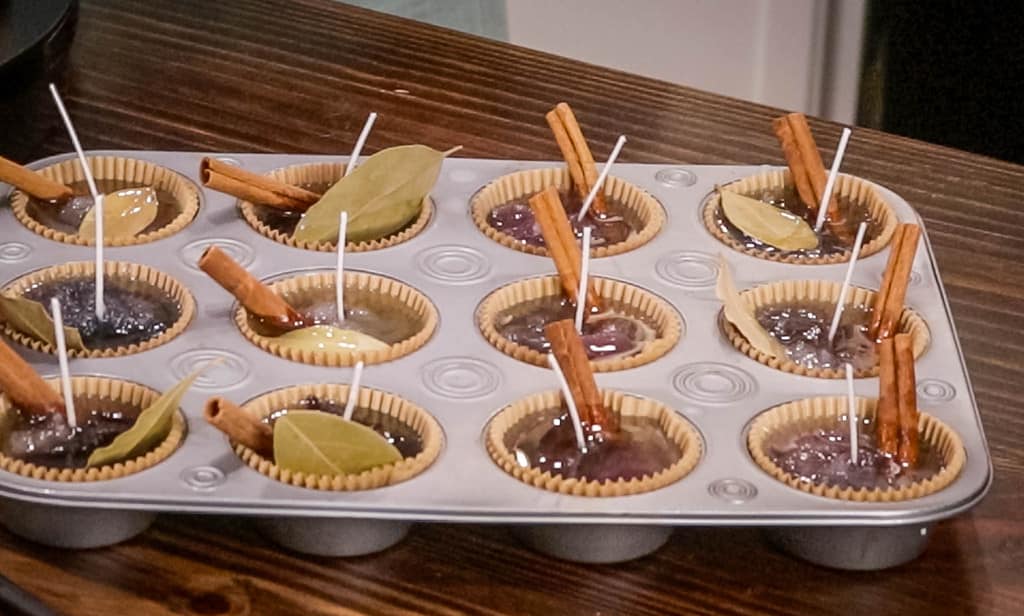
Step 2: While the wax melts, prepare your muffin tin by placing unbleached muffin liners in each cup. Secure a candle wick in the center of each liner using a wick sticker.
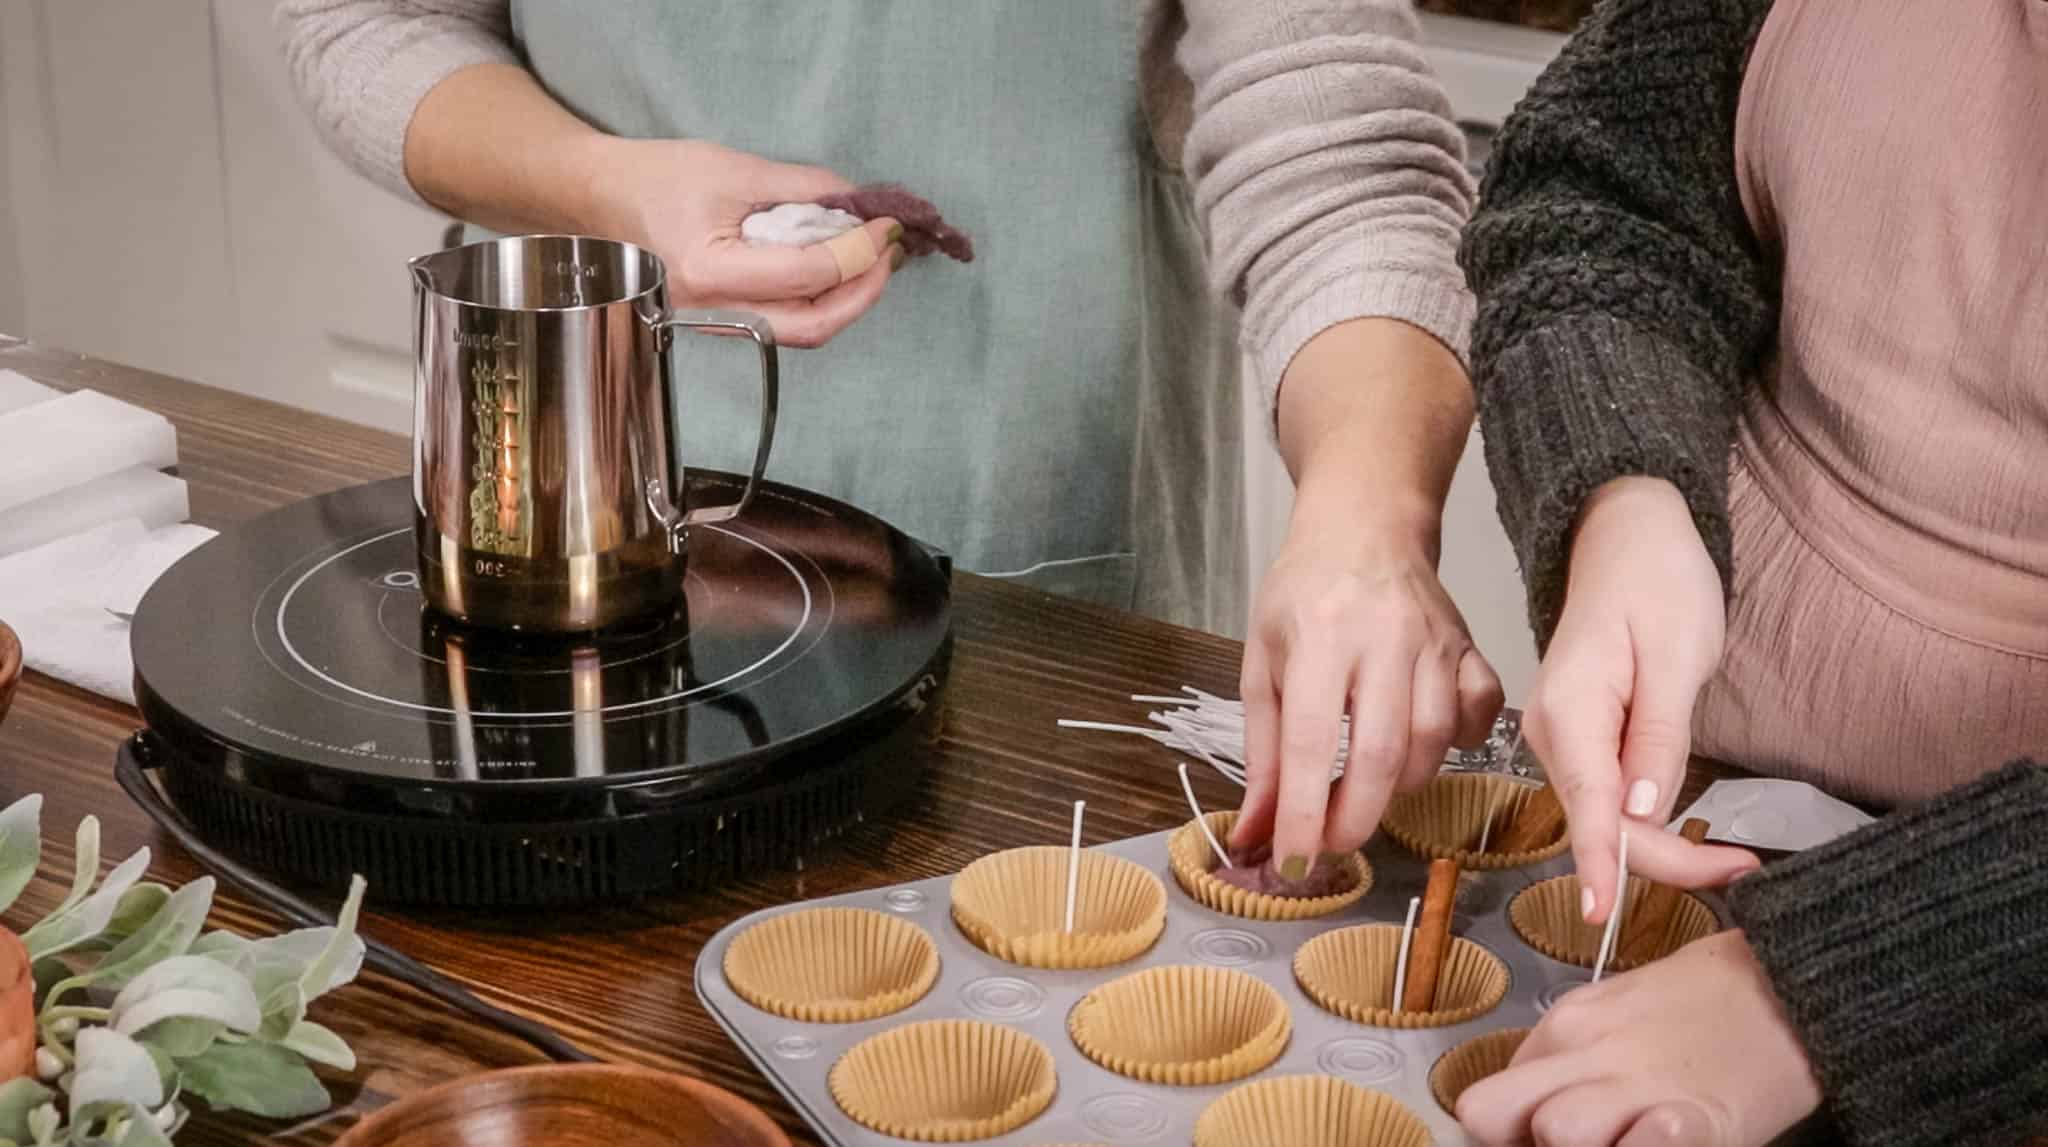
Step 3: Fill each muffin liner about halfway with dryer lint, keeping it loose so the wax can fully saturate it. Make sure the wick stays centered as you work.
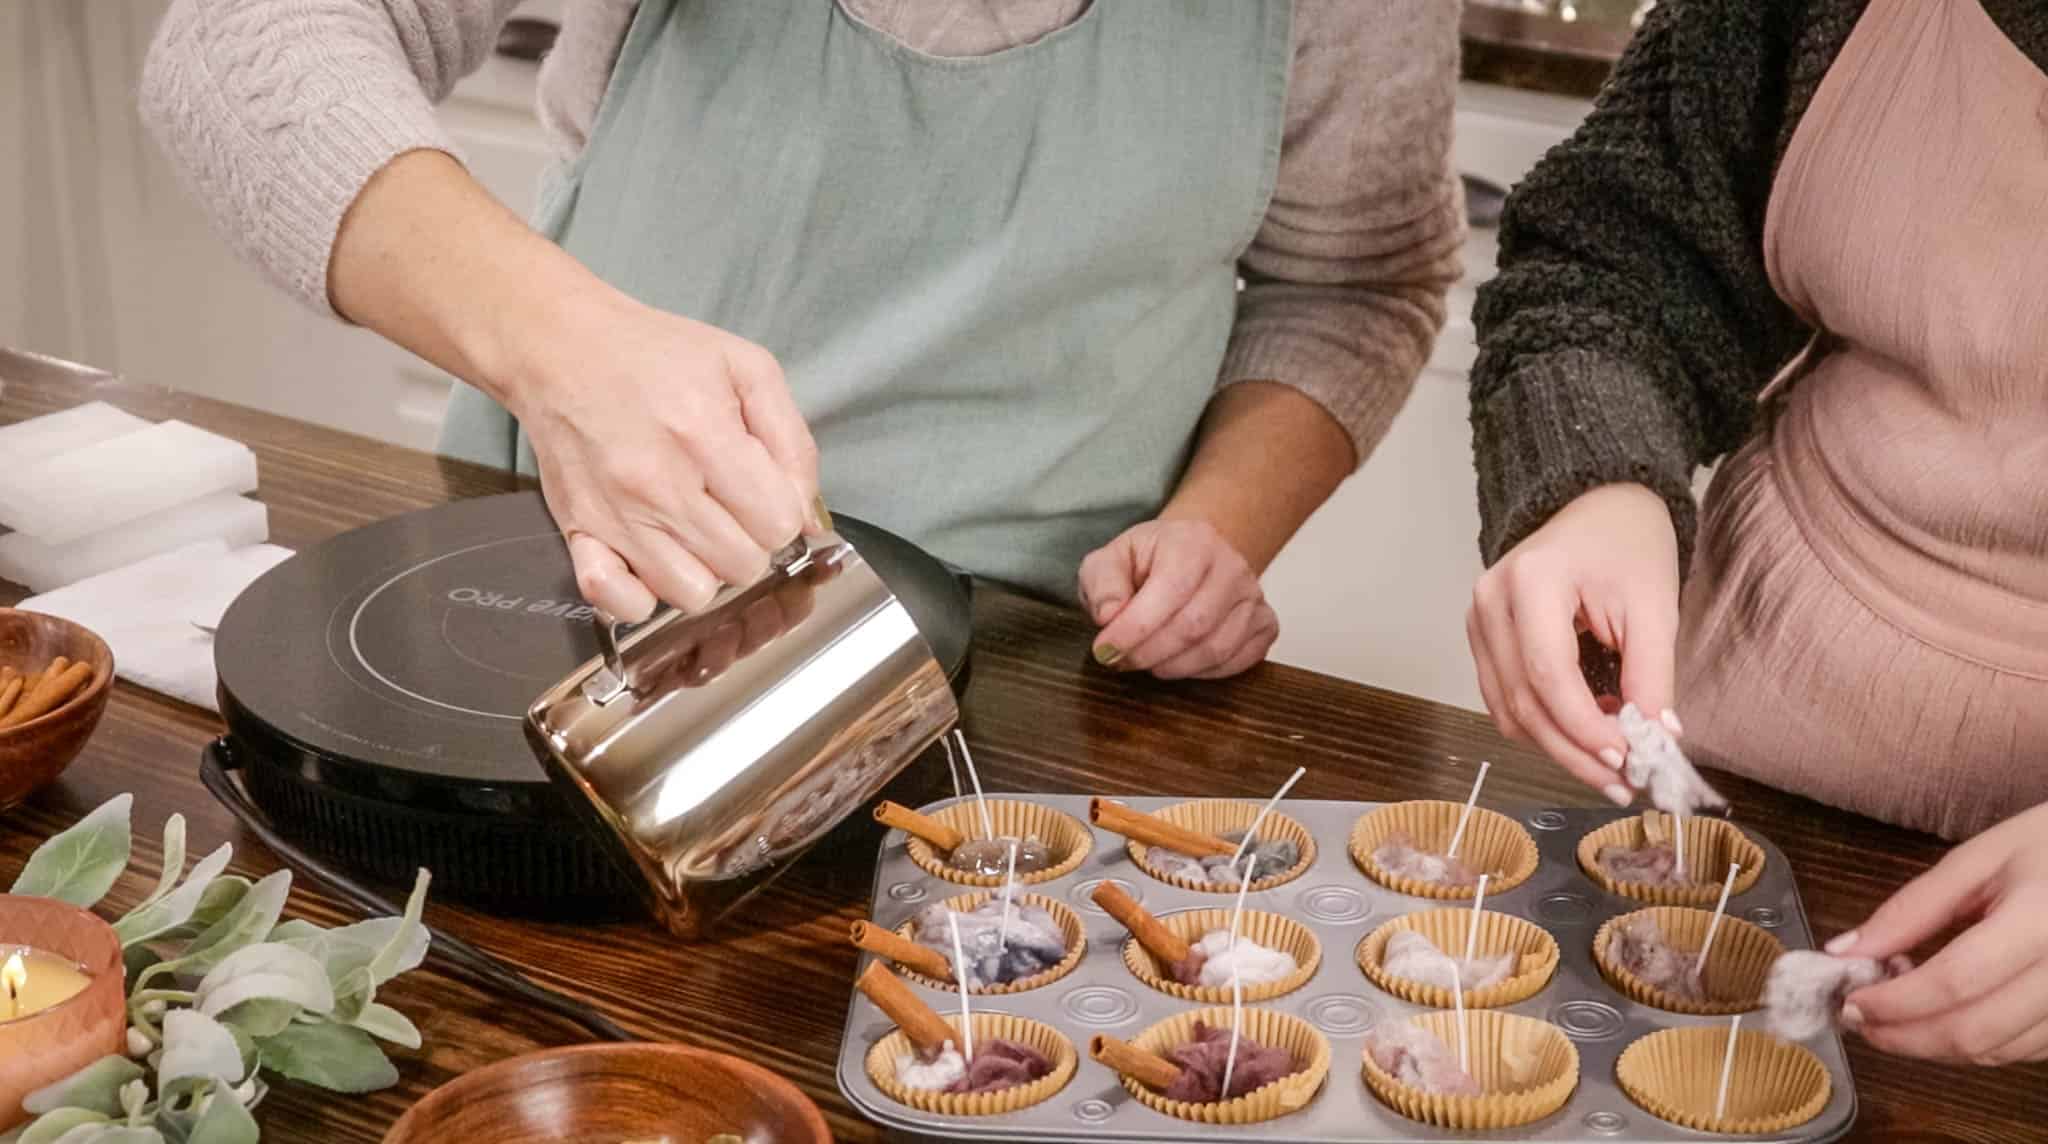
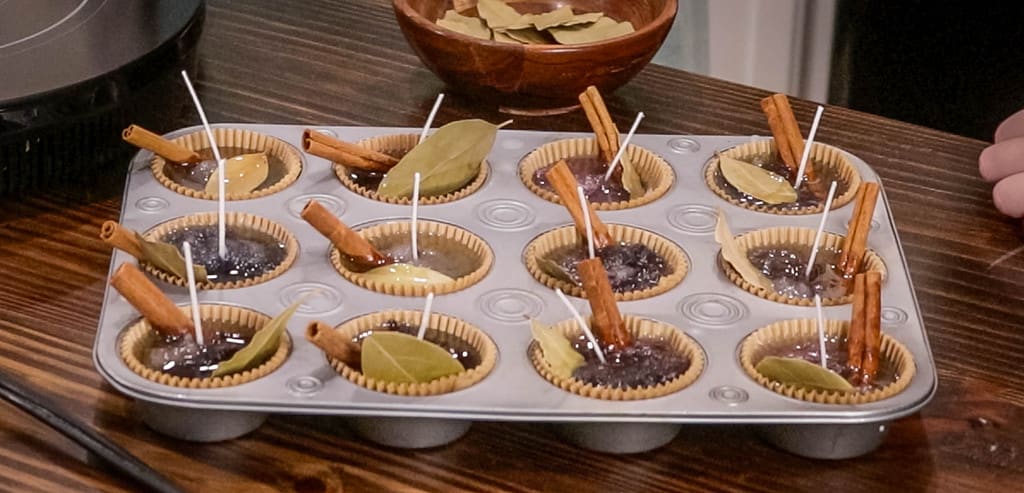
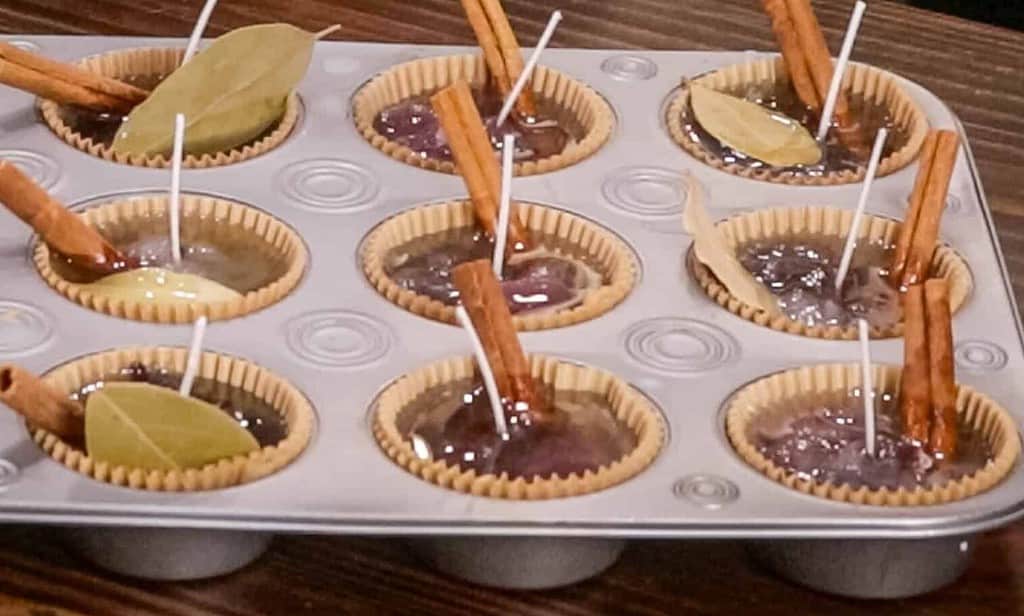
Step 4: Once the wax is melted, carefully pour it into each prepared liner, covering the lint completely. Leave a little room at the top to prevent overflow.
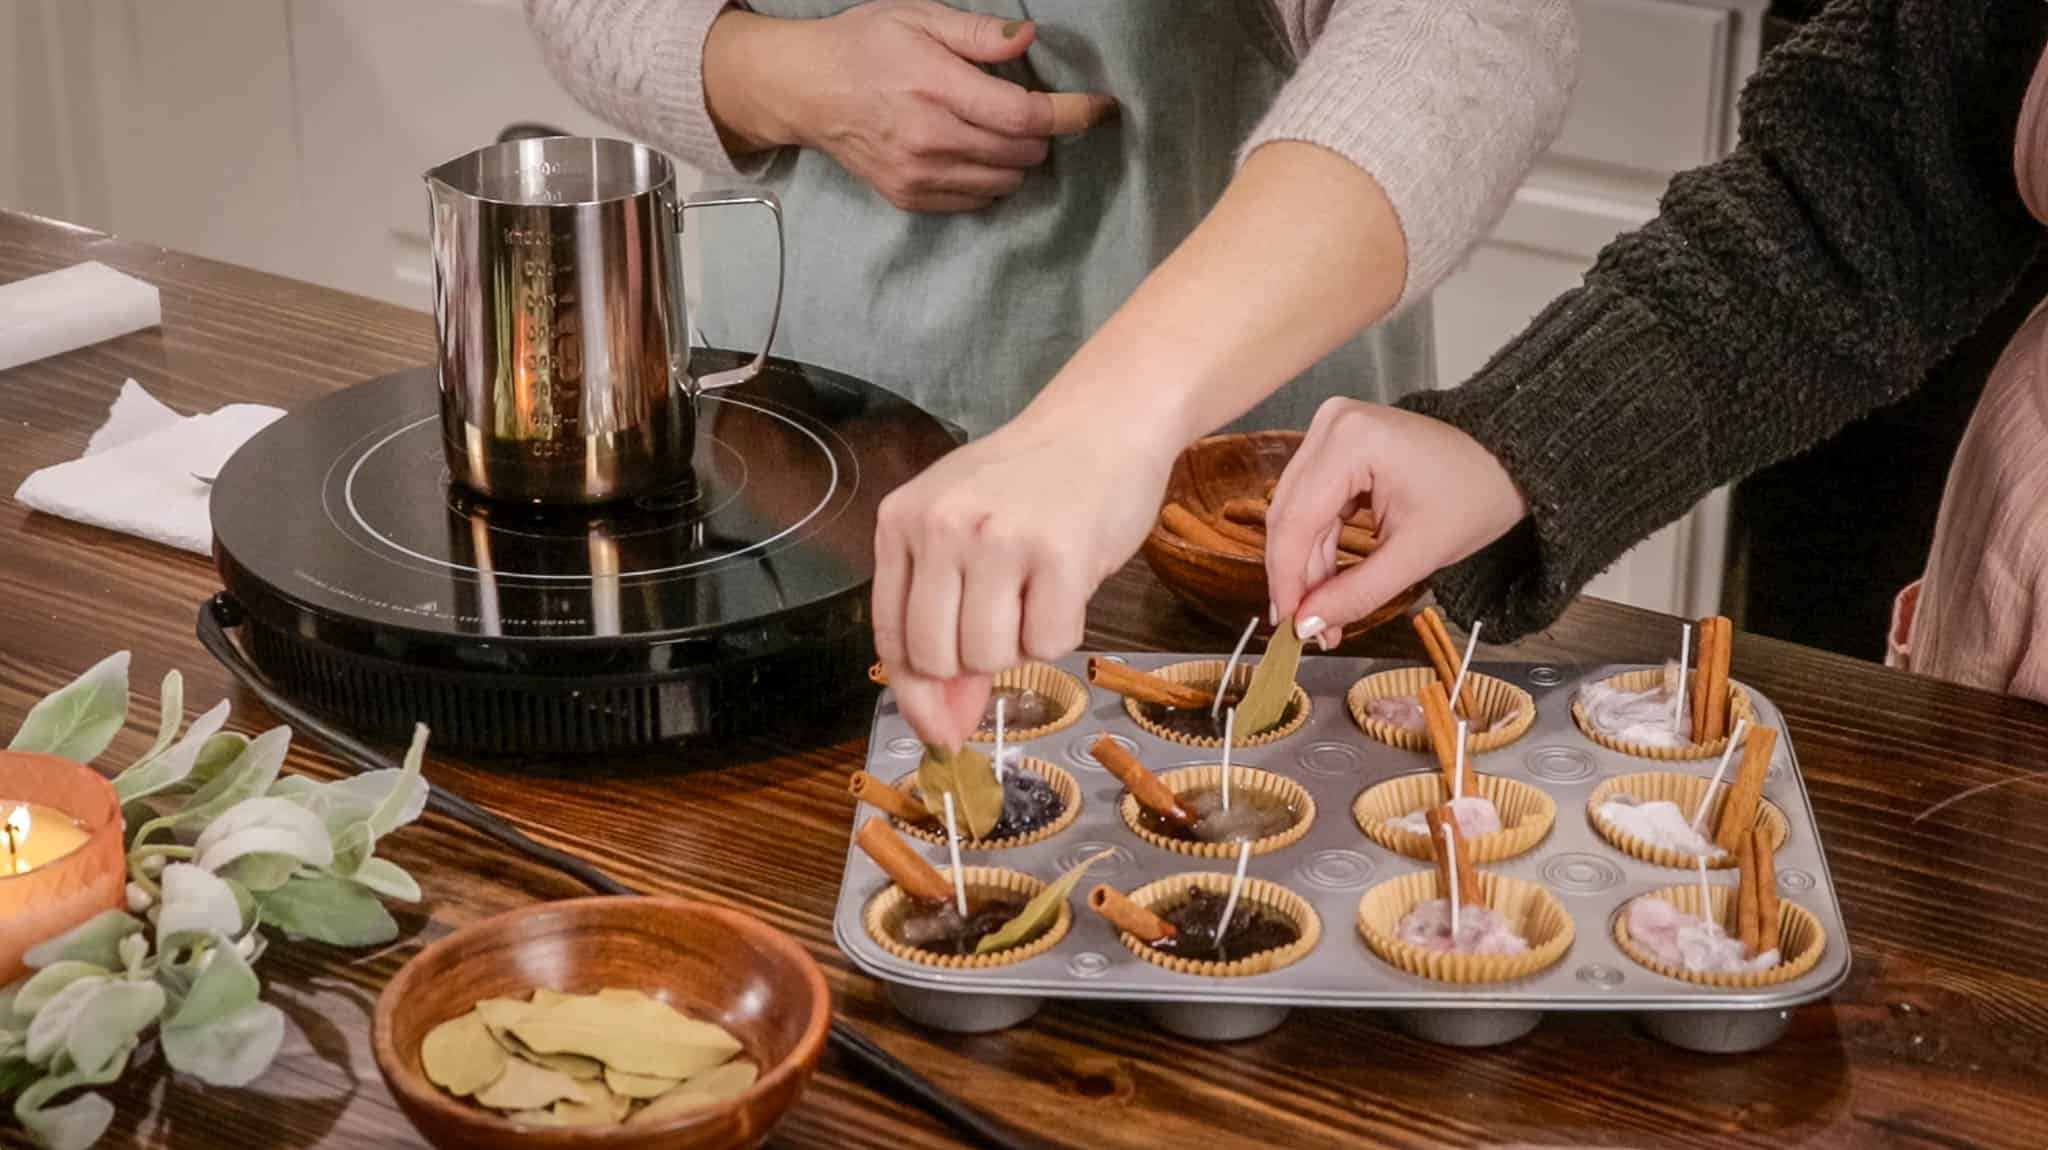
Step 5: For an optional touch, place one cinnamon stick and one bay leaf on top of each filled cup. These add fragrance and a warm, rustic appearance when lit.
Step 6: Allow the fire starters to cool undisturbed for at least 30 minutes. The wax should harden fully before you move or trim the wicks.

Step 7: Once cooled, remove each fire starter from the muffin tin and trim the wicks to about one inch. They should hold their shape firmly in your hands.
Step 8: Store the finished fire starters in a dry basket or airtight container. Keep them away from direct sunlight and moisture until you’re ready to light one.
Finishing & Care
How To Gift or Share These Fire Starters
FAQ
Join The Community
Want More Cozy Recipes & Seasonal Inspiration?
Get cozy, from-scratch recipes, seasonal cottage living tips, and slow living inspiration delivered straight to your inbox.
Another favorite from my kitchen to yours, where the seasons guide the table and every meal is an act of love — may this recipe become a favorite in your kitchen too.
With gratitude & love,
Emily
Find more DIYs cottage projects:

DIY Fire Starters
Supplies
- Candle Melting Pot
- Muffin Tin
- Double Broiler optional
Elements
- 1–2 lbs Candle Wax or Paraffin Wax 454–907g
- 12 Unbleached Muffin Liners
- 12 Candle Wicks
- 12 Candle Wick Stickers
- 12 Cinnamon Sticks optional
- 12 Bay Leaves optional
- 1 Quart-size Bag of Dryer Lint optional 200g
Instructions
- Melt: Place candle wax or paraffin wax in a candle pot or double boiler and melt until fully liquid.
- Prepare: Line each muffin tin compartment with an unbleached muffin liner.
- Set Wicks: Attach candle wicks in the center using wick stickers to hold them in place.
- Fill: Add dryer lint to each muffin liner, keeping the wick centered.
- Pour: Carefully pour the melted wax over the dryer lint until just covered.
- Add Aroma: Place a cinnamon stick and bay leaf on top if desired for fragrance.
- Cool: Let the fire starters cool and harden completely at room temperature.
- Trim: Remove the hardened fire starters from the tin and trim each wick to about 1 inch.
- Store: Keep the finished fire starters in a cool, dry place until ready to use.
Video
Notes
Did you make this recipe?
If you gave it a try and loved it, I’d be so grateful if you came back to leave a 5 “⭐️” rating. Use the buttons below to share, comment, or connect—I truly enjoy seeing and celebrating your beautiful bakes.

Emily Rider
Cottage lifestyle blogger and home miller with 25+ years of sourdough and fresh-milled flour experience.
Sharing cozy homemade recipes that help you bake with confidence, celebrate each season, and savor the beauty of everyday cottage living.


Could you put citronella essential oil in them to use them outside as fire starters?
Absolutely! You can definitely add citronella essential oil to make them outdoor-friendly as fire starters. It’ll help keep the bugs at bay too — just make sure to store them in a cool spot until you’re ready to use them, since essential oils can be flammable. Great idea for summer evenings around the fire!