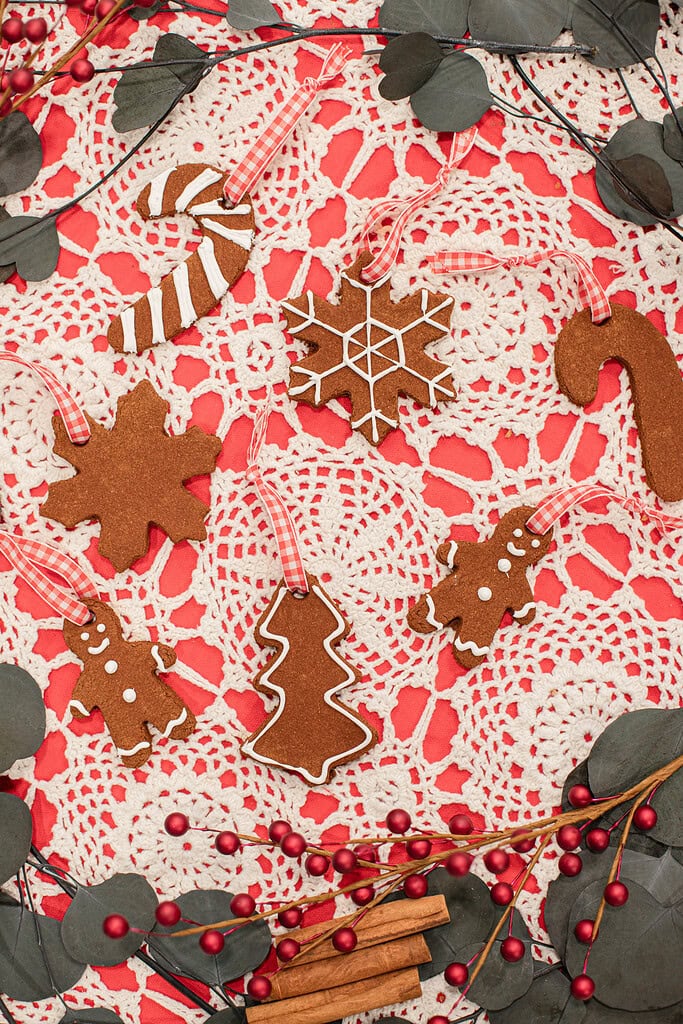
These cinnamon applesauce ornaments fill the house with the warm scent of the season, the moment the dough comes together, ground cinnamon, unsweetened applesauce, and white glue mixed into a smooth, workable dough that rolls out cleanly, cuts into any holiday shape, and dries into deep cinnamon-brown ornaments that carry their fragrance through the full season and year after year.
Every holiday season, this is one of the first things we make in the cottage kitchen. The smell is amazing and always brings back memories from years past when we made them. We pour a mug of Easy Creamy Crockpot Hot Chocolate and mix up a batch while the Sourdough Gingerbread Cookies cool on cooling racks nearby. The ornaments go on the tree, into garlands across the mantel, and tucked into gift packages alongside bottles of this Homemade Vanilla Extract for homemade Christmas gifts.

Why You’ll Love This DIY

Ingredients
Tools & Supplies You’ll Need
Make It Your Own
DIY Tips
Get the dough consistency right first – the dough should feel soft, smooth, and easy to shape without sticking to your hands. If it cracks when you press it, knead in a small spoonful of applesauce. If it sticks to everything, knead in a small pinch of ground cinnamon. Correcting the consistency before rolling saves the batch.
Roll to a consistent thickness – aim for between 1/8 and 1/4 inch throughout. Thinner ornaments curl as they dry and are more prone to cracking. Thicker ornaments take significantly longer to dry but are more durable. An even thickness means every ornament in a batch dries at the same rate.
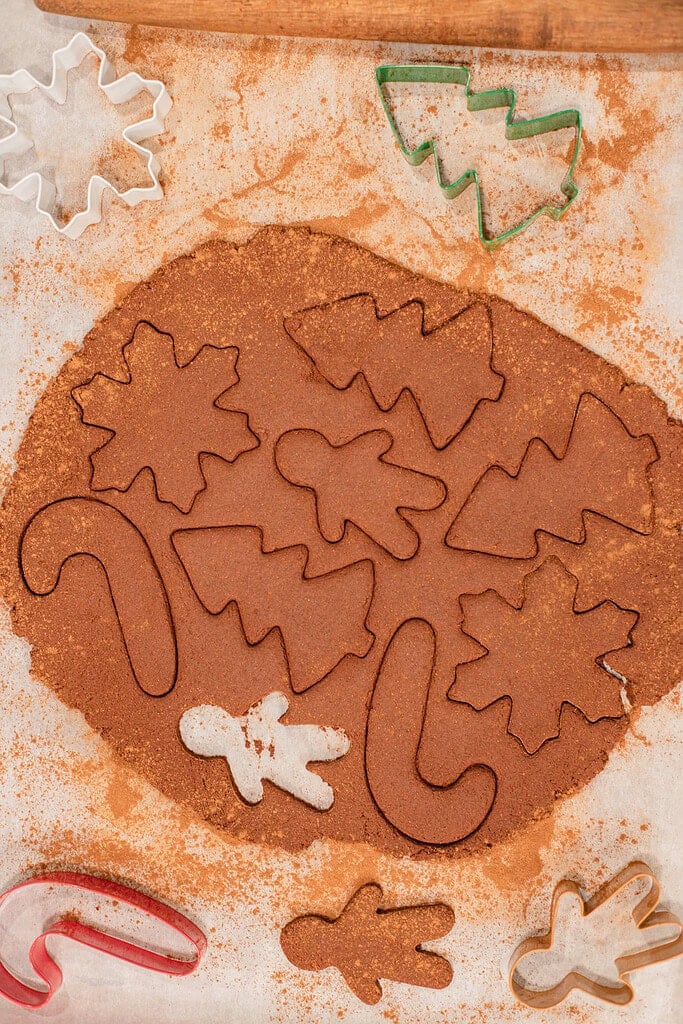
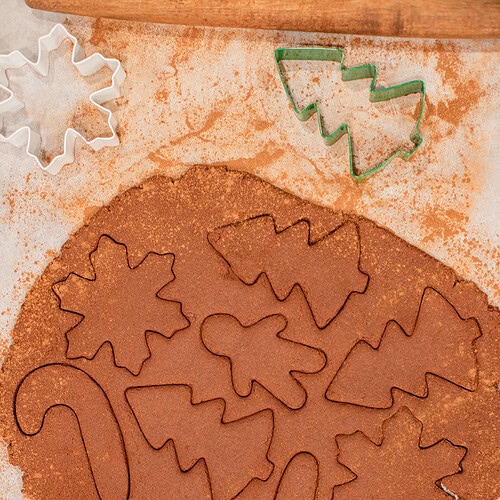
Dust with cinnamon, not flour – lightly dust the work surface and cookie cutters with ground cinnamon before rolling and cutting. Flour changes the dough composition and can leave pale patches on the finished ornament. Cinnamon keeps the dough moving without altering the color or texture.
Lift straight up when cutting – press cookie cutters straight down into the dough and lift straight up without twisting. Twisting the cutter drags the edges and produces uneven, rough-edged shapes that do not dry as cleanly as straight-cut edges.
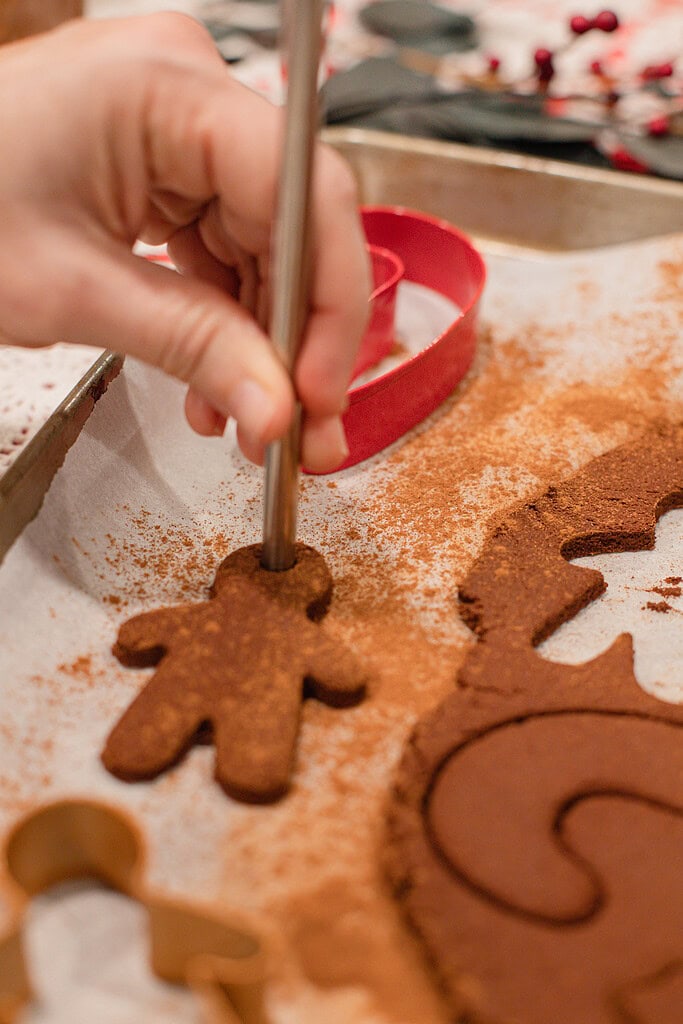
Make the hole before drying – use a drinking straw or wooden skewer to punch a clean hole near the top of each ornament immediately after cutting. The hole should be at least 1/4 inch from the edge so the ribbon has enough dough on either side to hold its weight once hung.
Dry low and slow – bake at 200°F and resist the urge to raise the temperature. A higher temperature causes the outside of the ornament to firm before the interior is fully dry, which creates internal stress that cracks the surface as the ornament continues to dry after coming out of the oven.
Flip once during drying – turn each ornament over once at the halfway point of the bake to ensure both sides dry at the same rate and the ornament stays flat rather than curling toward the heat source.
Let them cool completely before decorating – any warmth remaining in the ornament after the bake will cause puffy paint or acrylic paint to spread rather than hold its shape. Let them cool on a rack until completely room temperature before any decorating begins.
Instructions
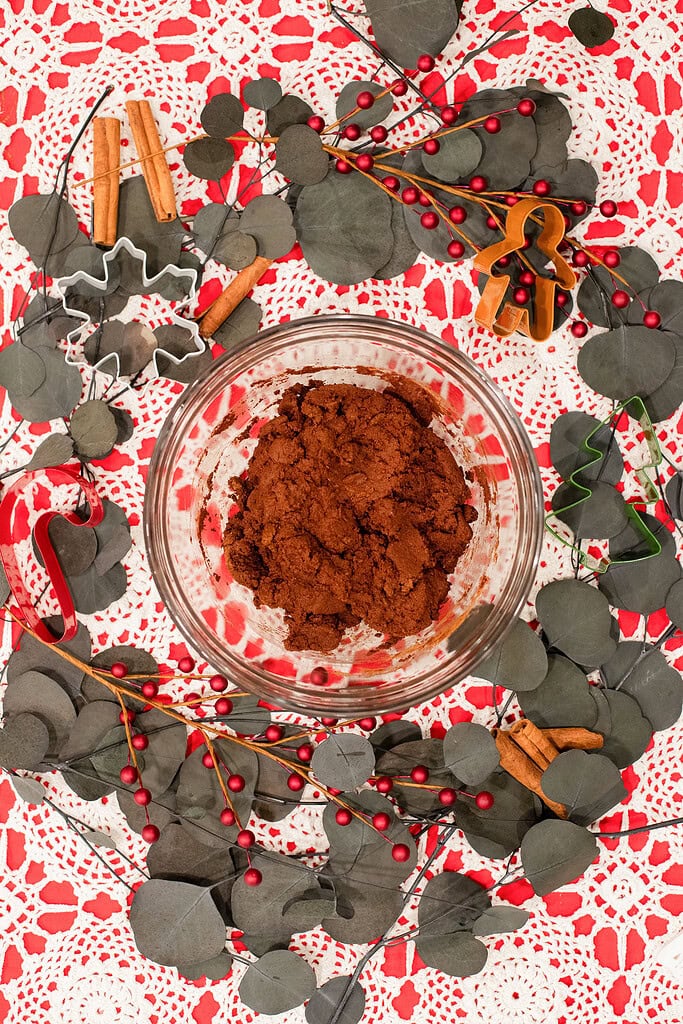
- Mix the dough – in a medium mixing bowl, combine the ground cinnamon, unsweetened applesauce, and white glue. Stir with a spoon until the mixture begins to come together, then knead by hand until the dough is smooth, soft, and cohesive. The dough is ready when it no longer feels sticky and holds a clean shape when pressed.
- Rest the dough – cover the bowl and let the dough rest for 30 minutes. This rest time allows the cinnamon to fully absorb the moisture from the applesauce and makes the dough easier to roll without cracking.
- Roll and cut – turn the dough onto a sheet of wax paper or a lightly cinnamon-dusted work surface and roll to between 1/8 and 1/4 inch thickness. Press cookie cutters straight down into the dough and lift straight up to cut clean shapes. Transfer each cut-out carefully to a parchment-lined baking sheet.
- Make the hanging hole – use a drinking straw or wooden skewer to punch a small, clean hole near the top of each ornament. Press firmly and twist slightly to remove a clean plug of dough. The hole should be at least 1/4 inch from the edge.
- Dry the ornaments – for the oven method, place the baking sheet in a 200°F oven and dry for 2 to 4 hours, flipping each ornament once at the halfway point. The ornaments are ready when they feel completely firm and dry to the touch with no soft spots remaining. For the air dry method, place ornaments on a cooling rack in a dry room and allow to dry for 1 to 2 days, turning occasionally.
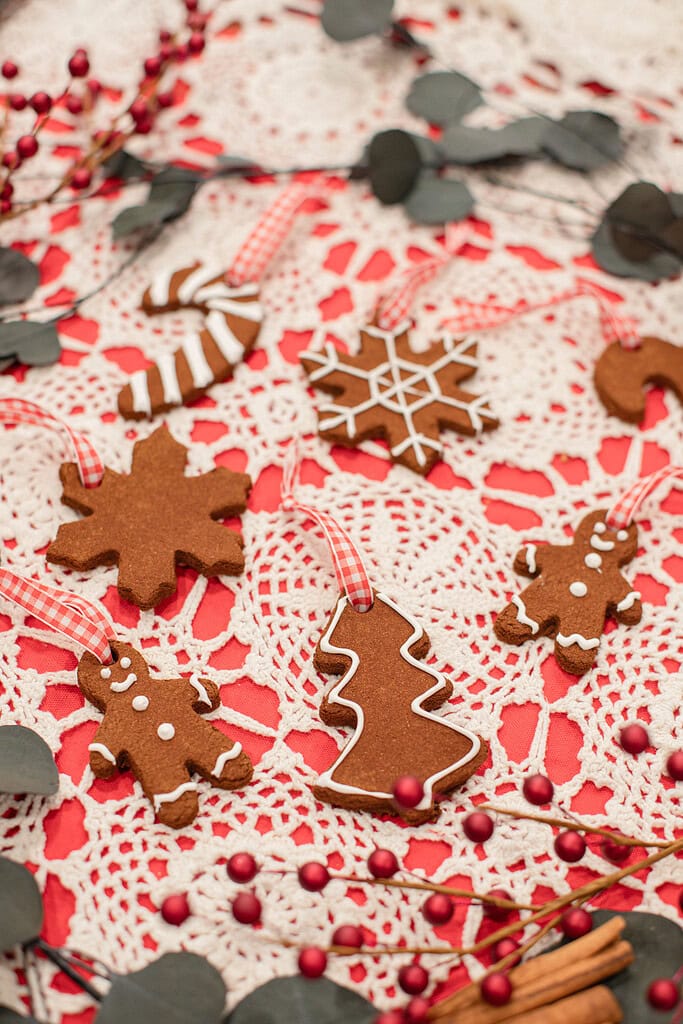
- Cool and decorate – let the ornaments cool completely on a wire rack before decorating. Add white puffy paint details if desired, allow the paint to dry fully, then apply a thin coat of clear sealer if the ornaments will be used for multiple seasons.
- Hang and display – thread ribbon, twine, or jute cord through each hole and hang on the tree, tuck into garlands across the mantel, or tie to wrapped gifts for a scented, handmade finishing touch.

Care and Storage
Gifting Ideas
FAQ
More Christmas Recipes and Decor Ideas from The Cottage
Cottage Living Newsletter
Join the Cozy Cottage Community Today!
Get, from-scratch recipes, seasonal cottage living tips, and cozy cottage living inspiration delivered straight to your inbox.

Homemade Cinnamon Applesauce Ornaments
Supplies
- Medium Mixing Bowl
- Rolling Pin
- Measuring Cups and Spoons
- Baking sheet
- Wax paper or parchment paper
- Cookie cutters different shapes and sizes
- Drinking straw or wooden skewer
- Ribbon or twine *optional
Elements
- 1 ¾ cups ground cinnamon (175 g)
- 1 cup unsweetened applesauce (255 g)
- ⅓ cup white glue (80 g)
Instructions
- Mix the dough – combine the ground cinnamon, unsweetened applesauce, and white glue in a medium mixing bowl. Stir until the mixture begins to come together then knead by hand until the dough is smooth, soft, and cohesive with no dry patches remaining.
- Rest the dough – cover the bowl and let the dough rest for 30 minutes to allow the cinnamon to fully absorb the moisture from the applesauce.
- Roll and cut – turn the dough onto a wax paper or lightly cinnamon-dusted surface and roll to between 1/8 and 1/4 inch thickness. Press cookie cutters straight down and lift straight up to cut clean shapes. Transfer to a parchment-lined baking sheet.
- Make the hanging hole – use a drinking straw or wooden skewer to punch a small clean hole near the top of each ornament at least 1/4 inch from the edge.
- Dry the ornaments – oven method: place in a 200°F oven for 2 to 4 hours, flipping once at the halfway point, until completely firm and dry to the touch. Air dry method: place on a cooling rack in a dry room for 1 to 2 days, turning occasionally.
- Cool and decorate – let ornaments cool completely on a wire rack before adding paint or ribbon. Decorate with white puffy paint if desired and seal with a thin coat of clear acrylic sealer once fully decorated.
- Hang and display – thread ribbon, twine, or jute cord through each hole and hang on the tree, tuck into garlands, or tie to wrapped gifts.
Notes
Did you try this project?
Rate it ⭐️⭐️⭐️⭐️⭐️ below.
If you liked this project, I’d be so grateful if you would share it with others. Use the buttons below to share, comment, or connect.

Emily Rider
Home miller since 1999 with fresh-milled flour & sourdough experience. Sharing from-scratch recipes and traditional kitchen skills, rooted in the seasons and inspired by everyday cottage living and seasonal rhythms.