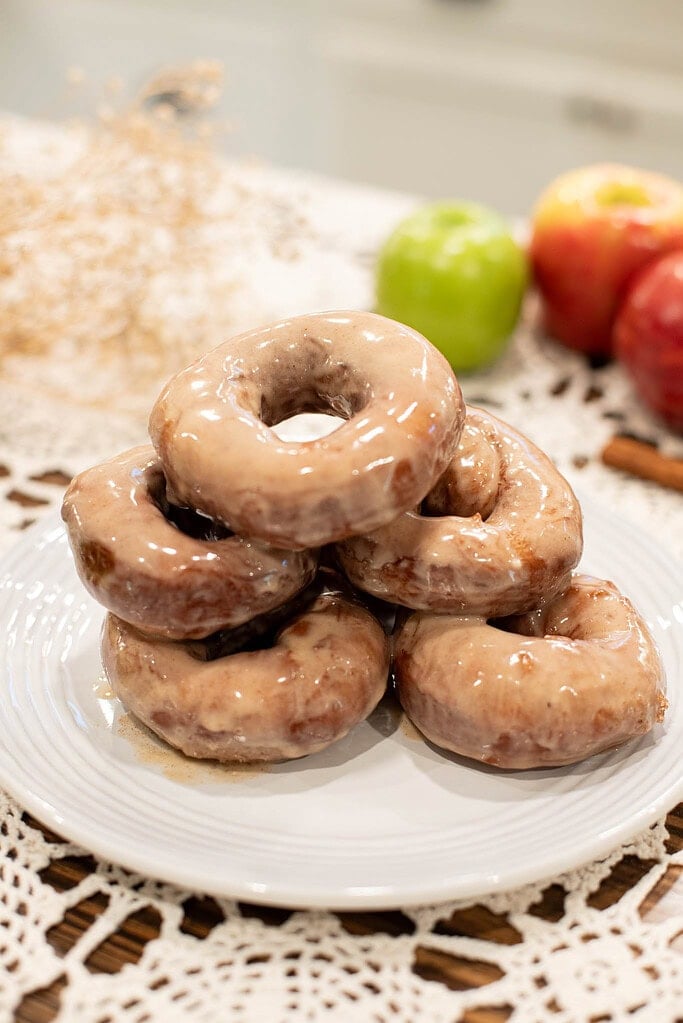
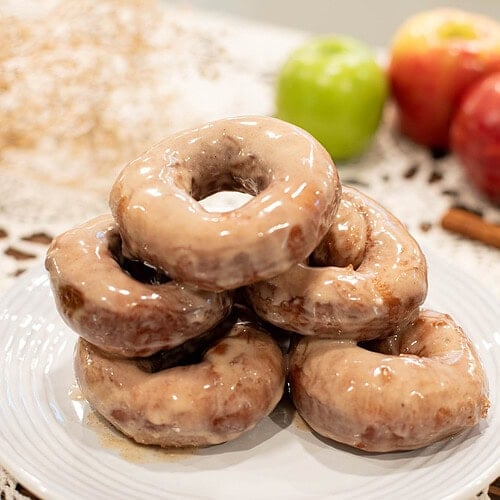
These sourdough apple cider donuts are made with apple cider simmered down to a thick, fragrant syrup and folded into an enriched sourdough dough that fries up golden and crisp or bakes up soft and spiced.
The dough rests overnight for deeper flavor or comes together same day, with two finishing options — warm cinnamon sugar or a spiced apple cider glaze.
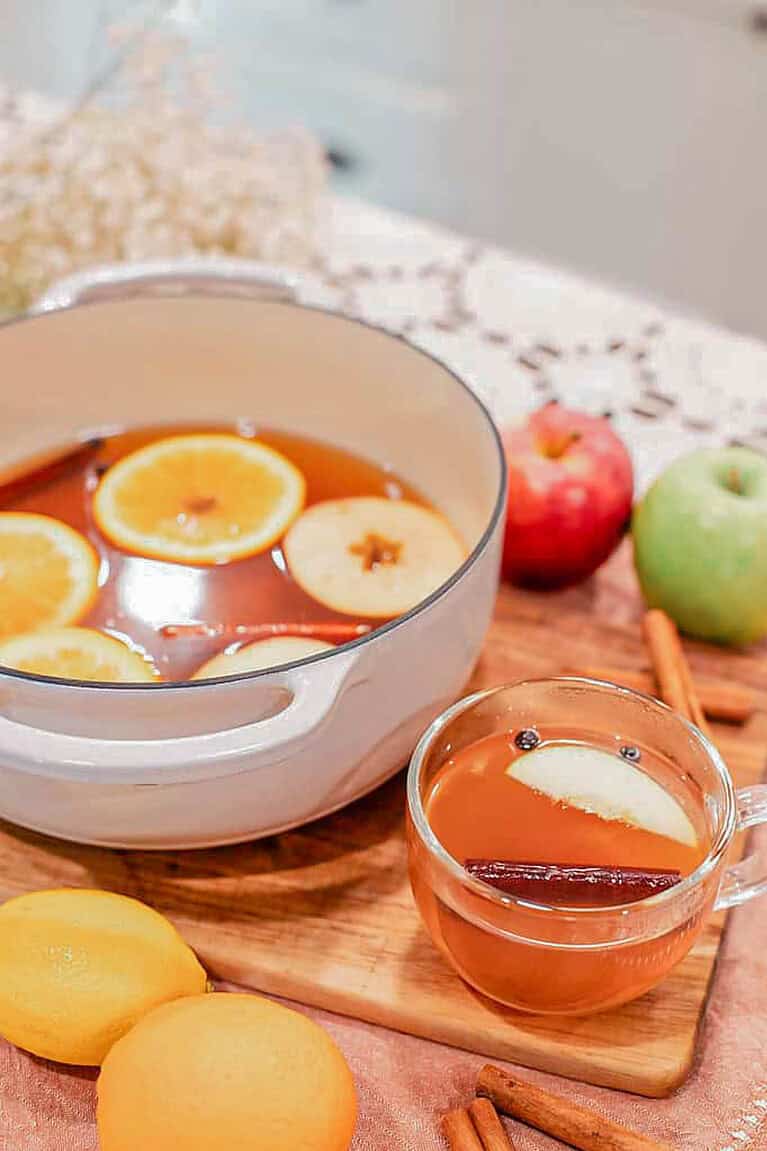
For more fall apple baking, explore Homemade Apple Cider Dutch Oven, Sourdough Apple Snaps Recipe, and Easy Homemade Apple Pie Spice Recipe. If you mill your own flour, The Cottage Mill has guides and resources to help you get started.

Did you know you can convert your recipes to freshly milled flour? I share how to convert your recipes and more at The Cottage Mill.
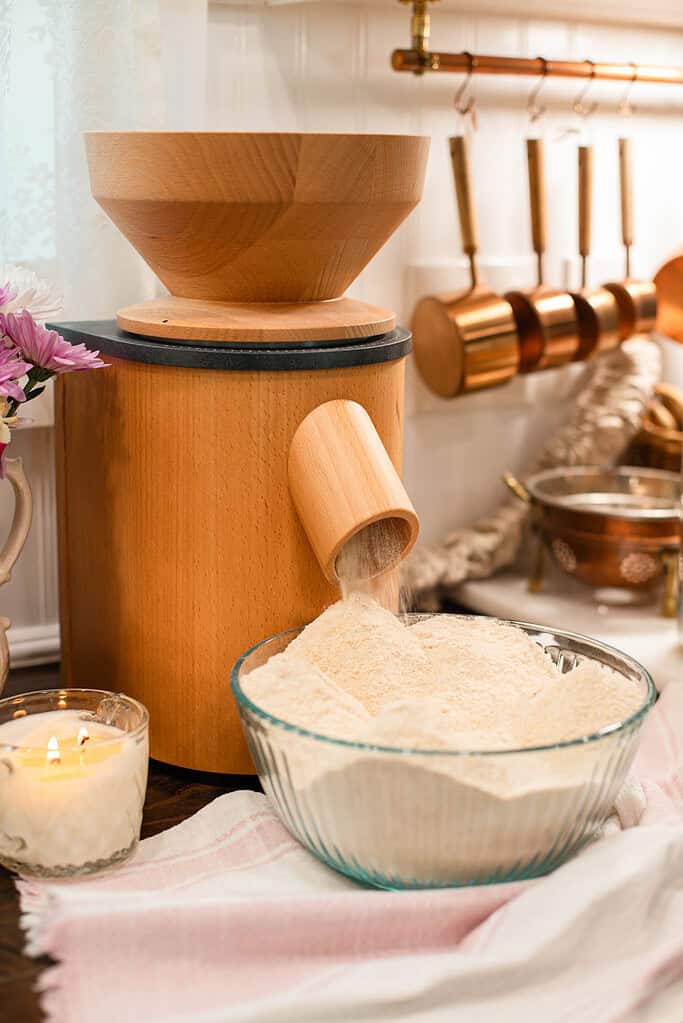
Step into The Cottage Mill: Freshly Milled Flour Guides, Recipes, and More Await!
Love your step-by-step recipe. Your blog is easy to follow. I always enjoy your recipes and tips ~Anonymous
Why You’ll Love This Recipe
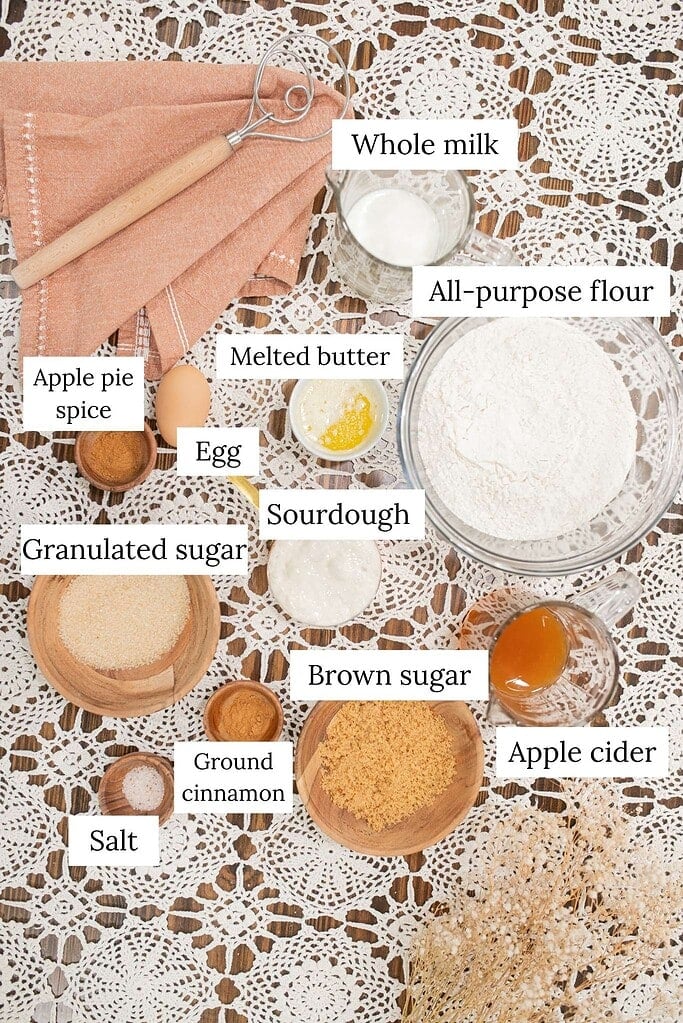
Ingredients

Variations & Add-Ins
Recipe Tips
Reduce the cider low and slow – Simmer over medium heat without rushing. The kitchen smells like warm apples and spice when it is ready. Cool completely before adding to the dough.
Choose your starter based on your timeline – Active peaked starter for a same-day bake with three to four hours of rise time. Discard for an overnight refrigerator rest of eight to twelve hours.
Keep the dough warm during bulk fermentation – A warm draft-free spot near the oven works well. The dough should look light and puffy before shaping.
Watch the oil temperature – Keep oil steady between 375 and 380 degrees Fahrenheit. Too low and the donuts absorb excess oil. Too high and they brown before cooking through. Fry two to three at a time maximum.
Coat while warm, not hot – Rest donuts two to three minutes on the rack before coating. Too hot and the coating slides off. Slightly warm and it clings evenly.
Chill before cutting – Cold overnight dough is much easier to roll and cut cleanly. If baking same day, a thirty minute refrigerator rest after bulk fermentation helps significantly.
Freeze uncoated for later – Cool completely, wrap individually, freeze up to one month. Thaw, warm in a low oven, then coat before serving.


Instructions
- Reduce the cider – Simmer 1 cup apple cider over medium heat until reduced to half a cup, thick and syrupy. Cool completely before using.
- Mix the dry ingredients – Whisk together flour, salt, cinnamon, and apple pie spice in a medium bowl until evenly combined.
- Combine the wet ingredients – Whisk starter or discard with egg, warm milk, cooled reduced cider, melted butter, granulated sugar, and brown sugar until smooth.
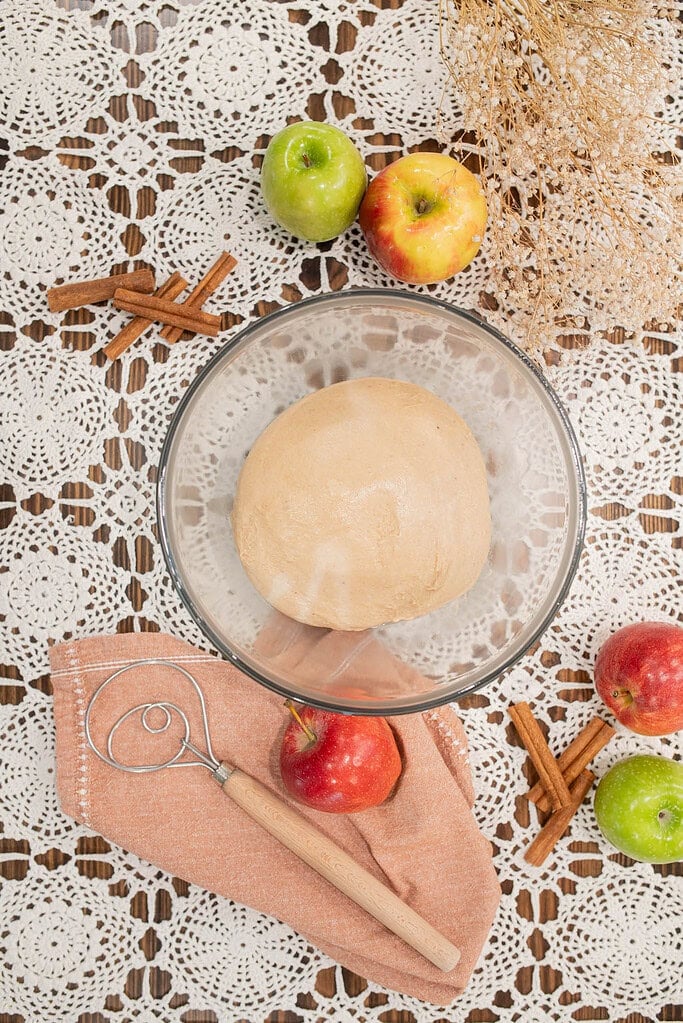
- Bring the dough together – Gradually add dry ingredients to wet, mixing until a soft slightly tacky dough forms and pulls away from the bowl sides.
- Knead the dough – Knead with a dough hook or by hand on a lightly oiled surface for 8 to 10 minutes until smooth and elastic.
- Bulk ferment with stretch and folds – Transfer to a lightly oiled bowl, cover, and rest 30 minutes. Perform four rounds of stretch and folds, resting 30 to 45 minutes between each. Let rise 3 to 4 hours until puffy. For deeper flavor refrigerate 8 hours or overnight.
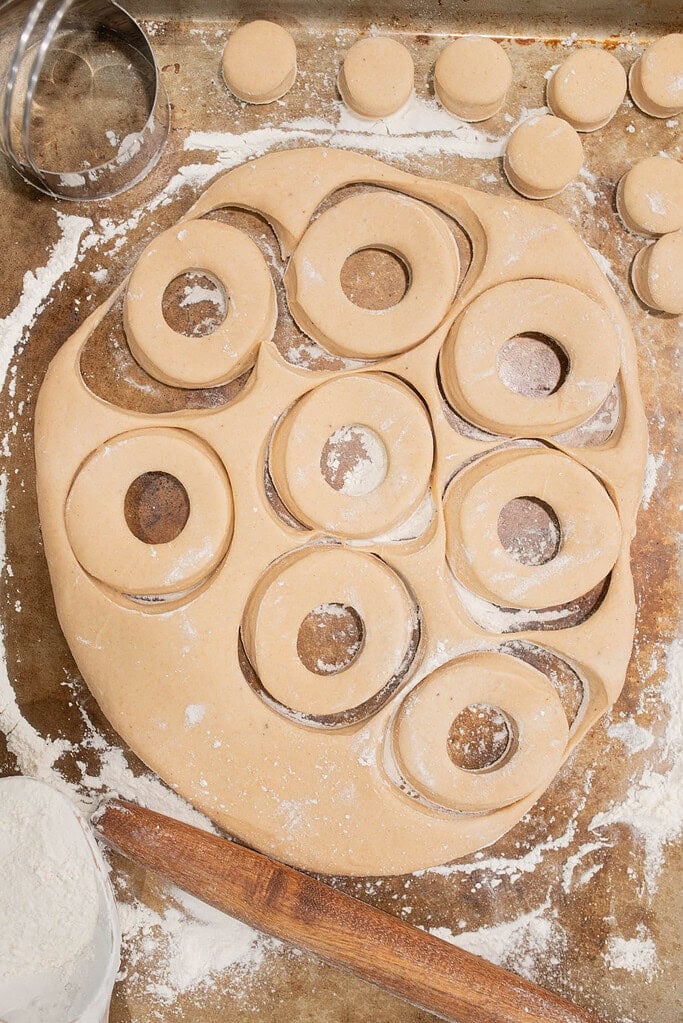
- Shape the donuts – Roll chilled dough on a lightly floured surface to one quarter to one half inch thick. Cut donuts and holes, arrange on parchment, and refrigerate 30 minutes while heating oil or preheating oven.
- To fry – Heat oil in a Dutch oven to 375 to 380 degrees Fahrenheit. Fry two to three donuts at a time for two to three minutes per side until deep golden brown. Drain on a wire rack.
- To bake – Preheat oven to 375 degrees Fahrenheit. Bake on a parchment-lined sheet for 10 to 15 minutes until golden and set.
- Make the cinnamon sugar coating – Stir granulated sugar and apple pie spice together in a shallow bowl. Roll warm donuts until fully coated.
- Make the apple cider glaze – Whisk sifted powdered sugar with apple cider, whole milk, apple pie spice, and a pinch of salt until glossy and pourable. Dip warm donuts and set on a rack to set.
- Serve warm – These are best slightly warm. A few minutes in a low oven or air fryer brings back that fresh texture if serving later.
Freezing and Storage
- Room temperature – Covered up to two days. Coat just before serving for best texture.
- Refrigerator – Covered up to four days. Warm briefly before serving.
- Freezer – Freeze uncoated individually wrapped donuts up to one month. Thaw overnight in the refrigerator, warm in a 300 degree oven, then coat before serving.
- Reheating – A low 300 degree oven or a brief air fryer pass restores texture without drying the crumb. Avoid microwaving.
FAQ
Join The Community
Want More Cozy Recipes & Seasonal Inspiration?
Get cozy, from-scratch recipes, seasonal cottage living tips, and slow living inspiration delivered straight to your inbox.
More Apple Recipes from the Cottage
⭐️ Rate This Recipe
Made this recipe? Leave a star ⭐️ rating below, it means the world to me and helps my recipes get found by more people like you.

Sourdough Apple Cider Donuts | Fried or Baked Recipe
Equipment
- 1 Small saucepan
- 1 Large mixing bowl or stand mixer
- 1 Rolling Pin
- 1 Donut Cutter
- 1 Candy Thermometer
- 1 Dutch Oven or deep , heavy bottom pot
- 1 Wire cooling rack with pan
Ingredients
Dough
- ½ cup whole milk warmed to 110 to 120 degrees Fahrenheit, 120 grams
- 1 cup apple cider reduced to 1/2 cup, 120 grams
- 4 tablespoons unsalted butter melted and cooled, 57 grams
- 1 large egg 50 grams
- ½ cup granulated sugar 100 grams
- ½ cup brown sugar lightly packed, 110 grams
- 4 cups all-purpose flour unbleached, 480 grams
- 1 cup sourdough starter or discard 180 to 240 grams
- 1 teaspoon ground cinnamon 3 grams
- 1 and 1/2 teaspoons apple pie spice 4 grams
- 1 teaspoon fine salt 6 grams
Oil For Frying
- 4 to 5 cups vegetable oil or coconut oil amounts vary by pot size, minimum 2 inches depth
Apple Pie Spice Sugar Coating
- 1 cup granulated sugar 200 grams
- 1 tablespoon apple pie spice or ground cinnamon 8 grams
Apple Cider Spice Glaze
- For the Apple Cider Spice Glaze
- 1 cup powdered sugar sifted, 120 grams
- 2 tablespoons apple cider 30 grams
- 2 tablespoons whole milk 30 grams
- 1 and 1/2 teaspoons apple pie spice or cinnamon 4 grams
- 1 pinch fine salt
Instructions
- Reduce the cider – Simmer 1 cup apple cider over medium heat until reduced to half a cup, thick and syrupy. Cool completely before using.
- Mix the dry ingredients – Whisk together flour, salt, cinnamon, and apple pie spice in a medium bowl until evenly combined.
- Combine the wet ingredients – Whisk starter or discard with egg, warm milk, cooled reduced cider, melted butter, granulated sugar, and brown sugar until smooth.
- Bring the dough together – Gradually add dry ingredients to wet, mixing until a soft slightly tacky dough forms and pulls away from the bowl sides.
- Knead the dough – Knead with a dough hook or by hand on a lightly oiled surface for 8 to 10 minutes until smooth and elastic.
- Bulk ferment with stretch and folds – Transfer to a lightly oiled bowl, cover, and rest 30 minutes. Perform four rounds of stretch and folds, resting 30 to 45 minutes between each. Let rise 3 to 4 hours until puffy. For deeper flavor refrigerate 8 hours or overnight.
- Shape the donuts – Roll chilled dough on a lightly floured surface to one quarter to one half inch thick. Cut donuts and holes, arrange on parchment, and refrigerate 30 minutes while heating oil or preheating oven.
- To fry – Heat oil in a Dutch oven to 375 to 380 degrees Fahrenheit. Fry two to three donuts at a time for two to three minutes per side until deep golden brown. Drain on a wire rack.
- To bake – Preheat oven to 375 degrees Fahrenheit. Bake on a parchment-lined sheet for 10 to 15 minutes until golden and set.
- Make the cinnamon sugar coating – Stir granulated sugar and apple pie spice together in a shallow bowl. Roll warm donuts until fully coated.
- Make the apple cider glaze – Whisk sifted powdered sugar with apple cider, whole milk, apple pie spice, and a pinch of salt until glossy and pourable. Dip warm donuts and set on a rack to set.
- Serve warm – These are best slightly warm. A few minutes in a low oven or air fryer brings back that fresh texture if serving later.
Notes
Nutrition
Did you make this recipe?
Rate it 5 “⭐️” below.
If you liked this recipe, I’d be so grateful if you would share it with others. Use the buttons below to share, comment, or connect.

Emily Rider
Home miller since 1999 with fresh-milled flour & sourdough experience. Sharing from-scratch recipes and traditional kitchen skills, rooted in the seasons and inspired by everyday cottage living and seasonal rhythms.


Love your step by step recipe. Your blog is easy to follow. I always enjoy your recipes and tips
Thank you so much! 😊 We’re so glad to hear that you enjoy the step-by-step guides and find the blog easy to follow. It means a lot to us that our recipes and tips bring joy to your kitchen! Happy baking, and feel free to reach out anytime!