This flaky pie crust recipe uses cold butter and vegetable shortening for a tender, golden crust that rolls out cleanly and bakes up with distinct, buttery layers whether you are making a sweet fruit pie or a savory pot pie.
The dough comes together by hand with no food processor needed, chills for at least 30 minutes before rolling, and makes enough for a full double crust or two single crust pies.
This crust is the base for Homemade Sourdough Apple Pie with Cinnamon and Sourdough Chicken Pot Pie, and if you want a sourdough version of the same crust, Sourdough Pie Crust Recipe uses the same method with starter folded in.

Did you know you can convert your recipes to freshly milled flour? I share how to convert your recipes and more at The Cottage Mill.

The Cottage Mill: Freshly Milled Flour Guides, Recipes, and More Await!
Why You’ll Love This Recipe

Ingredients
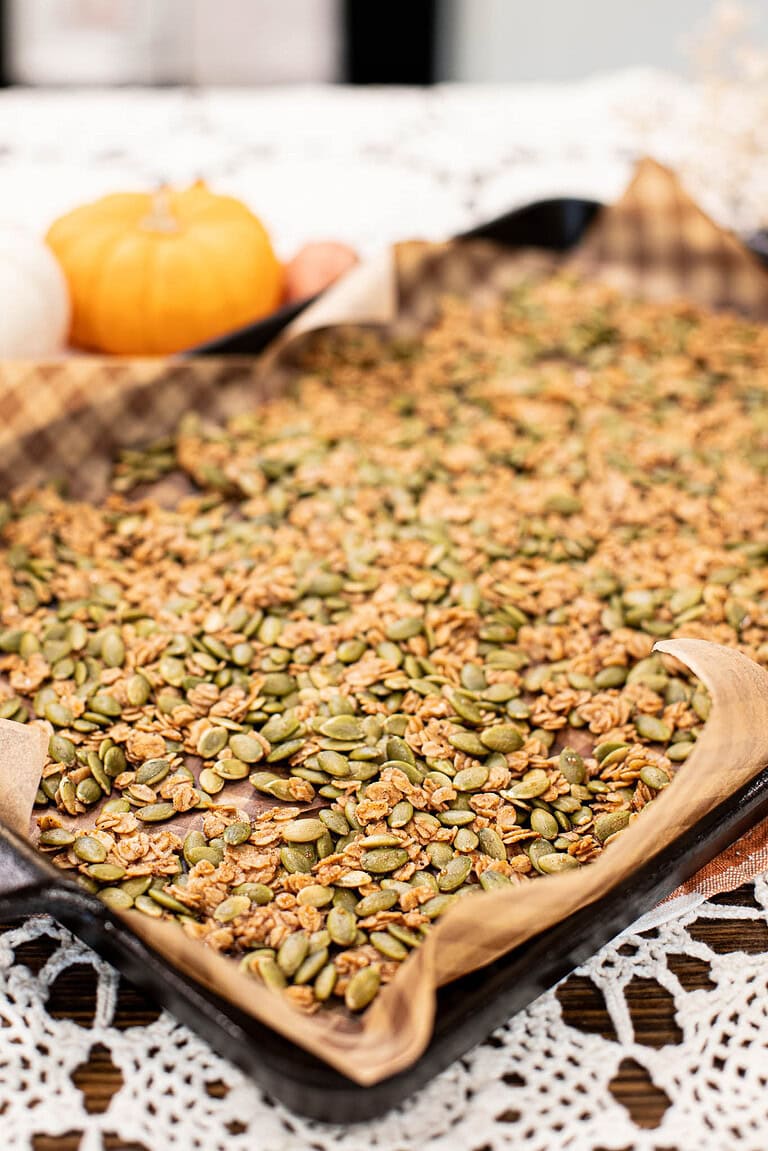
Variations & Add-Ins
Recipe Tips
Keep everything cold – Cold butter and shortening are what create the flaky layers in this crust. If the dough starts to warm while you are working with it, return it to the refrigerator for 10 to 15 minutes before continuing.
Frozen butter grates cleanly – If your kitchen runs warm or your butter is softening too quickly, freeze it for 30 minutes and grate it directly into the flour using a box grater. The small pieces coat in flour immediately and stay cold throughout mixing.
Add water slowly – Add ice water one tablespoon at a time and stop as soon as the dough holds together when pressed. Too much water develops the gluten and makes the finished crust tough rather than tender.
Use the lobster claw method – Hold your hands like a claw and use your thumbs and fingers to rub the butter pieces lightly into the flour, coating each piece without fully blending it into the dough. This keeps the butter in distinct pieces that create visible, flaky layers once baked.
Do not overwork the dough – Mix only until the dough just comes together. Overworking builds gluten and results in a crust that shrinks during baking and feels more like bread than pastry.
Leave some butter pieces visible – Pea-sized pieces of butter throughout the dough are what create distinct, visible flaky layers once baked. If the mixture looks too smooth, the crust will be more crumbly than flaky.
Chill before rolling – Rest the dough in the refrigerator for at least 30 minutes before rolling. This relaxes the gluten, firms the fat back up, and makes the dough much easier to roll without springing back.
Roll from the center out – Use light, steady pressure and roll from the center of the dough outward, rotating the dough occasionally to keep it even. Uneven dough means some edges will overbrown before the center is done.
Protect the edges – If the crust edges start to brown too quickly during baking, cover them loosely with foil or a pie crust shield for the last 10 to 15 minutes of the bake.

Instructions
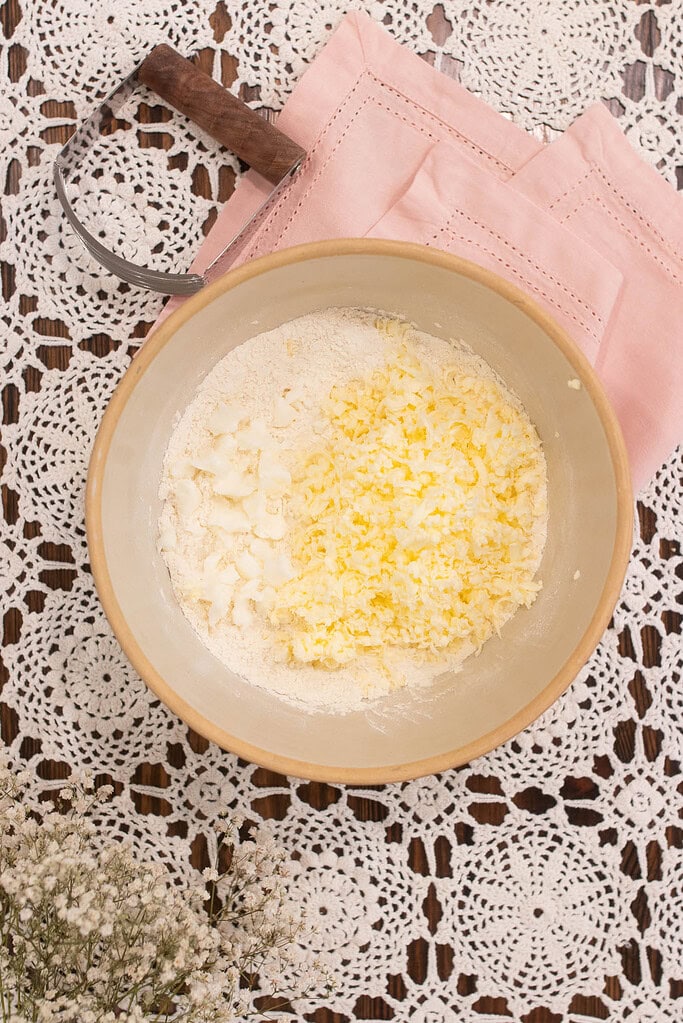
- Mix the dry ingredients – In a large bowl, whisk together the all-purpose flour and salt until evenly combined.
- Cut in the fat – Add the cold cubed butter and chilled shortening to the flour mixture. Use a pastry cutter or your fingers to work the fat into the flour until the mixture resembles coarse, sandy crumbs with some pea-sized pieces of butter and shortening remaining throughout.
- Add the ice water – Add ice cold water one tablespoon at a time, stirring gently after each addition, until the dough just comes together when pressed. Stop adding water as soon as the dough holds without crumbling. Do not overwork.
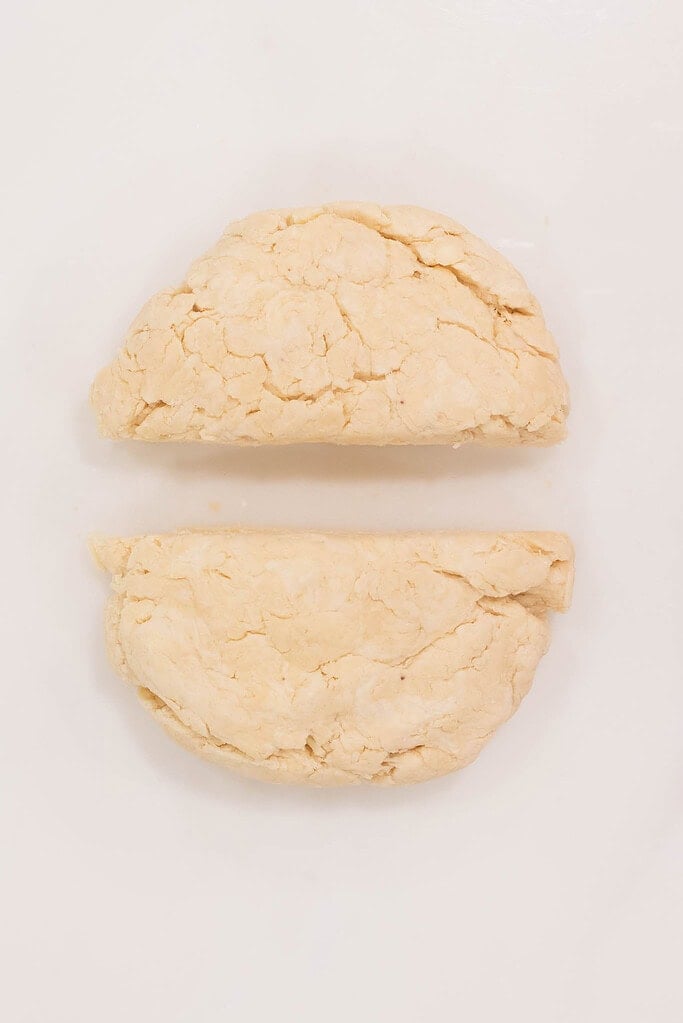
- Form and chill the dough – Divide the dough into two equal disks and shape each into a flat round. Wrap each disk tightly in plastic wrap and refrigerate for at least 30 minutes before rolling. The dough can rest in the refrigerator for up to 2 days.
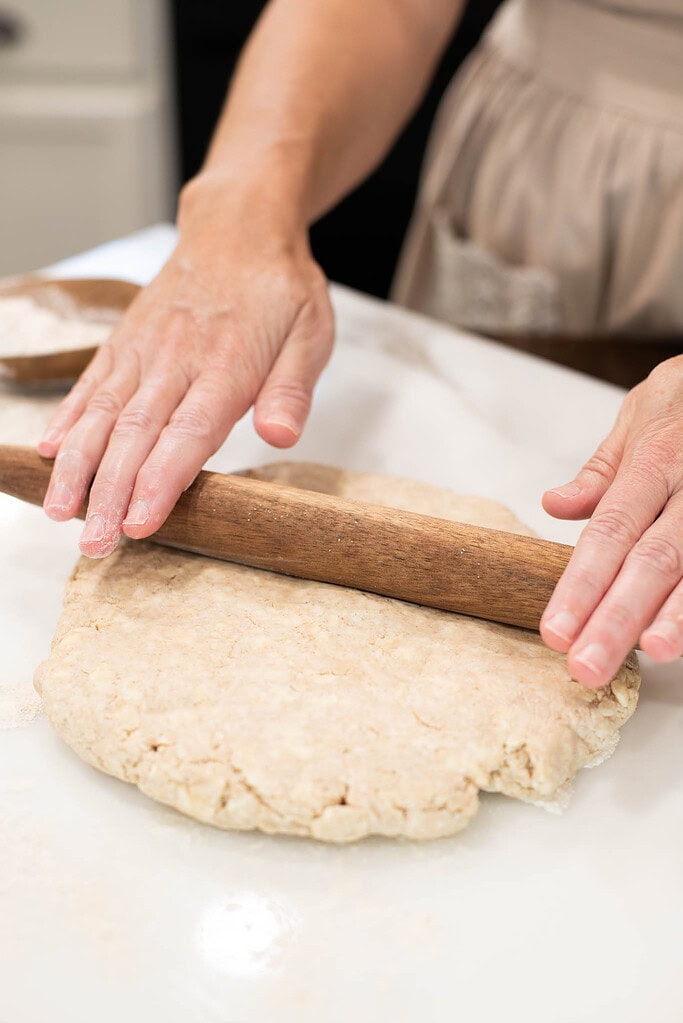
- Prepare the work surface – Lightly flour a clean work surface and a rolling pin. Keep extra flour nearby but use it sparingly to avoid drying out the dough.
- Roll out the dough – Remove one disk from the refrigerator and roll it out from the center outward to about ⅛ inch thick, rotating the dough occasionally to keep an even thickness throughout.
- Transfer to the pie dish – Carefully fold the rolled dough in half or drape it over the rolling pin and transfer it to a 9-inch pie dish. Press it gently into the bottom and up the sides, trimming any excess with a slight overhang around the edge.
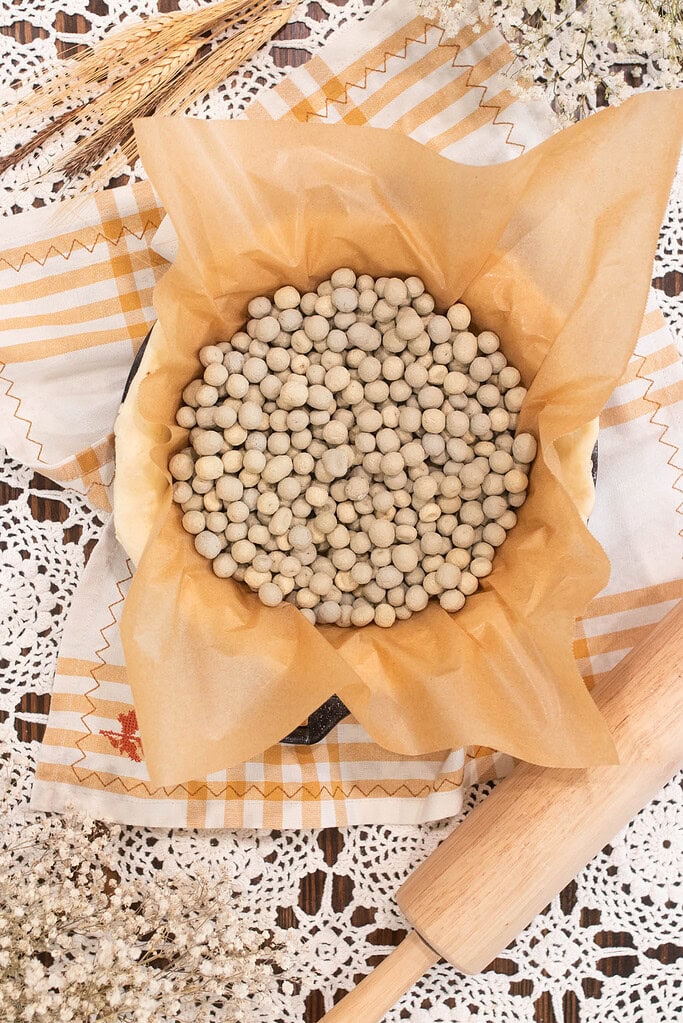
- Add the filling or par-bake – For a single crust pie with a wet filling, par-bake the crust before adding the filling. Line with parchment paper, fill with pie weights or dried beans, and bake at 425°F for 10 to 15 minutes. Remove the weights and bake for another 5 to 10 minutes until the base is lightly golden. For a double crust pie, add the filling now and top with the second rolled crust.
- Finish and bake – Trim and crimp the edges to seal, cut several small slits in the top crust to allow steam to escape, and brush with egg wash for a deep golden finish. Bake according to your pie recipe, typically at 375°F to 400°F, until the crust is golden brown and the filling is bubbling.
- Cool before slicing – Let the finished pie cool completely on a wire rack before slicing. This allows the filling to set and keeps the crust from going soggy underneath.
Freezing and Storage
- Refrigerate the dough – Wrapped tightly in plastic wrap, the unbaked dough disks keep in the refrigerator for up to 2 days. Let the dough sit at room temperature for 5 to 10 minutes before rolling if it feels too firm straight from the fridge.
- Freeze unbaked dough – The dough disks freeze well for up to 3 months. Wrap each disk tightly in plastic wrap, then place in a freezer-safe bag. Thaw overnight in the refrigerator before rolling.
- Freeze a pre-shaped crust – Roll the dough, press it into a pie dish, and freeze the whole dish uncovered until solid, then wrap tightly. Bake directly from frozen, adding a few extra minutes to the bake time.
- Store a baked crust – A fully baked and cooled pie crust can be stored loosely covered at room temperature for up to 2 days or refrigerated for up to 4 days before filling and serving.
FAQ
Welcome Gift
Baking from scratch, the Cottage Kitchen way
✨ Join the cottage newsletter and get The Cottage Kitchen Starter Set — a measurement conversion chart and two printable recipe cards.
More Pie Recipes from the Cottage
⭐️ Rate This Recipe
Made this recipe? Leave a star ⭐️ rating below, it means the world to me and helps my recipes get found by more people like you.


Flaky Pie Crust Recipe
Equipment
- 1 Large mixing bowl
- 1 Pastry cutter
- 1 Rolling Pin
- 1 9-inch pie dish
- 1 sheet parchment paper
- 1 pie weights or dried beans
Ingredients
- 2½ cups all-purpose flour 300 grams
- 1 teaspoon salt about 6 grams
- 10 tablespoons salted butter cold and cut into small pieces, 142 grams
- ¼ cup vegetable shortening or lard cold and cut into small pieces, 48 grams
- 6 to 10 tablespoons ice cold water 90 to 150 grams
Instructions
- Mix the dry ingredients – In a large bowl, whisk together the all-purpose flour and salt until evenly combined.
- Cut in the fat – Add the cold cubed butter and chilled shortening to the flour mixture. Use a pastry cutter or your fingers to work the fat into the flour until the mixture resembles coarse, sandy crumbs with some pea-sized pieces of butter and shortening remaining throughout.
- Add the ice water – Add ice cold water one tablespoon at a time, stirring gently after each addition, until the dough just comes together when pressed. Stop adding water as soon as the dough holds without crumbling. Do not overwork.
- Form and chill the dough – Divide the dough into two equal disks and shape each into a flat round. Wrap each disk tightly in plastic wrap and refrigerate for at least 30 minutes before rolling.
- Prepare the work surface – Lightly flour a clean work surface and rolling pin, using extra flour sparingly to avoid drying out the dough.
- Roll out the dough – Remove one disk from the refrigerator and roll from the center outward to about ⅛ inch thick, rotating the dough occasionally to maintain even thickness throughout.
- Transfer to the pie dish – Fold the rolled dough in half or drape it over the rolling pin and transfer to a 9-inch pie dish. Press gently into the bottom and up the sides, trimming any excess with a slight overhang around the edge.
- Add the filling or par-bake – For a single crust pie with a wet filling, line with parchment, fill with pie weights, and bake at 425°F for 10 to 15 minutes. Remove weights and bake for another 5 to 10 minutes until lightly golden. For a double crust pie, add the filling and top with the second rolled crust.
- Finish and bake – Trim and crimp the edges to seal, cut several small slits in the top crust, and brush with egg wash for a deep golden finish. Bake at 375°F to 400°F according to your pie recipe until the crust is golden brown and the filling is bubbling.
- Cool before slicing – Let the finished pie cool completely on a wire rack before slicing so the filling sets and the crust stays crisp underneath.
Video
Notes
Nutrition

Emily Rider
Home miller since 1999 with fresh-milled flour & sourdough experience. Sharing from-scratch recipes and traditional kitchen skills, rooted in the seasons and inspired by everyday cottage living and seasonal rhythms.