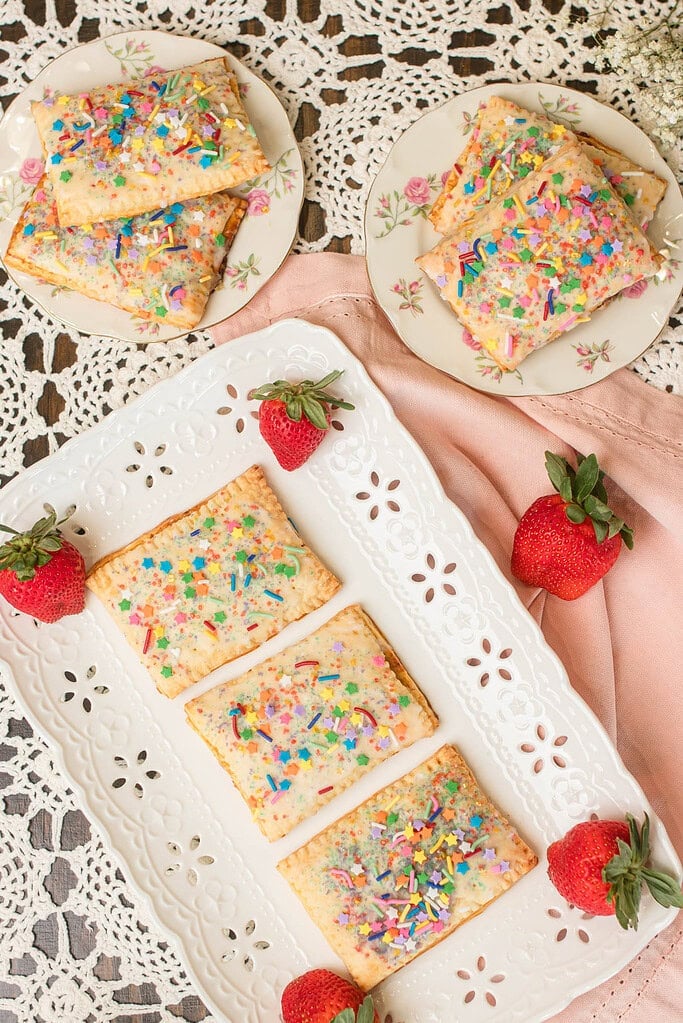
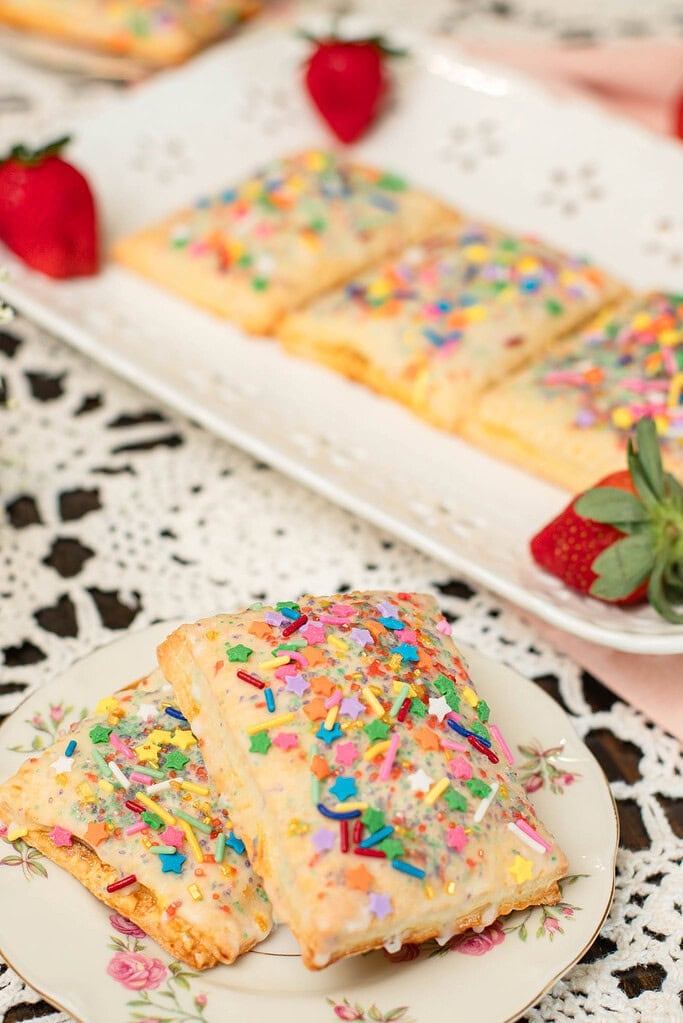
These sourdough pop tarts bake up flaky, tender, and lightly sweet with buttery layers that hold together around the filling and a smooth glaze that sets cleanly over the cooled pastry.
The dough comes together with sourdough discard or active starter, cold butter, and a handful of pantry staples, then chills for 30 to 60 minutes for same-day baking or rests overnight for a deeper, more developed flavor.
If you love sourdough baking, you might also enjoy Sourdough Animal Crackers with Freshly Milled Flour, Sourdough Cherry Hand Pies with Freshly Milled Flour and Sourdough Banana Nut Muffins | Discard or Starter.

Did you know you can convert your recipes to freshly milled flour? I share how to convert your recipes and more at The Cottage Mill.

The Cottage Mill: Freshly Milled Flour Guides, Recipes, and More Await!
Why You’ll Love This Recipe

Ingredients
For the Dough
For the Glaze
Variations & Add-Ins
Recipe Tips
Keep the butter cold throughout – Cold butter is what creates distinct flaky layers in the finished pastry. Work quickly when mixing and shaping, and return the dough to the refrigerator if it starts to soften before you finish cutting and filling.
Use a food processor when possible – A food processor brings the dough together quickly and evenly without warming the butter the way hand mixing can. It produces the most consistent, flaky results and takes less than two minutes from start to dough.
Stop mixing as soon as the dough forms – Overmixing after the dough comes together develops gluten and produces a tough crust rather than a tender, flaky one. Mix until the dough just clumps and stop there.
Rest the dough before rolling – A chill of at least 30 minutes relaxes the gluten and firms the butter so the dough rolls out smoothly without shrinking back or tearing at the edges.
Roll the dough to an even thickness – Consistent thickness helps the pastries bake at the same rate from edge to center and prevents weak spots that can tear or leak during baking. Aim for ⅛ inch throughout.
Leave a clear border around the filling – Keeping at least ½ inch of unfilled dough around the edges gives you enough room to seal properly and prevents the filling from leaking out during baking.
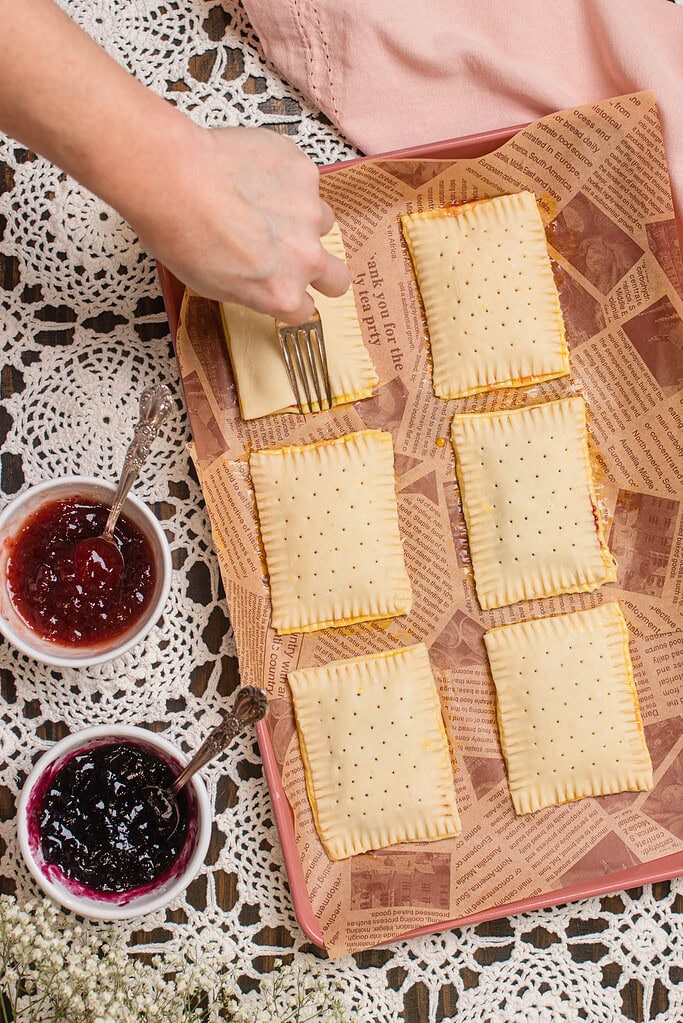
Seal the edges firmly before baking – Press the top layer down gently to remove any air pockets, then crimp firmly with a fork all the way around. A loose seal is the most common reason filling escapes during baking.
Vent the tops before going into the oven – Small cuts or use a fork to pierce holes in the top layer of dough, allowing steam to escape so the pastries bake evenly without splitting at the seams or puffing unevenly in the center.


Instructions
- Mix the dry ingredients – In a large bowl or food processor, combine the flour, maple syrup, cane sugar, and salt. Pulse briefly or stir to distribute evenly before adding the butter.
- Cut in the butter – Add the cold cubed butter and pulse or cut in with a pastry cutter until the mixture resembles coarse crumbs with visible pea-sized pieces of butter throughout. Cold butter pieces are what create the flaky layers during baking.
- Add the sourdough starter – Add the sourdough discard or active starter and mix until the dough begins to clump together. Stop as soon as it forms a cohesive dough to prevent developing excess gluten.
- Rest the dough – Press the dough into a flat rectangle and wrap tightly in plastic wrap. Refrigerate for 30 to 60 minutes for same-day baking, or refrigerate for 8 to 12 hours for overnight fermentation. If fermenting overnight, let the dough rest at room temperature for 20 to 30 minutes before rolling and keep it chilled while shaping as it will feel slightly softer.
- Roll and cut – Roll the chilled dough to ⅛ inch thickness on a lightly floured surface. Trim the edges and cut into evenly sized rectangles, re-rolling scraps once if needed to keep the dough cold.
- Add the filling – Spoon 1 to 1½ tablespoons of jam or filling into the center of half the rectangles, leaving at least ½ inch of clear border around the edges for sealing.
- Seal the pastries – Lightly brush the edges with water or egg yolk, place a second rectangle on top, and press gently to remove air pockets. Crimp firmly with a fork all the way around to seal completely.
- Vent and chill – Transfer to a parchment lined baking sheet and cut small vents in the tops of each pastry. Chill for 10 to 15 minutes while the oven preheats to 375°F to help the butter firm back up and maintain structure during baking.
- Bake – Bake for 20 to 25 minutes until lightly golden around the edges and the tops look set. Allow to cool completely on the pan before glazing.
- Prepare the glaze – Whisk together the powdered sugar, milk, vanilla extract, and optional lemon extract until smooth and spoonable. Add milk a small amount at a time until the glaze ribbons off the whisk but still has enough body to set on top of the pastry.
- Glaze and set – Spoon or spread the glaze over the fully cooled pastries and allow it to set completely before serving or storing.
Gifting Ideas
Freezing & Storage
- Room temperature. Store fully cooled and glazed pastries in an airtight container at room temperature for up to 1 day. The jam filling means these do better refrigerated after the first day.
- Refrigerator. Transfer to an airtight container and refrigerate for up to 3 days. The cold temperature keeps the filling stable and the pastry from softening too quickly. Bring to room temperature for 15 to 20 minutes before serving for the best texture.
- Freezer. Freeze fully baked and cooled pastries in a single layer on a parchment lined sheet until solid, then transfer to a freezer-safe container or bag for up to 2 months. Freeze without the glaze and add it fresh after thawing for the cleanest finish.
- Reheating. Warm thawed pastries in a 325°F oven for 5 to 8 minutes until heated through. Add the glaze after reheating if it was not applied before freezing.
FAQ
Join The Community
Want More Cozy Recipes & Seasonal Inspiration?
Get cozy, from-scratch recipes, seasonal cottage living tips, and slow living inspiration delivered straight to your inbox.
More Snack Recipes from the Cottage
Did you make this recipe?
Rate it 5 “⭐️” below.
If you liked this recipe, I’d be so grateful if you would share it with others. Use the buttons below to share, comment, or connect.


Sourdough Discard Pop-Tarts Recipe
Equipment
- 1 Large mixing bowl
- 1 Pastry cutter
- 1 Rolling Pin
- 1 Parchment Paper
- 1 Fork
- 1 Spatula
Ingredients
- 2 cups + 2 tablespoons all-purpose unbleached flour 260 grams
- 2 tablespoons maple syrup 39 grams
- 2 teaspoons cane sugar 8.25 grams
- 1 teaspoon salt 6 grams
- 1 cup cold salted butter cubed 226 grams
- 1 cup sourdough starter or discard 240 grams
Glaze
- 1 ½ cups powdered sugar sifted 170 grams
- 2 tablespoons whole milk 30 grams
- 1 teaspoon vanilla extract 4 grams
- ¼ teaspoon lemon extract optional 1 gram
Instructions
- Mix the dry ingredients – In a large bowl or food processor, combine the flour, maple syrup, cane sugar, and salt. Pulse briefly or stir to distribute evenly before adding the butter.
- Cut in the butter – Add the cold cubed butter and pulse or cut in with a pastry cutter until the mixture resembles coarse crumbs with visible pea-sized pieces of butter throughout. Cold butter pieces are what create the flaky layers during baking.
- Add the sourdough starter – Add the sourdough discard or active starter and mix until the dough begins to clump together. Stop as soon as it forms a cohesive dough to prevent developing excess gluten.
- Rest the dough – Press the dough into a flat rectangle and wrap tightly in plastic wrap. Refrigerate for 30 to 60 minutes for same-day baking, or refrigerate for 8 to 12 hours for overnight fermentation. If fermenting overnight, let the dough rest at room temperature for 20 to 30 minutes before rolling and keep it chilled while shaping as it will feel slightly softer.
- Roll and cut – Roll the chilled dough to ⅛ inch thickness on a lightly floured surface. Trim the edges and cut into evenly sized rectangles, re-rolling scraps once if needed to keep the dough cold.
- Add the filling – Spoon 1 to 1½ tablespoons of jam or filling into the center of half the rectangles, leaving at least ½ inch of clear border around the edges for sealing.
- Seal the pastries – Lightly brush the edges with water or egg yolk, place a second rectangle on top, and press gently to remove air pockets. Crimp firmly with a fork all the way around to seal completely.
- Vent and chill – Transfer to a parchment lined baking sheet and cut small vents in the tops of each pastry. Chill for 10 to 15 minutes while the oven preheats to 375°F to help the butter firm back up and maintain structure during baking.
- Bake – Bake for 20 to 25 minutes until lightly golden around the edges and the tops look set. Allow to cool completely on the pan before glazing.
- Prepare the glaze – Whisk together the powdered sugar, milk, vanilla extract, and optional lemon extract until smooth and spoonable. Add milk a small amount at a time until the glaze ribbons off the whisk but still has enough body to set on top of the pastry.
- Glaze and set – Spoon or spread the glaze over the fully cooled pastries and allow it to set completely before serving or storing.
Video
Notes

Emily Rider
Home miller since 1999 with fresh-milled flour & sourdough experience. Sharing from-scratch recipes and traditional kitchen skills, rooted in the seasons and inspired by everyday cottage living and seasonal rhythms.